Trial Road
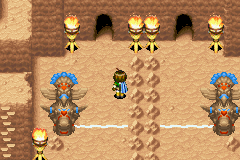
Trial Road is a "minigame-like" dungeon in Golden Sun: The Lost Age. It is located at Shaman Village in Hesperia and is the first mainline dungeon the party must head toward and complete after reaching the Western Sea late in the game. It holds some parallels to the Colosso Finals the party in Golden Sun must pass to proceed with the plot: Felix's party must traverse several self-contained puzzle areas in a row to reach the end before their opponent, Shaman Village's leader Moapa, can complete his respective course, and Moapa must then be defeated in a boss battle. The reward for doing so is the Hover Jade, which bestows the Hover Psynergy needed to climb through Jupiter Lighthouse near Contigo.
In-universe, Trial Road — referred to as "the way of the vanishing sand" by Shaman Village's citizens — comprises a series of competition grounds that Moapa and visiting outsiders must use to determine whether Shaman Village will give the outsiders the Hover Jade that has been in their care for generations. Far in the ancient past, Moapa's ancestor, Hoabna, fought against the champion of Contigo, Yegelos, and the two committed to their friendship by exchanging their societies' respective treasures, the Shaman's Rod and Contigo's Hover Jade, for mutual safekeeping. Moapa is charged with accepting the challenge of any modern-day descendant of Contigo who brings the Shaman's Rod back to Shaman Village and then proves their (supposed) Contigo heritage by using Jupiter Psynergy (namely Whirlwind) to make the sand covering Trial Road disappear.
Walkthrough
Opening up Trial Road just above Shaman Village's village is a simple matter of following along with the cutscene and having Sheba cast Whirlwind on the giant, purple stone. (It is also technically possible to have a different party member in the Ninja class series cast the Gale Psynergy instead.)
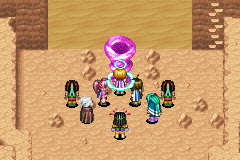
The party may make as many attempts as they need to pass through Trial Road and fight a boss battle with Moapa and his two Knights that takes place at the summit. Your party will pick one of two linear 4-puzzle courses inside the mountain, and Moapa's party will pick the other course. When the Trial Road competition begins, all four of your party members' inventories will temporarily be stripped of any equippable pieces of gear that are not currently equipped. This is to prevent exploiting Trial Road's unique gimmick for an unfair advantage, since the party will have to temporarily give up at least four of their own equipped pieces of gear (only weapons, head armor, hand armor, and body armor are eligible) in order to reach the boss battle at the summit.
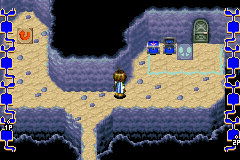
Each of the four possible puzzle rooms in your course tests your ability to quickly work out and execute the solution so that your party can step on the floor switch next to a pair of empty chests near the exit door before Moapa can step on the chest-switch in his equivalent room in the other course. If successful, only one of the two chests will open up, and you will only have to unequip one of your party members' pieces of equipped gear and place it into the chest to unlock the door.
If Moapa has reached his floor switch first in a given "tier" of Trial Road, on the other hand, both empty chests will open up for you when you get to your floor switch in that tier, forcing you to place two pieces of valuable gear into the chest in order to pass. Furthermore, the boss battle at the end will feature improved defensive statistics and behaviors for your opponents proportional to how many extra chests you had to put your own gear into; this represents your opponents having had to put fewer of their own defensive gear pieces into chests on their side to unlock the way forward. How exactly each stacking instance of Felix failing to get to his door-chests in time to outpace Moapa is detailed below:
- If you had to give up 5 items overall to the chests, Moapa will gain 54 Defense, and his chance to use his Bosca Hit ability in place of a normal Attack will raise from 3/8 to 4/8. He will also exercise better intelligence with his attack-targeting.
- If you had to give up 6 items overall to the chests, Moapa will gain an additional 45 Defense, and his chance to use Bosca Hit now raises to 5/8.
- If you had to give up 7 items overall to the chests, one of the two Knights will additionally gain 45 Defense, and his chance to use his Strong Hit ability in place of a normal Attack will raise from 2/8 to 4/8. He will also exercise better intelligence with his attack-targeting.
- If you had to give up 8 items overall to all 8 chests on account of being behind Moapa in every single room along the way to the summit, the other Knight will receive the same benefits listed above as the first.
Even a single instance of falling behind Moapa and having to give up two pieces of gear to the same room's chests results in two strikes against the likelihood you can win the battle at the summit. One of your opponents will get an improved defensive statistic and increase their offensive threat, and one of your own party members will unavoidably miss a potentially sizeable extra chunk of their own defense. As a result, you may consider stepping on a red arrow switch positioned off to the side of the chests to give up on the current Trial Road run early and be returned outside with Moapa, where you can try again. Fortunately, real time freezes for Moapa whenever any menu is open during Trial Road, so you can take the time to study each room and work out the fastest way to clear it before closing out the menu and executing your strategy.
Ideally, you would reach the end of all four rooms before Moapa and only have to give up one of each party member's currently equipped pieces of armor, minimizing the risk that any one party member will lose so much defense that they can be picked off by Moapa's side in a single turn if your luck turns sour. Generally, you should avoid dropping weapons into the chests; however, an exception can be made for Sheba if your party's class setup results in her being a dedicated caster or supporter, where she would prefer having more defensive survivability in place of the ability to deal a rather weak physical attack even with a weapon.
In another parallel to the first game's Colosso Finals, each puzzle room also features at least one collectable treasure chest that contains a strong healing item, but you would have to spend extra time and effort getting to that chest. Unlike Colosso, none of the party's own healing items are removed from the inventory during a Trial Road run, so it is far more debatable whether it is worth bothering to open these chests along the way to the summit and risk having to give up more pieces of armor to the empty door-chests.
For most players, each of the two courses will always feature the same puzzle rooms in the same order between different game files. However, in an obscure mechanic that is shared with the conduit puzzle in Gabomba Statue and the hallway maze in Gaia Rock, which puzzles rooms are assigned to which course is dynamically determined by the name the player gave Felix at the start of Golden Sun: The Lost Age. This walkthrough arranges and labels the two courses' puzzle rooms the way they appear in a game file where the player left the main player-character's name as "Felix".
"Sand river" (left course)
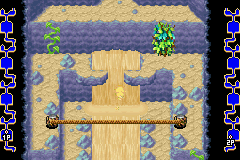
You will be railroaded into running up along a sand river being fed by a sandfall, and the "normal" solution will be self-explanatory by looking at the surroundings as Felix forces his way upward; simply climb the lower-right ivy and walk west along the tightrope, and climb the northwest ivy to the empty chests. Since this sandfall works like the ones in Ankohl Ruins, however, casting Sand allows Felix to climb up the short sandfall itself and rematerialize next to the upper-right bush, which exposes its own ivy ladder and saves fairly good time bypassing the tightrope route.
The chest at the lower left corner requires only a brief detour from the base of the sandfall and contains a Potion. When returning northeast from it, either cross east across the base of the sandfall or cast Sand to head up the sandfall and make use of the Whirlwind shortcut.
"Log-rolling" (left course)
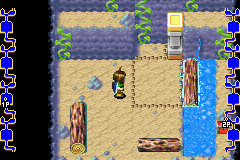
As you arrive at this room, you will have no choice but to roll the horizontal log up against a pillar, then the lower vertical log left, in order to climb a winding ivy ladder that places you above the pillar. Roll the horizontal log back down, then push the pillar right and all the way up to clear the way for the upper vertical log to be rolled right into the water. The two short ivy ladders at the right edge lead straight to the empty chests. There are no available shortcuts to use (though time will freeze for Moapa while a log is in the act of rolling).
If you want the chest at the lower right corner (which contains a Vial) for the sake of the upcoming Moapa battle, the best time to roll the lower vertical log back right so that it falls into the water near the chest would be early on, before you start climbing the northwest ivy. Otherwise, you would have to wait until you have finished pushing the upper vertical log into the river, in order to roll the horizontal log back north and out of the way of the lower vertical log.
"Short pillar hop" (left course)
Though you seem to be presented with five pillars that can be moved, with two pillars that must be freed from bushes using Whirlwind in order to be pushed fair distances north, the simplest solution for saving time is also an ideal solution for reaching the chest, and it takes little time to set up. Simply move the lower-left pillar right, the center pillar down, and the lower-right pillar left, and climb up the ivy to hop left across the five pillars. When you climb up the ivy at the northwest corner, you can very quickly climb back down to grab the chest's Vial before climbing up to the empty chests.
However, pushing both of the bush-trapped pillars all the way north — so you can hop directly west onto the space above the chest — is not necessarily a "worse" method of going about this room in practice because Moapa's movement also freezes while Felix is actively pushing a pillar.
"Geyser hop" (left course)
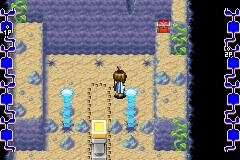
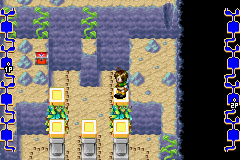
In this room, two enclosed holes on either side of a pillar will briefly spout geysers every three seconds of in-game real time, inviting you to move the pillar up two spaces so that you can hop west across the geysers and pillar to the left on the left edge of the room. If the party is significantly ahead of Moapa at the current stage of Trial Road, you are free to take this route even though it will force you to wait either on the pillar or in the enclosed spaces of the geysers themselves when the geysers go back down, since the geysers are not up long enough for Felix to make it all the way to the left in one motion. From there, before heading to the empty chests, you can go to the right corner and climb down to the chest containing a Potion.
A far more effective shortcut is to use Scoop on the partially closed-up holes lining the upper edge of the lower level of the traversable space, which will also start shooting up geysers every three seconds. Scooping open the geyser at the upper-right corner and then standing on it will let Felix step into the ledge far above, quickly climb down to get the Potion chest if desired, and get to the empty chests in a far less delayed fashion.
"Pillars on stakes" (right course)

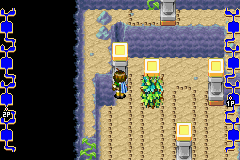
This slow puzzle room requires you to pound each of the two gray stakes into the ground to make the gray stakes they are connected to rise up, then cover the now-depressed stakes with the nearby pillars, to create a hoppable series of pillars four pillars long. Casting Whirlwind on the pillar trapped by a bush and then moving that onto the right depressed stake takes a little less time than moving the far-right pillar onto the same stake. Once you are done, climb the upper-left ivy and hop east across them, and climb up through the linear route to the empty chests.
Setting up the solution to reach this room's end as fast as possible already takes long enough as it is, and so moving pillars further to reach the isolated chest (which contains a Vial) is not worth the time spent putting the timed main course on hold. In theory, after Pounding the left stake and moving a pillar onto it, you can purposefully leave the right stake standing and move the bush-trapped center pillar two spaces up, parking it right under the chest's thin ledge and left of the standing stake. Then, you can hop across the pillars and stop immediately left of the right stake, hop up to get the chest, and hop down and step onto the right stake so that you ride it down to the ground level quickly; this would let you cast Move to shift the pillar right onto the stake you just rode down, then climb up the left ivy again to hop across the now-completed route of pillars. This is not worth the time lost because Moapa's movements are not frozen while you are spending in-game real time climbing up to and hopping across the pillars.
"Long pillar hop" (right course)
This puzzle room makes it appear at first that you would have to push the two lower pillars a long distance up each to create a perfectly linear set of four hoppable pillars that you can use to hop across from the left ledge of the room to the right ledge, bringing you into the linear route leading toward the empty chests at the end (with you briefly having to push an elevated north pillar two tiles right to access the short ivy ladder behind it). This is not even necessarily an overly "inferior" way of passing this room because Moapa's movements freeze while Felix is actively pushing a pillar from one tile of floor space to the next, making setting up this solution take less in-game real time than the game would suggest.
Nonetheless, since hopping across the pillars and running northwest along the east ledge to the ivy leading to the empty chests does take in-game real time that Moapa will capitalize on, you can still save several in-game seconds by only pushing the leftmost pillar as far north as it can go, then stepping onto that from the left ledge and hopping directly north.
The chest at the lower-right corner of the room would obviously take an incredibly delaying detour to reach because you would have to instead push the upper two pillars (freeing the bush-trapped pillar with Whirlwind) all the way down to become level with the starting positions of the two lower pillars, then hop east across the four pillars to pick up the chest's Vial, then painstakingly move every pillar four spaces north each, and then hop east across all those again in order to pass the room.
"Burst pillars" (right course)
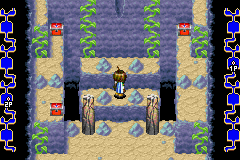
This puzzle room is unique for featuring multiple optional chests — but also for injecting some unavoidable trial-and-error that can only be avoided by players either using a guide or relying on memories of prior playthroughs. There are two Burst pillars blocking your way to long ivy ladders leading to the top ledge, but only the route behind the right pillar actually leads to an area on the top ledge that provides a route to the empty chests at the end; this fact only becomes visible as you are climbing up either of the long ivy ladders.
The fastest way through is to cast the Burst Psynergy on the right pillar (or alternatively destroy it by climbing on the right ivy and hopping onto the pillar twice to make it crumble, though this wastes quite a few seconds), climbing the upper-right long ivy, and perhaps climbing the short ivy at the upper-right edge of the room to get to the upper-right chest's Vial. If you have the time, you can also quickly climb up to and open the lower-left chest for its Nut as your first step in this room.
The upper-left chest, which contains a Potion, requires hopping north past the left Burst pillar and climbing the left, long ivy ladder, which leads to the chest exclusively; rocks at the north ledge prevent you from reaching the empty chests at the end, so you will be forced to backtrack all the way to the bottom of the room and begin traversing the path north of the right Burst pillar. Remember that Moapa's movements are not frozen while you are climbing an ivy ladder.
"Ice pillars and torches" (right course)
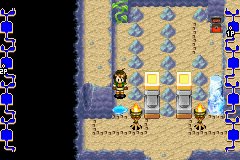
This room features standing torches next to ice pillars that have already been frozen from puddles; moving one of the nearby torches past an ice pillar melts it into a puddle, and you will then have to move that torch away from the puddle in either direction to give yourself the space to hop directly over it into the space above. First-time players will have to push one of the two yellow-tipped pillars north to see how to progress to the northern ledge of the room, and fortunately, the ideal solution to this room necessitates pushing both yellow-tipped pillars as far north as they can go anyway. This lets you get the chest with a Vial very easily, and all you will have to do to hop east across the pillars to get to the empty chests at the end is to move the lower-left torch right two spaces, melting the lower-left ice pillar and letting you climb to where the yellow-tipped pillars now stand.
A more convoluted method of passing this room would be to instead cast Move to shift both yellow-tipped pillars one space down each, melt the lower-left ice pillar, then reform it from above it by casting the Frost Psynergy. That way, you can climb the upper-left small ivy ladder, head south along the left ledge, and hop right across the four pillars to reach the right ledge, which lets you head to the empty chests up north. This version of the solution forces more time spent traversing more space in in-game real time, and you would also have to take an additional detour beforehand to the Vial chest (if you want it) by also moving the right torch to melt the right ice pillar and hop over that. You would then have to hop south over the right puddle and refreeze it with Frost before you start hopping over the left puddle.
Reaching the summit
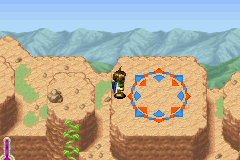
Some puzzle rooms take longer to complete, leading to uneven difficulty between the two courses relative to each other. While these differences are manageable in most cases, the "pillars on stakes" course is by far the most time-consuming puzzle room in either course, in terms of the shortest possible solution available; whichever course has this room can be considered the "hard course" on this basis alone. In fact, in a "Felix"-named game file (where this puzzle is the first in the right course and Moapa must deal with the much easier sand river puzzle room over to the left), if you execute the fastest solution perfectly and without any delays, it is only possible for Felix to outspeed Moapa to the chests by over three seconds.
The issue goes both ways; Moapa will be delayed by over twenty seconds at the pillars-on-stakes room if that room lies on his course, giving the player a significant time advantage that will last the rest of the run. This is especially the case in a "Felix"-named game file, which places the pillar-on-stake puzzle at the very start of the right course. The player will be afforded far more leeway in their ability to make it to the empty chests at the ends of all four of the four puzzle rooms along the left course as a result.
All that said, the main incentive to reach the summit of Trial Road before Moapa's arrival is to retain more defensive pieces of gear while softening his party's defenses and threat level when he then engages you in a boss battle with his two Knights. The battle is still winnable, depending on how many Djinn and levels you have acquired, if you fall behind during the race and end up with a statistical disadvantage, and you are best off focusing down one Knight at a time before focusing all of your party's attacks against Moapa alone. If you win, you will gain the Hover Jade and automatically be returned to Shaman Village's inn, but losing will let you try all of Trial Road again.
Late-game area
Once you have won Trial Road, you are free to reenter both of the courses in Trial Road and explore each of their respective puzzle rooms at your leisure, and you can loot any of the restorative items that you might have passed over during your successful trip to the summit. Once you are up there, you can cast your new Hover Psynergy on the glowing purple tile connected to the bird-shaped pattern left of the summit, but you cannot pass a round boulder just inside the cave entrance without the Lift Psynergy. (Even so, you can fight random encounters in this limited space within the cave.)
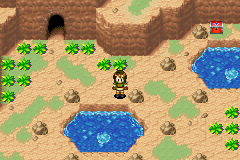
A little later in the game, Isaac's party from the first Golden Sun will join Felix's party as additional party members and bring with them the first game's Utility Psynergy items, including the Lifting Gem. This lets you travel all the way back to Trial Road's summit, take the aforementioned Hover pattern to the cave off to the side, and pass under the round boulder with Lift. This brings you to an outdoor area with lots of weeds and several springs; clearing away the weeds just left of the entrance exposes a Mad Plant that will drop a Lucky Pepper, and using Reveal at the northeast spring lets you hop across it to a chest containing an Elixir. The Jupiter Djinni Gasp will use the third spring to prevent you from reaching it, but cast Reveal here and hop across the spring to drive Gasp off to the right and allow you to fight it and add it to your collection. Retreat will only bring you back to the Lift Boulder; you will have to go all the way back south through the puzzle rooms to return to Shaman Village and the overworld.
Enemies
| Bestiary of Trial Road | ||||||||||
| Monster Name | LVL | HP | ATK | DEF | AGI | EXP | Coins | Weakness | Drop | Drop Rate |
| Mole Mage | 31 | 199 | 265 | 47 | 74 | 191 | 132 | 1/32 | ||
| Nightmare | 31 | 258 | 287 | 89 | 138 | 241 | 198 | 1/64 | ||
| Pteranodon | 31 | 242 | 291 | 100 | 166 | 341 | 174 | 1/16 | ||
| Wargold | 31 | 202 | 303 | 78 | 181 | 321 | 226 | 1/16 | ||
| Wolfkin | 31 | 213 | 309 | 89 | 174 | 337 | 219 | 1/16 | ||
| Jupiter Djinni (Gasp) (unique) | 32 | 870 | 276 | 84 | 239 | 1000 | 660 | N/A | ||
| Mad Plant (unique) | 35 | 730 | 358 | 103 | 174 | 1121 | 594 | 1/1 | ||
| Knight (2) (boss) | 37 | 1954 | 321 | 106/151 | 143 | 835 | 205 | Equal | N/A | |
| Moapa (boss) | 37 | 3042 | 354 | 120/174/219 | 181 | 1670 | 2460 | Equal | N/A | |
Note: The defense ratings for Moapa and the Knights vary depending on how often the preceding run through Trial Road results in the party reaching the empty chests before Moapa reaches the equivalent chests on his course.
Trivia
- When Moapa is giving his explanation to the party about how the contest in Trial Road works, Felix will suddenly state "Why?" out loud, even though he is supposed to be bound by the unstated traditions of a silent protagonist. In the Japanese version, Felix simply says "???" to convey that he is curious about the rules, but the localization apparently missed the intent.
Duplication glitch
Ordinarily, if the party purposefully drops an Artifact from their inventory, it will reappear in the appropriate vendor's Artifacts menu, ready to be bought again. This is the basis for a powerful exploit that takes place only at Trial Road, where the party's inventories are temporarily replaced with somewhat stripped-back versions of themselves during a Trial Road run, only to be returned exactly the way they were beforehand once the run ends. If you begin Trial Road and purposefully drop one of the party's currently equipped Artifacts (not dropped into the empty chests), that artifact will appear in vendors' Artifact menus — even though a copy of the same Artifact will also end up back in the party member's inventory and equipped to that member when the current run ends.
Though the above does mean you will have to head all the way to a different village with functioning item shops and buy each duplicated artifact for the full purchase price, this allows you to buy multiple copies of all sorts of useful Artifacts that are otherwise one-of-a-kind throughout a given game file. Items like Mist Potions, Waters of Life, Psy Crystals, Lucky Medals, Tear Stones, Star Dusts, Sylph Feathers, and Dragon Skins can be duplicated in stacks, and you can amass copies of the uniquely useful Golden Boots and the Guardian Ring, copies of any of the Class-changing items, and copies of valuable Artifacts like the Crown of Glory and Hyper Boots. You can also duplicate Rusty weapons before reforging them so that you technically have access to both forms of the weapon.
Furthermore, the fact Lucky Medals are among the "Artifacts" that can be duplicated in stacks gives you an opportunity to very quickly fill up the party's money reserves, far in excess of what you would need to buy the other artifacts duplicated through this glitch. You can sail all the way back into Lemuria and dump around 15 Lucky Medals into the Lucky Medal Fountain to get close to 15 pieces of "free" gear that will each sell for around 6,000-to-11,000 coins at any vendor outside Lemuria, then sail all the way back to Shaman Village and duplicate your remaining Lucky Medal stockpile at Trial Road. The only downside to this process is that it forces you to slowly sail from practically one end of the game's overworld to the other every time you want to "cash in" your free equipment.
This exploit is primarily restricted by how Trial Road stops becoming available the moment you first complete it, which is mandatory for reaching the game's remaining dungeons; therefore, even stronger items that can only be gotten after Trial Road cannot be gotten in time for this glitch. Also, items that permanently boost stats are among the items that temporarily disappear whenever a run of Trial Road is ongoing, which prevents the player from gathering potentially infinite bonus statistics on all party members.
