Islet Cave

Islet Cave (小島のどうくつ, Islet’s Cave) is a short, optional endgame-level dungeon-like location in Golden Sun: The Lost Age, which is connected to the Sea of Time Islet in the Eastern Sea. Reaching it is a tricky affair that requires trading various items between various NPCs accessed from across the Eastern Sea, and completing this sidequest also requires completing Gaia Rock and learning the Sand Psynergy. Even then, reaching the later depths of Islet Cave requires completing Mars Lighthouse and acquiring the Teleport Psynergy near the end of the game.
This "dungeon" is noteworthy for containing randomly encountered Wonder Birds in its later depths, which reward enormous amounts of experience. Both its earlier and later portions contain one collectable Djinni each, and the tough optional boss Sentinel stands at the end of the dungeon, which guards the Catastrophe summon tablet.
Walkthrough
Accessing Islet Cave
While exploring the vast Eastern Sea, the party may complete a side objective involving an animal and receive a rare item from it, and that item will turn out to be wanted by another animal NPC residing elsewhere in a location accessible from the Eastern Sea. In each case, you will have to "talk" to each animal by casting the Mind Read Psynergy on it. During this "chain of deals," you will be blocked off from progressing further until you earn the Sand Psynergy by completing the Gaia Rock dungeon. The full sequence of trades is as follows:
- At E Tundaria Islet, east of the continent of Tundaria at the south edge of the world, solve the puzzle by pushing the pink-bow-wearing Pengulina east across a log floating in the water to Pengus on the other side, and Pengus will immediately communicate with you via Mind Read-style telepathy and give you the Pretty Stone.
- At SE Angara Islet located northwest of the Sea of Time, solve the puzzle with the two crates and the Frost puddle and Mind Read the bird in its nest to offer it the Pretty Stone, and you will get the Red Cloth in exchange.
- At N Osenia Islet, southwest of the Sea of Time and north of the center of Osenia, cast the Sand Psynergy to travel under the jars south of the cow, and Mind Read it to offer it the Red Cloth, getting the Milk in exchange.
- At West Indra Islet, located in the narrow stretch of the ocean between Indra and Gondowan, Mind Read the dog in the water and offer it the Milk, getting the Li'l Turtle in exchange.
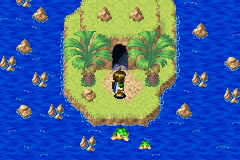
- At Sea of Time Islet, located southeast of the Sea of Time, Mind Read the turtle, "Lonesome George", and offer the Li'l Turtle to it. From then on, whenever you Mind Read Lonesome George, it will offer to let Felix ride on its back to Islet Cave, its "secret spot."
Once you have ridden Lonesome George to the tiny island, you can Mind Read it again to travel back to the beach at the Sea of Time Islet.
Exploring Islet Cave

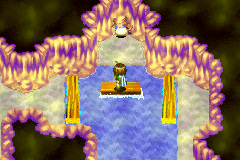
After climbing down multiple staircases, you will touch down on a watery area, which you can only explore a limited portion of. Ride the square log left to collect the novelty Turtle Boots, then hop right to another water-filled area and ride a square log right against another square log floating in the water. Hop down and ride the horizontal square log from the south end of the room to the north end, where you can fight the Venus Djinni Meld and add it to your inventory. Ride the log back down and hug the east edge of the room as you travel back up so that you can ride the upper-right square log left. Follow along back into the main watery chamber to reach another chest at the northwest part of the chamber, which contains a Rusty Staff that will be reforged into the Dracomace back in Yallam. This is all you can do in Islet Cave for now, so you can cast Retreat to return to the stairs near Lonesome George.
Near the end of the game, when you have access to the Teleport Psynergy, return to Sea of Time Islet and once again ride George to Islet Cave, and return to the detailed circular pad in the watery main chamber — which Mars Lighthouse will have clarified for you is a "Teleport pad." Casting Teleport on it will warp Felix to the connected pad at the north edge of the area. You will enter a series of five long, vertical hallways leading up to the final chamber in Islet Cave.
While you are traversing these increasingly dark hallways, each of the random enemies — which are generally the toughest in the game outside Anemos Inner Sanctum — can prove itself worthwhile to farm. Chimera Worms drop a Water of Life with a 1/8 chance whenever felled using a Mars Djinni as the knockout blow, and Mars Djinn can similarly "rainbow-kill" Druj and Cruel Dragon enemies to get them to drop Berserker Band and Tisiphone Edge at enhanced 1/32 and 1/64 probabilities, respectively. The Tisiphone Edge is one of the best weapons in the game.

Most significantly, the random Wonder Birds fought here award an astonishing 8,622 EXP per kill, which is increased by 30% when slain with an offense-based Mercury Djinni. This makes Islet Cave the ideal endgame level-grinding area, though be warned that a Wonder Bird may attempt to flee with any of its three moves it can use per turn. Having one of your party members wear the Lure Cap transferred from the original Golden Sun via the password system will increase the rate of initiating encounters, cutting down on the time spent making Wonder Birds appear. Each rainbow-kill of a Wonder Bird will also produce a 1/32 chance to drop a Dark Matter.
In the second of the five hallways leading north, a gray statue will be wobbling off to the left. Position Felix so that he faces left against the lower half of the statue and cast Tremor to make the Mercury Djinni Serac appear, which you have to battle to add to your collection.
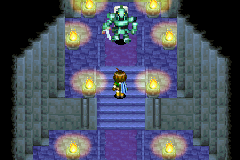
After exiting through the top of the fifth hallway in a row, you will reach a dark chamber where walking up the stairs will bring you to a battle with the optional endgame-tier boss Sentinel, which is immune to all Psynergy. It can be rather easily dealt with by piling on summon sequences, and your reward for defeating it will be the summon tablet for Catastrophe. If you cannot enter Anemos Inner Sanctum in this file because of an inability to collect all 72 Djinn between the two GBA titles, Catastrophe will be the strongest summon sequence available to you in this file.
Enemies
| Bestiary of Islet Cave (Pre-Teleport) | ||||||||||
| Monster Name | LVL | HP | ATK | DEF | AGI | EXP | Coins | Weakness | Drop | Drop Rate |
| Dinox | 27 | 172 | 264 | 82 | 116 | 239 | 166 | 1/16 | ||
| Harridan | 27 | 231 | 261 | 66 | 118 | 150 | 164 | 1/32 | ||
| Magicore | 28 | 321 | 253 | 74 | 109 | 169 | 208 | 1/128 | ||
| Squirrelfang | 27 | 130 | 229 | 59 | 168 | 176 | 131 | 1/32 | ||
| Stone Soldier | 28 | 179 | 241 | 105 | 104 | 98 | 98 | 1/32 | ||
| Venus Djinni (Meld) (unique) | 27 | 710 | 221 | 65 | 187 | 729 | 531 | N/A | ||
Enemy Formations (Pre-Teleport Area)
- Group 1: Harridan x1
- Group 2: Magicore x1
- Group 3: Magicore, Stone Soldier x1
- Group 4: Squirrelfang x1
- Group 5: Squirrelfang, Harridan x1
- Group 6: Squirrelfang, Magicore x1
- Group 7: Dinox x1, Squirrelfang x1
- Group 8: Dinox x1-2
| Bestiary of Islet Cave (Post-Teleport) | ||||||||||
| Monster Name | LVL | HP | ATK | DEF | AGI | EXP | Coins | Weakness | Drop | Drop Rate |
| Chimera Worm | 38 | 251 | 452 | 133 | 152 | 359 | 179 | 1/32 | ||
| Cruel Dragon | 38 | 636 | 539 | 216 | 162 | 661 | 358 | 1/256 | ||
| Druj | 38 | 672 | 549 | 197 | 205 | 627 | 348 | 1/128 | ||
| Wonder Bird | 38 | 424 | 510 | 190 | 285 | 8622 | 333 | 1/128 | ||
| Mercury Djinni (Serac) (unique) | 34 | 920 | 290 | 90 | 257 | 1093 | 706 | N/A | ||
| Sentinel (boss) | 48 | 8736 | 608 | 216 | 171 | 10538 | 6144 | N/A | ||
Enemy Formations (Post-Teleport Area)
- Group 1: Chimera Worm x1-2
- Group 2: Chimera Worm x1-2, Druj x1
- Group 3: Wonder Bird x1, Chimera Worm x1
- Group 4: Wonder Bird x1-2
- Group 5: Druj x1, Cruel Dragon x1
- Group 6: Cruel Dragon x1, Wonder Bird x1
- Group 7: Cruel Dragon x1-2
Collectibles
In the part of Islet Cave that can be reached prior to reaching Lemuria, these three collectibles are found:
 Rusty Staff: In the chest at the upper left of the "main water hall" with the teleport pads, accessed by riding a rolling log from right to left. Take it to the blacksmith in Yallam and he will reforge it into the Dracomace staff artifact.
 Meld: A Venus Djinni reached by rolling a log across the water in the vertical "water-hallway" to the right. It must be fought to be acquired.
 Turtle Boots: In the chest to your left as soon as you enter the "main water hall" with the teleport pads. This is mainly meant for collection and selling for money, since it is far outclassed by the far superior (but still iffy) Safety Boots found much earlier in the game.
The later portion of Islet Cave, which can only be reached near the end of the game by using Teleport, offers these collectibles:
 Serac: This Mercury Djinni is hiding in the shaking statue up on one of the pillars in one of the screens. To make it fall and make the Djinni able to be battled to be collected, cast Tremor near the statue. Precise positioning, and thus several repeated attempts to Tremor the statue off, may be required.
 Catastrophe: This Summon tablet lies at the final room of the dungeon, guarded by the optional boss Sentinel. Essentially, the dungeon's "main" goal and reward, following one of the main optional "superboss" battles of the game.