Sol Sanctum
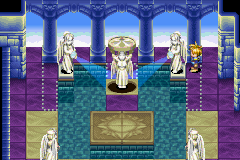
Sol Sanctum (ソル神殿, Sol Sanctuary) is the man-made complex of chambers within Mt. Aleph that connects to the Elemental Star Chamber deep in the mountain. It hides the entrance to the Elemental Star Chamber and the sensitive secrets within by presenting itself as a shrine to the sun (which it names Sol and is itself named after), and only visitors/trespassers that can use Psynergy are able to figure find their way forward. It serves as the introductory dungeon in Golden Sun, and by extension the series.
Walkthrough
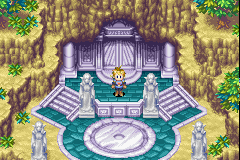
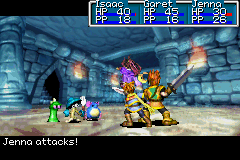
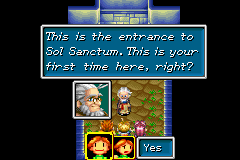
When you sneak past the healer patrolling around the sanctum at the top end of town to exit off the top of the town's screen while Kraden accompanies you, you come across the Sol Entrance; press up against the double-doors to enter the dungeon and watch a brief cutscene. There are random monster battles here, but all of them are very weak and easy to deal with whether you use offensive Psynergy like Flare or not, and if you spend enough time fighting them to level up to 5 (not necessary, since there is no boss battle at the end), random battles will no longer trigger. The layout and puzzles of the dungeon itself, likewise, are extremely easy by the standards of the rest of the series and are meant to introduce the general dungeon-solving methodology players will be using in all future dungeons.
The first room of note you come across features many separate platforms in the water for you to hop across. This serves as the first puzzle in all of Golden Sun; position yourself below the lower-rightmost platform and press up for a third of a second to hop onto it. Any gap that is as large as one of these floor tiles can typically be hopped across in Golden Sun games. To pass the room, hop up several times, hop left twice, hop down once, hop left once, and hop up three times. Follow the linear, blue hallway all the way to a second watery room with platforms to jump across.
In this second room with a tile-hopping puzzle, hop onto the central platform, hop right, and hop in a northwestern-direction to get to a treasure chest containing a Small Jewel, a quest item that is needed to progress elsewhere in the dungeon. Hop back down three times, then hop right and up to get to the northeastern dead-end with a minotaur-head relief carved into the wall with one of its eye-sockets filled with a jewel. Interact with it, then when your menu automatically pops up (Golden Sun games do this whenever you're expected to Use a specific item in your inventory, whether you actually have that item or not), go into your Item menu, select the Small Jewel, and use it to place it in the empty eye socket of the relief. You "hear the sound of shifting stone"; go hop back down to the bottom end of the watery room, and this time, hop up the left series of platforms so that you reach the door at the northwestern end of the room (this door is what opened up with the sound of shifting stone).
You get to a room that Kraden identifies as what seems like the final room of the dungeon, but is most likely not. On either side of the room is a statue surrounded by what looks like lines of dots on the ground; these dots appear all throughout puzzle-areas in Golden Sun games and serve both to denote that the objects within them may be moved around - either by manually pressing against it or remotely with the Move Psynergy - and to establish the limited areas that said objects may be moved through. Therefore, these statues surrounded by dots may be pressed off to the sides, and they will reveal doorways behind them. While the doorway beyond the left statue leads to a featureless dead-end and should be ignored, the doorway beyond the right statue leads deeper into the dungeon. Climb up the stairwell, and when you are at a point where you can either go left or right, it doesn't matter which way because you'll be going up to a three-way fork that branches left, right, and up. First, go left to find a chest containing another Small Jewel, then return to the fork. Now go up, then at the next fork, go left to reach the door at the top end of the room.
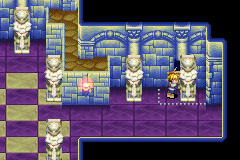
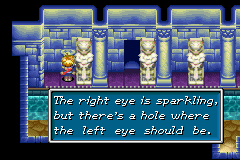
You reach a horizontally-shaped room with water and a series of seven statues along the wall, which Kraden in a cutscene suggests can be gotten past with the Psynergy you have. The dots at the edges of the purple floors the statues stand on should instantly suggest they can be moved left or right, and the seven floor tiles that extend partially across the water let each one of these statues be moved by your remote Move Psynergy. Currently, the second statue from the left is the only one concealing a door, but don't bother moving that out of the way to investigate, for the room beyond is another featureless dead-end. Instead, Move the leftmost statue out of the way, and hop up to reach another minotaur relief which you are to use your Small Jewel on. After another sound of shifting stone, move the rightmost statue out of the way to reveal a door that has newly appeared, and hop up and go through that to progress.
Now in a series of branching hallways, go up and left to reach a chest containing an Herb, then go right and up to reach what are essentially the series of chambers that the majority of the game's exposition cutscenes take place in. After one cutscene in the purple room with a glowing sun image on the ground, go right to see another cutscene in a room with an image of a crescent moon on the bottom. From here, go down and up a stairwell, and in the hallway you end up in, go down into a room filled with gemstones; the lone purple stone you see on the ground here is a Psynergy Stone that refills the PP meters of all party members, and most dungeons in the rest of the series have at least one of these lying around.
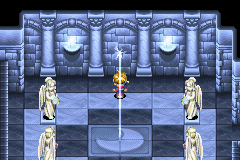
Return north and get into a room where there are four female statues bordering metal tiles on the ground; if you push any one of the four statues onto its tile, you'll trigger a cutscene. Ultimately, your objective lies in the room bordering this one to the left, where two small statues and one large statue can all be moved around. Move the center, large statue down one spot with the Move Psynergy, then move the two smaller statues up and onto their floor tiles so that sunlight shines onto the area of ground the large statue is on; this creates a hole that the statue falls through, and something will "click". Now, when you return to the room to the right and move one of the four statues onto their respective floor tiles, a different cutscene will transpire, and eventually you will need to move the other three statues on their floor tiles. Return downstairs for another little cutscene, then return to the first room you originally entered to see a beam of light pointing to the top wall. Interact with the point the light touches the wall to open a portal, and you are off to the Elemental Star Chamber, where a long series of story-intensive cutscenes will transpire.
Some time later, you will end up having been transported out of the Elemental Star Chamber, with Jenna no longer in your party, and you are commanded to get out of the trembling, quaking dungeon as fast as you can; while visually the area is shaking, there is no actual time limit, so don't feel pressed for time as you backtrack all the way through the dungeon to the Sol Entrance. Leave out of the bottom of the Sol Entrance to progress through the game.
Background and story
Any attempt at figuring out exactly when it was constructed into Mt.Aleph and for exactly what purpose inevitably leads to speculation. It contains the chamber containing the Elemental Star jewels, the containers for the purified essences of each of the four elements that comprise all reality. Should an Elemental Star be cast into its respective Elemental Lighthouse, that Star's energy will be channeled into a beacon, and when all four beacons are alight, that equates to the return of the supreme force of Alchemy to the world of Weyard. Since mankind was waging wars with the power of Alchemy in the world's ancient past, the wars were stopped when Alchemy was sealed away in an event that involved putting out the beacons that were alight on the four Lighthouses to begin with; however, Alchemy is also the "sustenance" that the world feeds on to remain in a stable state, and should it remain permanently sealed, the world would physically wither and collapse over time. Therefore, the Elemental Stars apparently exist so that Alchemy could eventually be returned to the world.
Sol Sanctum appears to be designed to prevent those other than capable Adepts from the modern day and age from sauntering in to take the Elemental Stars for themselves, but not completely keep the Stars away from outside grasp. First of all, it is known as a shrine in honor of the sun, but the chamber that reflects this theme is itself hidden by another chamber closer to the entrance that takes a keen eye and physical strength to bypass. The chamber representing the sun, as well as a neighboring chamber representing a moon ("Luna") and two chambers above them featuring statue puzzles, function together as a metaphorical safe for the vault that is the Star Chamber, but they have been constructed with a dangerous trap mechanism driven by some form of powerful magic; should anyone try to solve a riddle of moving statues to directly open the way into the Star Chamber, they will apparently be doomed, and Mt. Aleph itself will be wracked with a terrible, magically-generated thunderstorm. Only more level-headed Adepts that realize to disarm the trap mechanism by solving a statue puzzle in a neighboring room before solving the base riddle will earn passage into Sol Sanctum's most guarded secret.
Sol Sanctum is viewed as sacred by the people of the town at the foot of Mt. Aleph, Vale, enough that the ruling elders and healers of the village go so far as to even prevent the townspeople and themselves from casually exploring the locale, let alone travelers from outside the village. Their cultural legends believe that the sanctum and the mountain itself possess a purity of sorts that is responsible for Vale remaining pristine, and that if that purity is tainted, "terrible retribution" may be wrought. Of course, the elders and townspeople believe that everything up to the first main chamber of Sol Sanctum is the full extent of the shrine, unaware of the path that leads deeper into the sanctum where the actual shrine to Sol and Luna reside. An elderly scholar originally from outside Vale, Kraden, came to Vale to study Mt. Aleph, Sol Sanctum, and the secrets within, but had to live at Vale for years before gaining enough trust from the town elders that he was allowed to make brief trips into Sol Sanctum with escorts. During this time, Kraden came to suspect there was more to Sol Sanctum than meets the eye; the first main chamber, after all, had nothing to reflect the fact it was a shrine dedicated to Sol.
Three years prior to the start of Golden Sun, a raiding party of Mars Adepts from the far north, led by Saturos and Menardi, infiltrate Sol Sanctum with the intent to find the Elemental Stars for themselves. When they get to the chambers of Sol and Luna, they tragically misjudge the statue puzzle by not having disarmed the trap first. Through turbulent events not clearly explained, every raiding party member dies, and Saturos and Menardi themselves barely survive to escape the sanctum. A thunderstorm that only strikes Mt. Aleph's immediate area suddenly appears, and a large boulder somewhere up on Mt. Aleph begins to fall, sowing tragedy as it crashes through the town of Vale at the base of the mountain.
At the start of Golden Sun, Sol Sanctum is infiltrated again, this time by a smaller group of young Adepts from Vale itself - Isaac, Garet, and Jenna - who are led by Kraden in an off-limits expedition he claims is strictly for the sake of their education. Unbeknownst to them, however, they are being tailed by Saturos and Menardi, who have returned to attempt to raid Sol Sanctum for the Elemental Stars again, and this time are accompanied by two other companions, Felix and Alex. The young adepts successfully discover the way past the first, deceptive main chamber, and find the chambers with the Sol imagery and the statue puzzles; they do not make the connection that the puzzle and trap within the sanctum is what caused the disaster three years before, as they successfully disarm the trap before solving the puzzle and gaining entry into the Star Chamber. Saturos' group follows them sometime later, but not before Felix, who is the elder brother of Jenna, forces the others not to involve Isaac's group get involved in what they are doing.
The fateful events that transpire within the Elemental Star Chamber include the beginning of Mt. Aleph's volcanic eruption that is triggered in direct response to the Elemental Stars being removed from their pedestals; Saturos and his group flee the chamber with three of the four Stars in their possession, as well as two more in their group - Jenna and Kraden, now traveling with them as their captives much to Felix's chagrin - and they make their escape from Sol Sanctum; and later, Isaac and Garet, with the Mars Star in their possession, are teleported out of the erupting star chamber by the omniscient entity that guarded Alchemy's seal, the Wise One. The interior structure of the sanctum starts to crack and crumble during the trembling generated by the eruption, but Isaac and Garet barely make it out of Sol Sanctum in time, alive and well.
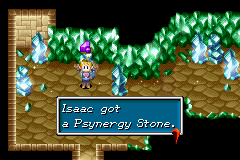
One of the rooms deep in Sol Sanctum is filled with a large quantity of the matter comprising Psynergy Stones. The eruption of Mt. Aleph causes all of the rock in this room to be spewed out of Mt. Aleph and shower all over the world; the Psynergy influence the stones bring immediately begin to change the world, as humans that come into direct contact with stones hailing from the sky attain previously unrealized Psynergy abilities as Adepts, while many wild animals unable to handle the mental influence become feral and ravenous.
Enemies
Being the game's first dungeon, the monsters in Sol Sanctum are weaker than their identically-named counterparts encountered later.
| Bestiary of Sol Sanctum | ||||||||||
| Monster Name | LVL | HP | ATK | DEF | AGI | EXP | Coins | Weakness | Drop | Drop Rate |
| Amaze | 2 | 28 | 25 | 8 | 12 | 3 | 3 | 1/16 | ||
| Bat | 1 | 17 | 21 | 6 | 13 | 1 | 1 | 1/32 | ||
| Slime | 2 | 22 | 22 | 6 | 8 | 2 | 2 | 1/32 | ||
| Vermin | 1 | 20 | 23 | 7 | 7 | 2 | 2 | 1/16 | ||
| Wild Mushroom | 1 | 18 | 22 | 5 | 10 | 1 | 2 | 1/32 | ||
Enemy Formations
- Group 1: Vermin x2-3
- Group 2: Bat x2-3
- Group 3: Slime x2-3
- Group 4: Amaze x1-2
- Group 5: Wild Mushroom x1-3
- Group 6: Bat x1-2, Vermin x0-1, Wild Mushroom x0-1
- Group 7: Slime x1-2, Bat x0-3
- Group 8: Slime x1-2, Wild Mushroom x0-3
- Group 9: Slime x1-2, Vermin x0-1, Wild Mushroom x0-1, Bat x0-1
- Group 10: Amaze x1, Vermin x0-2, Slime x0-2
- Group 11: Amaze x1, Bat x0-2, Wild Mushroom x0-2
Collectibles
 2 Small Jewels: Important items that are used to solve puzzles by being put in wall-mounted minotaur-head statues, necessary to progress in the dungeon.
 Herb: In a chest in the hallway right before the chamber with the symbol of Sol.
Trivia
Despite enemies being worth almost no experience, Jenna has special coding that turns off all encounters once she reaches 128 experience (30 experience short of level 4). This places a limit on how much grinding a player can do prior to leaving Vale. This limit can be circumvented by having Jenna downed before she reaches the experience threshold so that she no longer receives experience after battles.
