Warrior's Hill
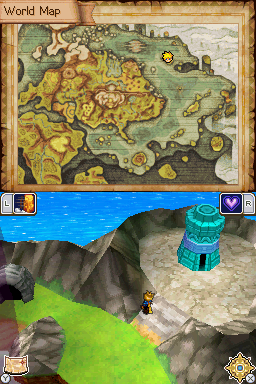
Warrior's Hill (オハ丘のネオス, Okha Hill's Naos) is a dungeon-style location featured in Golden Sun: Dark Dawn. Located on Harun Island, it is composed of a set of Zol-filled watchtowers and a network of channels and hydropowered mechanisms. It is conjoined with another dungeon-style location, Harun Channel (ハリン島の地下道, Halin Island Underpass), which has an entrance at the west end of Harun Island. These two locations should for all intents and purposes be counted together as one of the game's dungeons because both need to be visited at different stages to acquire all of the treasures shared between them. The story-important treasure at the end can be obtained with the Watchtower Key given to the party at nearby Harun Village.
Walkthrough
Warrior's Hill: Primary Dungeon
Enter Warrior's Hill on the overworld, represented by a single turquoise tower, and in the initial screen at the exterior, enter the lone tower and follow its stairwell down into a chamber with a large, spinning fan. It does not matter which of the two diagonal stairwells down you take because in the room below, both paths force you to a rotating belt of platforms which will lower you down its left, down into the B3 area. While being lowered down along the wall, hop left to reach a chest on a small platform containing a Cookie. Resume your descent down, and proceed west through another area, then southwest through a large, slanted, water-filled area.
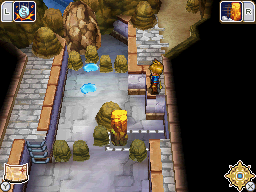
Go west through the long, multi-screen, dried-up Harun Channel area until you reach a dead-end with an earth pillar, two puddles, and a boulder blocking a stream of water. There is no point in following the lower-level part of the channel back south and east because it leads you to a room with Summon Tablet on it that is out of reach from this level; this tablet will be gotten later, but in order for it to be reached later, you must make sure to Move the earth pillar right two spaces before doing anything else. Then cast Cold Snap to turn the two puddles into ice pillars, then stand on the top ice pillar and cast Crush on the boulder to permanently fill the channel with flowing water. If the earth pillar is not as far right as it can be when the channel is filled, the tablet will be permanently missed.
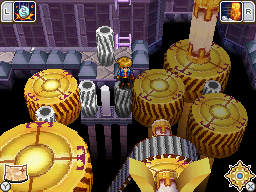
Backtrack all the way through the multi-screen channel until you get back to the slanted area, and enter the door at the northeast corner, which will lead you onto the now-active rotating belt of platforms. These will take you back up into the B2 level, into a new room filled with cogs, some rotating and some dormant. Don't hop left off the belt, or right off the belt for that matter when the vertical belt pushes you to its right downward column - letting yourself descend back down to the B3 floor on the right column of the belt of platforms will let you access a sometimes-missed chest containing the Dragon Mail (which is actually the first Golden Sun's Dragon Scales, not the inferior "Dragon Mail" from The Lost Age). Ride the belt back down and then ride it up again; you want to get to the right side of this room at B2, and you can either keep pressing right constantly while on the rotating belt to hop right off it, or hop left off the belt and hop across the path that the rotating and dormant gears suffice as, starting by hopping right onto the large golden gear at the left.
Once you are at the upstairs stairwell at the northeast corner of this B2 room, you will be forced back down into this room through the northwest stairwell, and a white, pillar-like cylindrical cog stands on your left. Move it down onto the level below, then retrace your steps back to the right side of the room, and use the aforementioned route of cogs to hop back to the left side of the room. Now move the cylindrical cog right and down so that it falls onto the white spire in between the rotating cogs and the dormant cogs; this will make all cogs spin and turn on the fan in the room above, which will raise the northwest of the three turquoise towers in the exterior screen at top. Climb back up the diagonal stairs to reach the area with the newly turned-on fan, and go up the stair of zol cubes and exit out of the tower that was just raised. A climbable tree to the left of this tower lets you reach the Venus Djinni Chain at the southwest corner of the exterior area. When you are done getting it, go back inside the tower and return to the spinning fan.
Back in B1, proceed diagonally southeast to a large area where a large zol structure rests on a larger, dormant fan, and climb down its stairs into the cog-filled puzzle room underneath that. Move the nearby cylindrical cog down and right into the square indentation right of the gold seesaw. Then, while standing on the seesaw's lowered right arm, cast Crush on the raised left arm to launch yourself onto the cylindrical cog, and proceed down to the southeast corner of the room. Another belt of platforms stands in your way, and let it lower you down into B3. You will be dropped near a chest containing the Aegis Shield. Take the short linear route to hop back onto the belt of platforms and let it take you back up into B2, and constantly press left so that at the top, you will hop left off the belt and end up at two more seesaws. Stand on the lower seesaw's lowered left arm and Crush its right arm to launch yourself across the pit, and then go to the northwest corner of the room, where another cylindrical cog waits to be moved and dropped in place to complete another circuit of cogs. This turns on the large fan in the circular chamber above, making the last and central of the turquoise towers emerge from the ground above. Use the newly completed path of gears to get to and go back up the stairs at the northeast corner of the room, and at the large fan room, go up the spiraling zol staircase.
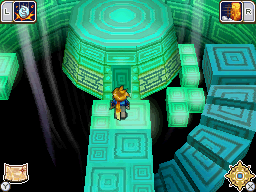
Because you do not have the key yet, the floating "pod" at the top of the zol staircase in the central turquoise tower, which contains the dungeon's important treasure, cannot be entered yet. The exitway just south of the pod takes you back outside to the exterior screen, and now you have a very quick and easy shortcut from the overworld to this pod. Leave for the overworld.
Harun Channel and the Watchtower Key
From Warrior's Hill on the overworld, travel west into the cave entrance, and in the exterior screen you begin at, take the linear road into the upper door of the two-doored stone structure. Your route indoors leads you past a pair of out-of-reach NPCs to a B1 area with a brown-and-red seesaw. Without standing on it, Crush its raised left arm down, then stand on this arm and Crush its raised right arm to launch you to a chest containing the Lucky Cap. Now stand on the Seesaw's lowered right arm and Crush its raised left arm to launch you to where you can now take the exit at the southeast corner of this room.
The route into Harun Channel soon leads you into the north end of the same room where you had crushed the boulder to fill the channel up with water earlier. Before using the seesaw, go past it southwest. The earth pillar that you should have pushed right against the wall earlier can now be hopped across, and will lead you to a room with a simple jumping puzzle that rewards you with the Coatlicue summon tablet. Backtrack to the seesaw and Crush its right arm while standing on its left arm, letting you proceed east along the lower end of the channel back to the area with the NPCs. Simply Move the earth pillar left and up into the square indentation to let yourself hop to where they are, and trigger a cutscene. After this, exit out the nearby door into the exterior area, and walk through the Grave Eclipse-covered portion to reach a chest on the southeast corner of the screen that contains the Muramasa. Cast Retreat to leave Harun Channel.
Having triggered the cutscene inside Harun Channel causes another cutscene to trigger inside Ikan's house in Harun Village, once you talk to Ikan and oblige him by Moving a nearby tall wooden crate. The lengthy cutscene that follows eventually ends with the Watchtower Key in your possession. Now you can return to Warrior's Hill and reenter the raised central tower with the pod inside it, and use the Watchtower Key to enter it. Another cutscene places the Third Eye important item into your inventory, and now Warrior's Hill is complete and you are free to continue the story at Yamata City.
Collectibles
 Aegis Shield
 Cookie
 Dragon Mail
 Venus Djinni Chain
 Lucky Cap
 Muramasa
 Summon Tablet Coatlicue
Enemies
| Bestiary of Warrior's Hill | ||||||||||
| Monster Name | LVL | HP | ATK | DEF | AGI | EXP | Coins | Weakness | Drop | Drop Rate |
| Bulky Bugman | 31 | 180 | 285 | 153 | 128 | 641 | 122 | 1/16 | ||
| Earth Lizard | 31 | 461 | 335 | 168 | 125 | 2,005 | 321 | 1/32 | ||
| Minos Warrior | 31 | 394 | 375 | 109 | 143 | 2,807 | 168 | 1/16 | ||
| Sky Dragon | 31 | 304 | 348 | 112 | 167 | 2,325 | 107 | 1/128 | ||
| Venus Djinni (Chain) (unique) | 31 | 732 | 298 | 127 | 196 | 3,208 | 382 | N/A | N/A | |
Background and Story
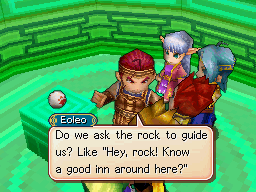
Warrior's Hill was apparently created in ancient times by the Jenei, ancestors of the Adepts, as part of a response to a potential Grave Eclipse. Within Warrior's Hill, the Jenei hid an Artifact known as the Third Eye, a treasure meant to help guide warriors stop the Grave Eclipse. The room containing the Third Eye was locked, and the towers buried beneath the ground by an unknown mechanism. In the passing years, a prophecy would be handed down regarding a future Grave Eclipse. The prophecy not only foretold the Grave Eclipse, but also told of those destined to stop it: "Warriors who wield weapons that are not weapons", i.e. Adepts.
After fleeing Belinsk, Matthew's party arrives at Harun Village. After saving the son and grandson of the local storyteller, Ikan, Ikan tells the group of the prophecy surrounding Warrior's Hill. He reveals that one of the towers spontaneously emerged following the start of the Grave Eclipse. After providing the Adepts with all the knowledge of the tower he knows, Ikan gives the Adepts the Watchtower Key needed to access the tower's treasure, and sends the Adepts to Warrior's Hill.
Matthew's party travels through Warrior's Hill, eventually causing the two other towers to rise from the ground. Upon reaching the final chamber, they are puzzled to see the treasure is an apparently ordinary rock. Though puzzled by the rock, the group decides to take it anyway, knowing that the Jenei would not have hidden it without a purpose. After leaving Warrior's Hill, the group leaves Harun Island in search of more answers.
