Gaia Rock
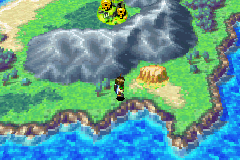
Gaia Rock (ガイアロック, Gaia Rock) is a mandatory dungeon-like location in Golden Sun: The Lost Age. It is the Venus-aligned example of a set of four similar "Elemental Rocks" standing across the world of Weyard. Located near the village of Izumo on the island of Nihan in the Eastern Sea, the villagers have named it Mt. Mikage (フジ山, Mt. Fuji), with its name in the Japanese-language version functioning as a parallel to the real-world Mt. Fuji. Compared to the other three elementally aligned mountains, Gaia Rock is a location in which a developed subplot involving characters from Izumo takes place.
Gaia Rock can be entered as soon as the party can start sailing the Eastern Sea with the Lemurian Ship a third of the way through The Lost Age. While the other three Elemental Rock dungeons end up being massively complex and time-consuming affairs like they suggest, Gaia Rock might deceive the unwary player into believing it to be far more "straightforward." A gaping main entrance at the base level leads to a comparatively short route to a final chamber where a character named Susa is trying to ply a monstrous dragon called the Serpent with liquor.
The party is actually expected to climb to the top of the mountain's exterior starting from a rather well-hidden ladder left of the entrance, collect the Dancing Idol key item (which requires the Reveal Psynergy gotten from Air's Rock), and use it to open up the interior and solve light-based puzzles that will remove the Serpent's invulnerability. After defeating the beast, Felix will be taught the Sand Psynergy.
Walkthrough
When you enter Gaia Rock's location on the world map, the large black entrance at the mountain's base initially leads you through a series of rooms that eventually lead into the final chamber where the boss battle with the Serpent takes place. If you go inside and prematurely get to the chamber (following the below section "Confronting the Serpent" first), a short and optional cutscene triggers, but the Serpent boss is currently impossible to defeat on account of restoring several thousand HP each turn. You therefore would have to leave the room and retreat to the gaping entrance of Gaia Rock so that you can begin the actual "dungeon."
Exterior climb
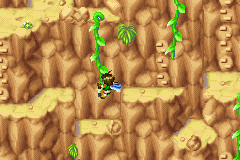
From just in front of the large, black entrance into the mountain, head left behind the trees to find a cliff ladder. Climb it, push the earth pillar you find two tiles left, and make it fall into the gap, then climb up and climb down onto the gray tile that the earth pillar is now standing right next to. Use the Move Psynergy to shift the earth pillar one space right onto said gray tile. Head right, climb down the cliff ladder at the right side of the screen to touch back down onto the ground level near the gaping black entrance, and climb up the left wall ladder again. Now hop right across the earth pillar and follow along with two more cliff ladders leading off the top edge of the screen to the next area.
Now in the first large exterior screen above the base-level screen with the entrance, climb up the right cliff ladder and the green vine, and follow along with the cliff ladder past that to get to the upper-right corner of the screen. At this point, two dangling green vines should be visible off to either side of your screen, and you can climb down the left vine to reach a chest containing a Nut. Climb back up to the top and slide down the cliff slide west of the left vine to reach a narrow ledge with a twisting cliff ladder to your left; the vine and cliff ladder underneath you would have been an alternate path to this ledge from the starting point of this screen that skips getting the Nut.
Climb up the twisting cliff ladder and head a fair distance west until you can start climbing down two cliff ladders in a row; as you descend through to the bottom edge of the screen, take note of how a moai statue facing left spouts whirlwinds at a dangling vine, causing it to swing back and forth. Before climbing all the way down past the vine underneath you, cast the Whirlwind Psynergy while facing left toward another, lower vine to make Felix latch onto it, and press the A button to have him swing across to the left. Head up to an earth pillar visible behind a rock to the left and cast Move to remotely push it one tile left. Use Whirlwind to swing back to the right and climb down the vine to the bottom edge of the screen, and follow along west and north until you reach the earth pillar you had just shifted to the left. Move it one tile further to the left to drop it onto the gray tile, then follow along with the remaining cliff ladders and exit the screen off its left edge.
The next outdoor screen is a fairly compact maze that is more linear than it might appear. Avoid swinging across the first vine immediately visible to you, and instead climb down the cliff ladders and dangling vine to reach the southeast corner of the screen. Follow along west across a pair of gaps and climb back up one cliff ladder and a vine adjacent to it. Rather than climb up the cliff ladder to a dead-end just above you, swing across the vine east of that, and follow along several more cliff ladders and dangling vines to climb off the top edge of the screen.
You are now at the bottom edge of a tall screen with an obstacle that can only be passed through trial and error: a seemingly straightforward maze-like cliff ladder that conceals moai statue heads behind three specific tiles. They will spontaneously pop out as soon as you climb onto these unassuming tiles and forcibly send Felix tumbling back down to the bottom. While a given moai head will remain where it spawned and allow you to safely climb around it the next time, no in-game indication is given whatsoever that allows the player to predict in advance where a moai head is hiding, so you must simply make enough attempts to climb up the entire wall ladder until you happen to reach the top. The easiest way to avoid running afoul of one of these obstacles is to first hug the right until you reach the fork above the large "cliff-ladder square," then take the left fork and hug the left and upper edges. You will soon reach a fork branching into a narrow route left and a wide wall of cliff ladders above you and to the right; the latter set of cliff ladders is a dead-end, so take the left fork and climb straight upward to the ledge at the top of the screen (avoiding a hidden moai head at the right edge of the 3x3 arrangement of cliff-ladder tiles near the top edge of the maze). Now follow along up through several small cliff ladders and exit the screen's northeast edge past the rocks strewn across the ground.
You have now reached the screen comprising the peak of Gaia Rock's exterior area. Hop right across the earth pillar to get to a chest southeast of it containing an Apple. Return to where you had entered this screen and climb down the wall ladder south of it, follow along until you reach the base of the earth pillar you had just hopped across, and Move it as far south as possible. Climb back up near the starting point again and hop across the earth pillar at its new position. You will now follow a twisting but ultimately linear path through scattered rocks and cliff ladders until you reach a circle of earth pillars arranged around an empty white podium; as the ''Golden Sun'' series should have conditioned you to do by this point, cast the Reveal Psynergy within this ring-like arrangement, which make an invisible idol on the podium visible. Add the Dancing Idol rare item to your inventory, then cast the Retreat Psynergy to return to Gaia Rock's base.
Interior exploration
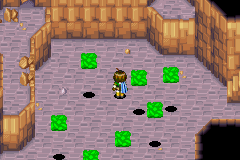
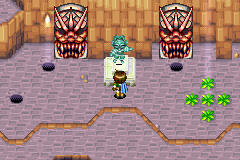
Now that you have the Dancing Idol, bring it into Gaia Rock's large, black entrance; you will enter a hallway that features the same type of white podium as what you originally found the Dancing Idol standing upon. Using the idol from your inventory in front of the podium will cause the two dragon-like statue heads on either side of it to shift aside and expose two new doorways. Enter the right doorway and follow along until you reach an area with a large clump of weeds positioned in the center of the floor. Cast the Cyclone Psynergy on them, which will cause them to transform into a set of floating green platforms that now hover above the ground and move back and forth through the air. Return to the main hallway, casting Retreat if preferred.
Back at the base-level podium, enter the doorway previously covered up by the left dragon-head statue, and follow along until you reach the upper level of the same room you had created the floating green platforms in. Jump from the lower-right corner of your ledge onto the green platform as it comes to a stop just right of your position. When it is done floating back south, jump right to another green platform, and walk one tile right from that once it floats back to the bottom. When that green platform floats back to the east, walk one tile right, then walk one tile left from that platform once it has floated back north. When that platform has reached its north position, walk one tile right to one last platform, which you can hop north from once it has floated to its north position.
After following along with some more twisting hallways, you will reach an open area with dragon-head statues and a podium visible above you. Reach them by taking the right fork and going down the stairs over to the east. Using the Dancing Idol at the podium will cause the left statue to shift aside and shine a beam of sunlight into one of the four holes in the ground, which will show a cutscene in which the Serpent boss in the final chamber gets weakened by the beam of sunlight. Clearing away the five weeds underneath the right dragon-head statue will expose another hole that causes another beam of sunlight to weaken the Serpent below. Now leave the chamber through its northwest exit.
When you go upstairs into the floor above, there is a 3x3 clump of weeds south of your position; casting Cyclone of them will initiate a battle with a Mad Plant that drops a Potion when felled. Head south into the next room to find a hallway with a wall-ladder maze featuring the same sorts of hidden moai heads as the similar maze near the top of Gaia Rock's exterior. Before you bother climbing to the east along this course, run east along the ground and enter the doorway to find a white podium near another dragon-head statue; placing the Dancing Idol on this podium shines a third weakening light onto the Serpent two floors below.
Return to the beginning of the trial-and-error wall-ladder maze and start climbing it, starting with the thicker lower route to avoid the moai head hidden in the narrow upper route. When the route branches off into three eastward paths, avoid the center path and take either the upper and lower paths; either of the following two branches east are safe. You will then arrive at a mass of wall-ladder tiles 4x3 tiles large; the last hidden moai head is in the second-to-last tile from the lower-right corner. Swing across the vine with Whirlwind and reach a room with a large spider web suspending a white podium above an abyss; send the podium falling into the chamber below by casting Cyclone on any of the weeds here, then slide down the wall slide to drop next to the new podium and immediately make use of it with the Dancing Idol. The final beam of light will now shine into the Serpent's chamber, weakening it as much as possible. Now cast Retreat to quickly return to the base-level hallway.
Confronting the Serpent
Head north past the white podium and two dragon-head statues at the base-level hallway at the start of Gaia Rock's interior and follow along. When you reach an area where two small earth pillars block your path, cast Move to remotely move the lower pillar two tiles up and one tile right, then Move the upper-left pillar two tiles right, two tiles down, and one tile left into a recess. This lets you proceed west and north into a maze.
You will step into a small room with exits in all compass directions and a small, green plant at the center. Cast Growth on this (changing classes as necessary if you do not currently have that Psynergy, such as exchanging Venus and Mars Djinn between Felix and Jenna) to make it manifest an arrow indicating which exit will bring you to the next, similar room in the maze, where another green "cross-plant" will indicate the direction you need to go once you cast Growth on that. If you take an exit that the plant would not point to in any of the rooms in this maze, you might end up either in the same room from a different direction or warp back to the first room. You must follow the directions of the cross-plants through a total of fourteen rooms before you will emerge in the Serpent's chamber at the end. Along the way, there will be one room with a chest revealing itself to be a Mimic, and it will drop a Game Ticket. Another room contains another chest that contains a Rusty Mace that can be reforged into the Demon Mace back in Yallam.
Which rooms' cross-plants point to which exits is actually determined at the start of the game file by a seed corresponding to the name given to the game's main player-character, meaning that a different arrangement of plant-based directions through the maze will be generated if you give Felix a different name or are playing a different-language version in which he would have a different name by default. For example, if you keep his name as "Felix", then after entering the first chamber, head west, north, north, east, north, east, east, south, east, east, north, east, east, and north into the final chamber.
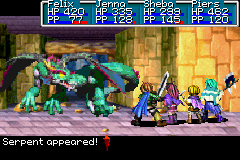
When you step into the final chamber, if you haven't made any lights shine into the chamber yet, a cutscene will have Susa address you and explain how he is feeding the monstrous green dragon in the area "Dragonsbane." Interacting with the dragon in this circumstance will bring you into a boss battle with a version of the Serpent that restores 2,430 HP per turn, which obviously will result in the party's annihilation; an extra post-battle cutscene will have Susa chastising your party for even trying.
If you step into the final chamber after having shone at least one light beam onto the Serpent, a different cutscene will play where Susa will attempt to strike the Serpent but get knocked aside. The version of the Serpent you will battle will be proportionately weakened based on how many lights shine into the bowl in front of the Serpent's mouth; with all four lights shining, it will only restore 30 HP per turn, act twice per turn, and use its more dangerous abilities less frequently. After slaying it and watching a follow-up cutscene, a tablet will emerge out of the sand and impart Felix the unique Sand Psynergy, which unlocks content such as the upcoming Ankohl Ruins dungeon.
Before retreating to the entrance and leaving, cast Sand on the sandy surface underneath the Serpent's petrified corpse and travel underneath it to reach the open space underneath the watery substance where its tail was, and interact with the far right end of the fluid to get the Cloud Brand. If you don't pick it up now, a cutscene back in Izumo will tell you that you can return here to pick it up, so collecting it now will save you time.
Enemies
| Bestiary of Gaia Rock (Exterior) | ||||||||||
| Monster Name | LVL | HP | ATK | DEF | AGI | EXP | Coins | Weakness | Drop | Drop Rate |
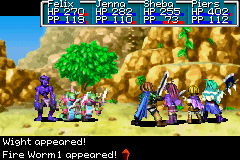
| Clay Gargoyle | 25 | 209 | 210 | 90 | 84 | 100 | 147 | 1/32 | ||
| Fire Worm | 25 | 97 | 211 | 49 | 94 | 158 | 113 | 1/32 | ||
| Gnome Mage | 25 | 162 | 179 | 50 | 108 | 86 | 126 | 1/16 | ||
| Golem | 25 | 266 | 217 | 57 | 40 | 105 | 161 | 1/64 | ||
| Wight | 25 | 192 | 205 | 55 | 54 | 92 | 115 | 1/16 | ||
| Bestiary of Gaia Rock (Interior) | ||||||||||
| Monster Name | LVL | HP | ATK | DEF | AGI | EXP | Coins | Weakness | Drop | Drop Rate |
| Clay Gargoyle | 25 | 209 | 210 | 90 | 84 | 100 | 147 | 1/32 | ||
| Dread Hound | 25 | 252 | 211 | 56 | 90 | 116 | 176 | 1/64 | ||
| Fire Worm | 25 | 97 | 211 | 49 | 94 | 158 | 113 | 1/32 | ||
| Gnome Mage | 25 | 162 | 179 | 50 | 108 | 86 | 126 | 1/16 | ||
| Golem | 25 | 266 | 217 | 57 | 40 | 105 | 161 | 1/64 | ||
| Mad Vermin | 22 | 131 | 164 | 22 | 67 | 55 | 80 | 1/32 | ||
| Wight | 25 | 192 | 205 | 55 | 54 | 92 | 115 | 1/16 | ||
| Wood Walker | 25 | 230 | 213 | 75 | 94 | 242 | 201 | 1/16 | ||
| Mimic (unique) | 28 | 707 | 251 | 71 | 153 | 840 | 531 | 1/1 | ||
| Mad Plant (unique) | 28 | 566 | 254 | 65 | 114 | 630 | 451 | 1/1 | ||
| Serpent (boss) | 33 | 3536 | 249 | 76 | 135 | 1995 | 2898 | N/A | ||
Enemy Formations
- Group 1: Fire Worm x1-2
- Group 2: Wight x1, Fire Worm x1-2
- Group 3: Gnome Mage x1, Fire Worm x0-2
- Group 4: Golem x1, Clay Gargoyle x1
- Group 5: Dread Hound x1, Fire Worm x0-1
- Group 6: Woodwalker x1, Mad Vermin x1, Fire Worm x1
- Group 7: Woodwalker x1, Clay Gargoyle x0-1
- Group 8: Woodwalker x2
Collectibles
Exterior:
 Apple: Found in a chest near the area where you can find the Dancing Idol.
  Dancing Idol: At the peak of the exterior, there is an empty pedestal surrounded by a ring of log pillars. Cast Reveal to see a dancing figure, which you can obtain as an item. Use it on any similar-looking pedestals in the interior portion to make progress in the interior of Gaia Rock.
 Nut: Found in a chest in the first screen off the ground level screen.
Interior:
 Rusty Mace: Found in the chest later on in the winding multi-room path towards the most interior room. Sunshine will reforge it into the Demon Mace.
 Sand: This Psynergy is the reward that presents itself following the boss fight with the Serpent. Inspect the stone slab that emerges out of the ground.
 Cloud Brand: Right after getting the Sand Psynergy after the boss battle, immediately cast it to transport yourself to the end of the trail of fluid, then inspect the end of the stream with the A button.
History
Gaia Rock is one of a set of four "Elemental Rocks" heavily associated with the four base elements of Weyard, sharing this distinction with Air's Rock, Aqua Rock, and Magma Rock. All four mountains can be presumed to have similar origins to what is described in-game about Air's Rock in particular, that being that it has stood since the world's beginning. It is located on an island that would later be referred to with the name Nihan. Similarly to the other Elemental Rocks, the mountain contains an ancient, labyrinthine complex with man-made sculptures such as moai statue heads.
The residents of the nearby village have long regarded the mountain as a sacred peak. A large dragon that the villagers would come to call the "Great Serpent" has slumbered within its deepest chamber for an untold span of time, and its apparent immortality played into their perception of it as a divine guardian. The mountain itself is named "Mt. Mikage" in their tongue, which means "the undying mountain," which references how they see the Serpent as a creature blessed with eternal life.
Like the other three elementally aligned mountains, Gaia Rock appears to have subtly granted some among the people living near it the powers of an Adept. Over the generations, the village's closest equivalent to a royal family was formed on the basis of its members having gained the ability to use Venus-aligned Psynergy. As of The Lost Age, this holds true for the Lady Uzume and her brother Susa.
The eruption of Mt. Aleph at the start of Golden Sun, which the people of Izumo become aware of despite their remoteness from the Angaran mainland, leads to rapid changes in the world's being, and an old man states that the Great Serpent awoke from its slumber "shortly afterward." On the other hand, the Encyclopedia feature in Golden Sun: Dark Dawn states that the Serpent awoke "when the Venus Lighthouse was lit." Regardless, it awoke as a mindless beast and rampaged during a festival being held in Izumo at that moment, and it ate up all of the food, suddenly turned relatively docile, and returning to its domain.
The people of Izumo, of course, were wracked with superstitious terror over what they perceived to be their guardian turning on them, and they came to believe that the Serpent demanded a yearly sacrifice. Some time after the Serpent's initial attack, in Golden Sun: The Lost Age, the village instated a grim lottery that would choose which of the village's young maidens would be offered up to the dragon this year. Kushinada, the fiancée to Susa, was selected by chance, and Kushinada accepted this horrific role on the basis that if she were to run away, she would only be putting the rest of Izumo in danger.
Susa, obviously not approving of any of this, recklessly entered Gaia Rock with the intent to put down the beast himself. He hauled over loads of barrels containing an inebriating fluid named Dragonsbane (in the Japanese-language script, this is simply the alcoholic beverage called sake) to the Serpent's chamber, and the creature started drinking it without any protest. Susa would continuously refill the Serpent's bowl with all the Dragonsbane he brought over, hoping to degrade the Serpent's power and resilience to a point where he would eventually land a killing blow with the Cloud Brand weapon he also brought over.
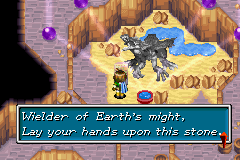
Felix and his traveling party of Adepts, the ones who set off the eruption and lit two of the Elemental Lighthouses thus far, happen across Izumo during their exploration of the Eastern Sea in search of the Psynergy powers needed to reach Lemuria and the remaining two lighthouses. They enter Gaia Rock and find Susa feeding the Serpent, and they help weaken it for him by letting sunlight flow into its chamber (which correlates with how the Serpent's attack on the festival took place at night). Susa takes a literal stab at his goal but finds that the dragon hardly even registers the pain, and the Serpent casually tosses Susa aside, leaving Felix's party to battle and subdue the beast at length. This allows Susa to deal the killing blow (and apparently hides the Cloud Brand under the tail of the now-petrified corpse in a split-second). Susa sincerely thanks Felix for his assistance and walks out of Gaia Rock; before following suit, Felix finds a stone tablet that imbues him with the unique Psynergy that lets him turn his body into self-animating sand.
Felix finds Susa lying on the ground in front of Gaia Rock's entrance and is quickly reassured that he is not on death's door, and Susa rather humbly insists that Felix take the credit for defeating the Serpent. Felix's party returns to Izumo to receive a heroes' welcome from Uzume and the now-saved Kushinada, and Susa follows shortly after. Felix also hands over the Dancing Idol he had found while exploring Gaia Rock, which Uzume apparently knew about already, and she says it will allow her to explore Gaia Rock on her own time. Felix may have to go all the way back into Gaia Rock to pick up Susa's Cloud Brand, which he describes as a gift he left behind for Felix.
Over the tumultuous 30-year timeskip between The Lost Age and Dark Dawn, Gaia Rock appears to largely stay intact even as tsunamis destroy Izumo and force its denizens to found a new village named Yamata City elsewhere on the island. Matthew visits Yamata City during his quest to put a stop to the Grave Eclipse wreaking havoc across the Angaran mainland; it is possible for him to approach Gaia Rock's outskirts from the south end, though he has neither any capacity nor reason to enter the mountain.
Trivia
- Gaia Rock's theme sounds very much like the music that plays in Okami when the Celestial Brush is used.
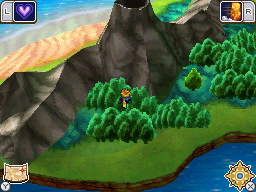
- Gaia Rock can be seen, though not visited, in Dark Dawn. It appear more similar in shape to Mt. Fuji in this game, as a conical volcano. The Mars Djinni, Sizzle, can be found on the overworld just south of where the entrance to Gaia Rock used to be found.
