Anemos Inner Sanctum
- This article is about the optional late-game dungeon in Golden Sun: The Lost Age. For a more general article about the in-universe location, see Anemos Sanctum.
Anemos Inner Sanctum (アネモス神殿ないぶ , Anemos Sanctuary Interior) is an optional postgame-level dungeon in Golden Sun: The Lost Age. It is set within Anemos Sanctum, an ancient structure located at the village of Contigo in the island continent of Atteka. While a very limited portion of its "lobby" can be reached by walking through the building's front entrance using the Reveal Psynergy, reaching the lobby requires using the Teleport Psynergy found in Mars Lighthouse near the end of the game. Furthermore, the door to the inner sanctum can only be opened by collecting all 72 Djinn available between The Lost Age and the original Golden Sun; transferring data between the two games is required.
Fittingly for its placement as a dungeon that requires comprehensively playing through two separate titles, Anemos Inner Sanctum features the hardest content in the second game. It features the strongest random monsters that drop valuable items, powerful treasures which include two summon tablets — Charon and Iris — and the game's hardest "superboss" by far, Dullahan.
Walkthrough
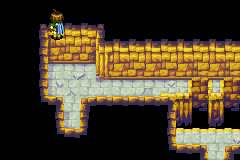
Starting from when the party gains access to the Western Sea and can reach Contigo, the large sanctum northeast of the town's main screen can be entered through three different doors. While the left and right doors lead to empty areas, the seemingly shut central entrance can be passed through by casting the Reveal Psynergy. This leads you to a dead-end at the bottom part of the "main lobby" with a chest containing a Dragon Skin.
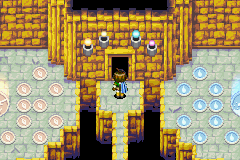
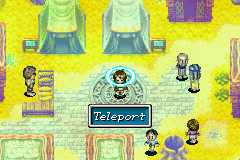
Once you collect the Teleport Lapis early in the final mandatory dungeon of the game, Mars Lighthouse, you gain the ability to warp directly into the main lobby of Anemos Inner Sanctum by casting Teleport on the circular pattern in the center of Contigo. However, the door north of you will not open unless you have collected all 72 Djinn, a feat which requires playing the original Golden Sun comprehensively to collect all 28 of its Djinn (or at least 6 out of 7 of each of the four elements worth of Djinn), then using the data transfer system to make sure Isaac's party eventually joins Felix's with all those Djinn. Felix must also collect all 44 additional Djinn available throughout The Lost Age (plus up to four potential "make-up" Djinn, one per each element, if necessary). This requires delving into the other three optional "postgame-tier" dungeons: Treasure Isle, Yampi Desert Cave, and Islet Cave. (You can show a piece of armor to Naribwe's Fortune Teller to receive a vague hint on the location of a TLA-exclusive Djinni you haven't collected yet.)
In the main lobby of the Inner Sanctum, when you step on one of the four elementally decorated patterns on the floor, Felix will raise his arms and project a transparent image of a Djinni associated with that element, and up to eighteen small orbs will attempt to spawn and light up the smaller, round surrounding patterns. If less than all 18 Djinn of that element between both games in the GBA duology have been brought, the lit-up patterns will turn back off. Otherwise, all patterns will stay lit, and a special light will manifest on one of the four "torch-holders" above the sealed green door. Do this for all four sets of patterns in the lobby — Venus for the upper left, Mercury for the upper right, Mars for the lower left, and Jupiter for the lower right — to turn on all four colored lights and unseal the door.
Exploring the inner sanctum
Now in the proper dungeon portion of Anemos Inner Sanctum (as indicated by the music changing to the theme that played in Sol Sanctum at the start of the first game), hop up and receive a telepathic message from a summon tablet placed upon a pattern of purple skeletal bones. Interact with it to collect the Charon summon sequence, the second-most powerful and expensive summon in the game, then follow along downstairs.
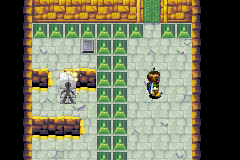
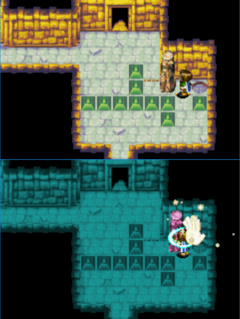
In the first basement floor, avoid the right branch because it leads to a dead-end, and follow along with the left branch north to another branch leading northeast and west across a gap. Take the gap west to enter the first of three puzzle rooms where a white block with a human-shaped pattern on it mimics Felix's own movements and can get erroneously dropped into the pits depending on where Felix moves on his side of the room. Move Felix so that the white human-block passes over the narrow bridges and settles onto the floor switch at its side of the room, making the green door open up.
Follow along southwest to where you can move an earth pillar two tiles over onto the indentation to its right to open a minor shortcut, and enter the door above you; ignore the staircase leading upstairs and hop the gap right of that, and you will enter a room where stepping over the seven black circles on the ground will make them light up and make the up-pointing floating block light up. Stepping on this block will bring you one floor up. You can move the earth pillar to your left all the way to the indentation to its left to create another shortcut for potential use on a future revisit to this dungeon, but pass left under the line of green blocks and follow along down two more staircases.
As you head northwest, go down the staircase you pass by to your right to find a dead-end room with a chest containing a Dark Matter. Go back up and continue southeast past a future "Sand-shortcut" to enter a puzzle room full of cracked tiles and black circles; you must step on all the black circles, then get to the now-lit-up up-pointing platform at the upper right, without stepping on a given cracked tile more than once (since Felix will fall back into the room with the Dark Matter chest). Step on the black circle immediately to your left, then walk down and then left to the second circle. Then head up and left to the upper-left corner of the screen, then down to the lower-left corner, and step on the black circle next to the southwest corner. Step one tile right off that black circle, then two tiles up, then two tiles right to another black circle, then two tiles down onto the center-bottom black circle, then right onto the lower-right black circle. Finally, hug the right edge of the screen as you travel upward onto the remaining black circle and then the goal platform.
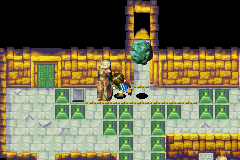
After you go down another staircase, you can take the branch to your left to push the earth pillar left at the aforementioned "Sand-shortcut" to open that up for future use, then take the branch to your right to a particularly large and complex puzzle chamber, where the goal is to eventually unseal the green door up ahead of you by Moving the visible earth pillar left under it. Cast the Lift Psynergy on the round boulder, then head south and follow along until you reach the second puzzle room to have a white human-patterned tablet that mimics your motions. Move Felix up so that the white tablet is positioned against the top edge of the lone green block in the center of its side of the screen, then move Felix down one tile, which pins the white tablet against the rock. Now move Felix up and through the gap in his course, which should cause the white tablet to cross the narrow bridge in its own course, and make the tablet settle on its floor switch to open the green door.
Now you are in the lower-right corner of the large chamber with the Lift boulder. Hop between the earth pillars in front of you and move the right one onto one of the two indentations on the ground. Now backtrack all the way through to the boulder portion of the same room, cast Lift on it again, and head through the doorway north of it so that you emerge right of the earth pillar right of the boulder. Hop south between the two earth pillars and move the one to your right into the other indentation on the ground. Head back through whence you came to get back to the round boulder from above it, cast Lift on it once more, head south past it, and cast Move on the leftmost of the three lower-right pillars to move it off to the right and allow yourself the space to hop north to the earth pillar right of the still-floating boulder. Move it all the way left onto the floor switch to permanently open the green door.
Ignore the next branch north as that leads to a dead-end, taking instead the next branch into the third and final white-tablet puzzle room. Positioning Felix one tile northwest of the southeast green block in his course should make the tablet pin against the green block in its course for about two tiles worth of displaced space. Then have Felix move to the top edge of his southeast block, move up two tiles, move back left one tile, and move back down two tiles to pin the tablet against its green block and realign its position with that of Felix's. From there, it should be a matter of having Felix move one tile right, two tiles up, one tile left, two tiles up, and three tiles left to place the white tile onto its floor switch.
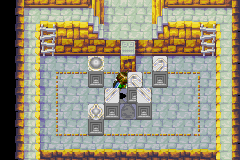
You will immediately enter a corner where you can go downstairs, which you should do; you will find another dead-end room with a chest containing an Orihalcon. Go back upstairs, take the east branch, and you will end up in a large chamber with a black chasm surrounding the platforms. Step onto the bottom edge of the 3x3 arrangement of cracked tiles and move left, up, and left to hop west from them, then follow along clockwise to a four-way intersection above the chasm. Take the east branch and remotely Move an earth pillar off to its right to free up a sand trail, then return to above the chasm and head south. Step back onto the 3x3 arrangement from above and move right, down, and right to hop east to the sand trail you just opened up, which you need to use the Sand Psynergy to pass. Follow along north and west from this part to the other sand intersection that lies north of the four-way intersection and push the earth pillar left off the trail onto the adjacent indentation in the ground, permanently opening a shortcut into the final chamber above.
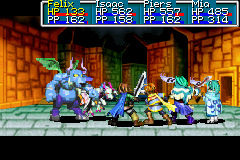
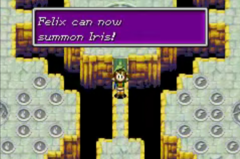
The final chamber in Anemos Inner Sanctum does not feature random encounters with monsters. Move the six disjointed blocks onto the six purplish-gray tiles that feature a bird-shaped pattern on them, matching the six blocks' surface-level patterns with the ones underneath them. The simplest order would be to fill in the upper-left, upper-center, upper-right, lower-left, lower-center, and lower-right parts of the pattern one at a time. If done correctly, all six should light up as a single purple pattern, with the large circle functioning as a tile to cast the Hover Psynergy upon. Now would be an ideal time to save the game because casting Hover will automatically transport Felix into a battle with Dullahan at the top edge of the chamber, which will almost assuredly annihilate any party that hasn't come in with the right proportion of all eight Adepts' Djinn On Standby to try to bring down the boss with a summon-rushing approach in several turns. If you manage the feat, you can collect the final summon tablet of the game, Iris.
Enemies
| Bestiary of Anemos Sanctum | ||||||||||
| Monster Name | LVL | HP | ATK | DEF | AGI | EXP | Coins | Weakness | Drop | Drop Rate |
| Bombander | 40 | 548 | 541 | 224 | 141 | 624 | 325 | 1/64 | ||
| Grave Wight | 40 | 460 | 530 | 213 | 151 | 551 | 379 | 1/32 | ||
| Mad Demon | 40 | 745 | 567 | 234 | 213 | 671 | 363 | 1/256 | ||
| Sky Dragon | 40 | 657 | 562 | 232 | 191 | 686 | 358 | 1/128 | ||
| Dullahan (boss) | 50 | 16000 | 676 | 269 | 241 | 15600 | 6775 | N/A | ||
Enemy Formations
- Group 1: Grave Wight x1-3
- Group 2: Grave Wight x1, Bombander x0-1
- Group 3: Bombander x1, Sky Dragon x0-1
- Group 4: Bombander x1, Mad Demon x0-1
- Group 5: Sky Dragon x1, Grave Wight x0-2
- Group 6: Sky Dragon x1-2
- Group 7: Mad Demon x1, Sky Dragon x0-1
- Group 8: Mad Demon x2
Collectibles
Considering its positioning as an extra-hard bonus dungeon, Anemos Inner Sanctum contains rather few material rewards and is more often valued for the quality of the items that can randomly drop from its monsters:
 Dragon Skin: Found in a chest within the main entrance chamber when entering the Sanctum using the Reveal method.
 Charon: The first summon tablet presented to you as soon as you enter the inner sanctum by passing the door that requires you having collected all 72 GBA Djinn.
 Dark Matter: In a chest earlier on in a room that you can access either by climbing down a stairwell or falling through a cracked floor tile in a room with many linearly arranged cracked floor tiles interspersed with floor lights and an elevator tile.
 : Orihalcon: In a chest later on in a room that you can access either by climbing down a stairwell or falling through a cracked floor tile in the big room with the huge abyss.
 Iris: The second summon tablet only becomes accessible after defeating the superboss, Dullahan, at the end of the dungeon.
Glitches and exploits
- The "Retreat Glitch" rather easily allows the party to acquire the Iris summon as soon as the Western Sea portion of the game begins, even in a game file that will be locked off from gaining access to the Anemos Inner Sanctum on account of missing too many Djinn from the first Golden Sun. Enter the "front entrance" of Anemos Sanctum's building while one of your leading Venus Adepts currently has at most 5PP remaining; assign his Retreat Psynergy to a shoulder button shortcut and attempt to cast it via this shortcut so that the attempt fails. Interacting with the chest will reward the party with the Iris summon, regardless of whether the chest has already been opened or not. See this video for a visual demonstration and explanation.
- A more advanced application of the Retreat Glitch in this same area makes it possible for even a party without all 72 Djinn, or even the Teleport Psynergy, to warp into Anemos Inner Sanctum's depths. This video explains a procedure that involves forcing your Venus Adept to fail to cast Retreat with a shoulder button on account of lacking the PP to do it, then parking Felix at the northeast corner tile of the narrow area underneath the Dragon Skin chest and saving the game, then hard-resetting and loading a game file located in the outdoors, daytime main town area of Kibombo, then soft-resetting using the Start+Select+A+B method, and finally reloading the file saved in Anemos Inner Sanctum. You should start in the black space of one of the early, featureless side halls, where exiting off the top in just the right way can warp the party to just before the final chamber with Dullahan.
- Two pieces of missing collision detection occur respectively within and near the puzzle chamber where you must push an earth pillar under a floating Lift boulder to the floor tile left of it. In the first instance, the wall making up the northwest corner of the room north of the boulder in question does not prevent Felix from walking through it, allowing him to enter and walk around within the black space surrounding the fairly small room. For the second case, once the earth pillar has been fitted onto the floor tile, it will behave as normal until the first time this chamber is exited for any reason. However, on all subsequent visits to this chamber, it is possible for Felix to walk left into the tile occupied by the earth pillar as though it were incorporeal, and he will suddenly warp to the top of the pillar, unable to move or jump off. You will have to cast the Retreat Psynergy to free yourself from this glitch.
- Throughout the dungeon, there are several cases where an earth pillar will block you off and amount to a dead-end until you have passed some puzzle off to the side and can move it from the other side into a nearby indentation, opening up a shortcut that makes reaching the final room on future visits a little more straightforward. The first two instances, however, are set up in such a way that it is possible for Felix to Move them out of the way himself, bypassing those puzzles. In both of these cases (the first case is pictured), if Felix's position near the pillar is pixel-perfect, it is possible for his Move Psynergy to latch onto the pillar and be able to move it into the tile Felix should be "occupying" but just barely avoids technically qualifying as such as far as the game's code is concerned. These are not particularly impactful sequence-breaks because the first such pillar you can move to the side allows you to skip the first puzzle room where a white tablet mimics Felix's movements, located just to the west of this area. The second instance takes place up the stairs just north of this area and allows you to skip a short detour into a room where you have to step on eight lights to ride a platform up a floor.
