Madra Catacombs

Madra Catacombs (マドラの地下遺跡, Madra's Underground Ruins) is an optional dungeon-like location reached from within the village of Madra in southern Indra early in Golden Sun: The Lost Age. It is presented as a seemingly ancient subterranean complex built underneath where the village currently stands, with two holes recently dug open both inside and outside Madra's walls serving as points of entry. During Felix's first visit to the town early in The Lost Age, a limited portion of the Catacombs can be explored to gain the Tremor Bit Utility Psynergy item. Subsequent visits to Madra allow the party to explore more of the Catacombs with the help of Psynergy like Reveal and Frost, and the Moloch summon tablet can be collected before setting out to sea on the Lemurian Ship.
Walkthrough
Initial visit
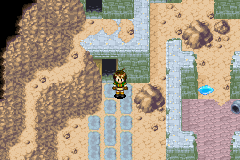
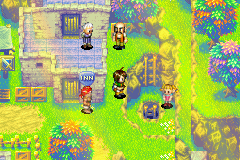
Shortly after passing Dehkan Plateau and reaching Indra's south coast, the party needs to enter Madra and watch the cutscene introducing Piers in Madra's jail so that the party can travel east to the neighboring continent of Osenia. At this point, both entrances into Madra Catacombs are available as open holes with ladders descending into them. The hole just right of the town's inn can be considered the "main entrance" because it leads through a linear, winding route west into the south end of the Catacombs' main area, which features a gate leading to a maze-like complex of stone ruins populating the screen. However, said gate currently blocks you off from proceeding and can only be opened by using the Reveal Psynergy earned at Air's Rock in Osenia, as hinted by a wall-mounted tablet that requests you to look upon it "with eyes of truth."

The second entrance ladder lies past the gravestones and colored trees reached by heading east underneath the gateway guarded by two Madran NPCs and heading to the northeast corner of the area. This hole can be somewhat easy to miss because it only becomes visible on your screen if you bother to step just past the gravestones, and you have to pass under the left side of the trees standing in front of it to reach it. This leads down into the "side tunnels" east of the main ruins screen, with a T-intersection allowing you to head south or north. If you head south, you can cast Lash on a coiled rope next to the standing NPC to connect the side tunnels to the previously mentioned winding route to the main gate, though there is scarcely little point in doing so.
If you head north from the T-intersection in the side tunnels, a linear route takes you through the main area's northeast corner, allowing you to explore a limited swath of the ruins complex hugging the top border of the area. From the cave doorway you stepped out of, climb up the vines immediately visible to your left, position yourself east of the standing earth pillar, and cast Move to remotely drop it into the gap left of you. Follow along west until you enter a broken-open entrance into a multi-story subterranean building, and continue following along over a gap to your right, down the northeast stairs, and through a door to find a room with a chest in it. This contains the Tremor Bit, which provides the Tremor Psynergy that is useful for completing side objectives (such as getting the Ixion Mail at Alhafran Cave). Now that you have discovered the only collectable item in the Catacombs at present, cast Retreat.
Subsequent visits
Once you have defeated Briggs at Alhafra, you can stop back at Madra on your way back from Osenia and toward southern Gondowan. By this point, the side-entrance hole is being sealed up by an NPC that will appear as soon as you try to climb down it, and the side tunnels are rendered permanently inaccessible. The main entrance hole next to the inn will be the only remaining method of entering Madra Catacombs, and you can see the new mound of discolored dirt blocking the hole just above the now-out-of-reach coiled rope on your way to the main entrance gate. If you have completed Air's Rock, cast Reveal in the vicinity of the gate to turn the tablet into a wall switch that permanently opens up the gate.
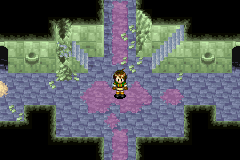
Follow the paved stone tiles along the ground north and west to where they make up a "T-intersection" at the west end of the area — though the real branch is a choice between the open route into the ground-level doorway into the subterranean building up north and the purple-floored area just east of that. Enter the structure's "main hall", which seemingly offers multiple routes; only the doorway at the east end of the hall is worthwhile. Just past that doorway is a staircase leading down to a maroon-colored gate of sorts that is currently sealed shut; following the linear route north past the stairs leads to a dead-end with a chest containing a Lucky Medal.

Back outside the subterranean building, head north through the purple spot just underneath the standing puddle and push an earth pillar with climbable green ivy into the indentation just east of it; this permanently reopens the upper swath of the main ruins area (allowing you to get the Tremor Bit if you had missed it earlier). Head southeast along the lower level to find a chest containing an Apple, then Move the earth pillar shortly east of that chest right onto the adjacent dark ground indentation to lock that pillar in place. If you have not added Piers to your party yet, there is no point exploring any further, so Retreat and complete the arc of the game that takes place at southern Gondowan before returning to Madra.
Once Piers is part of your party, reenter Madra Catacombs and have him cast Frost on the puddle along the way to the pillar with the ivy. Hop east across the two gaps between both pairs of stone walls east of the climbable ivy pillar. There is now a mound of dirt blocking what used to be the northeast entrance into the main area accessed from the side entrance hole, and you can hop east across it from the wall left of it to reach the far right edge of the screen. Follow along southwest and hop left across the previously locked-in earth pillar, then cast Lash on the coiled rope to your left and climb up it. Only slide down one of the two stone slides on the structure you climb onto, and hop left onto the ice pillar and hop northwest from that to end up in range of the upper-level doorway of the subterranean structure.
Enter the upper-level doorway of the subterranean structure to reach a bedroom with a bookcase with a chest on top of it; cast Tremor while facing the bookcase from the left to shake loose the chest and make it drop into the pit. Exit the structure and take the narrow route southwest, following it down to the enclosed stone ruins to the south, and climb down to the chest containing a Mist Potion before sliding down the stone slide right of the chest. Head northwest along the paved stone road to reenter the lower-left ground-level doorway of the structure, and pass through the double-doorway at the north end of the main hall and open the chest that dropped from above to gain the Ruin Key. Take it through the east doorway of the main hall and down the staircase just past that, and use up the Ruin Key on the maroon-colored gate to gain access to the Moloch summon tablet. This is the final treasure Madra Catacombs has to offer, so you can Retreat and leave.
Enemies
| Bestiary of Madra Catacombs | ||||||||||
| Monster Name | LVL | HP | ATK | DEF | AGI | EXP | Coins | Weakness | Drop | Drop Rate |
| Drone Bee | 10 | 63 | 68 | 19 | 36 | 19 | 28 | 1/16 | ||
| Mini-Goblin | 8 | 62 | 61 | 16 | 25 | 25 | 28 | 1/16 | ||
| Rat | 9 | 49 | 52 | 27 | 15 | 14 | 17 | 1/32 | ||
| Rat Soldier | 8 | 69 | 56 | 13 | 19 | 17 | 19 | 1/16 | ||
| Troll | 9 | 101 | 73 | 16 | 14 | 30 | 34 | 1/32 | ||
Enemy Formations
- Group 1: Mini-Goblin x1, Drone Bee x0-1
- Group 2: Drone Bee x1, Mini-Goblin x1-2
- Group 3: Drone Bee x1, Rat Soldier x0-1
- Group 4: Rat Soldier x1, Mini-Goblin x0-1
- Group 5: Troll x1-2
- Group 6: Troll x1, Rat x1
Collectibles
During the party's first mandatory visit to Madra following Dehkan Plateau, the entrance hole behind the graveyard can be taken to explore a limited swath of Madra Catacombs, letting you gain the following treasure:
 Tremor Bit: In a chest in a room accessed by entering the subterranean structure's upper-right broken-open entrance.
The Reveal Psynergy earned at Air's Rock allows most of the rest of Madra Catacombs to be explored via the entrance hole just right of the town's inn (including the above-mentioned swath, allowing the Tremor Bit to be collected if that was missed earlier). If this is done as soon as the party returns from their trip to Osenia, these additional treasures can be looted:
 Lucky Medal: In a chest at a dead-end in the subterranean structure, eventually reached by entering the "main hallway" and going through its east doorway.
 Apple: In a chest in the main ruins area "outside", south of the earth pillar with climbable green ivy.
However, these remaining treasures additionally require the Frost Psynergy to reach, which means the party must have recruited Piers and returned from Gondowan with him to reach them:
 Mist Potion: In a chest at the bottom edge of the main ruins area, reached by heading southwest from the upper-level entrance into the subterranean structure.
 Ruin Key: In a chest atop a bookcase in a room that is reached by entering the upper-level entrance into the subterranean structure. Cast Tremor to make the chest fall into the adjacent pit, then enter the structure's lower-level left doorway and head north through the main hallway to reach the chest where it now lies.
 Moloch: A summon tablet reached by using the Ruin Key at the large, maroon gate down the stairs just east of the main hallway.
History
This crumbling, subterranean complex built in the space underneath the present-day village of Madra appears to have been built in the ancient past, given that it is blocked off by a gate that instructs visitors to use the Reveal Psynergy to pass it. Furthermore, the complex houses a chamber containing a tablet affiliated with the powers of the supernatural entity referred to as Moloch.
Seemingly the entire local population of Madra is unaware of the presence of the Catacombs underneath their village until the start of Golden Sun: The Lost Age, when they arrest the Champan pirate leader Briggs and keep him in their jail. Briggs' crew of Sea Fighters, collaborating with Kibombo warriors who were incidentally dispatched to scout Madra for a future raid, settle on a plan to bust him out of the prison. By digging a tunnel underneath Madra's walls, the Sea Fighters plan to emerge within Madra from the inside, causing enough of a disturbance that the town's attention is diverted from the Kibombo's separate effort to bust down the wall near Briggs' prison.
To say the least, the Sea Fighters' decoy operation goes more smoothly than they could have imagined because they happen to bore their way into the ancient tunnels connecting to the catacombs, letting them quickly bore their way back through to the surface near the town's inn. The attackers retreat back through the tunnels to depart Madra as Briggs ends up fleeing the prison and the town through the separately broken opening in the nearby wall.
Naturally, the villagers are astonished that the pirates happened upon tunnels that happen to exist under their town. As Felix's party passes through Madra in their search for a boat, they steadily explore the Catacombs even as the townspeople scramble to plug up the hole the Champa created near their graveyard so that other invaders cannot use it to enter their town from the inside.