Dehkan Plateau
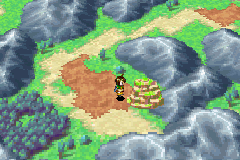
Dehkan Plateau (デカン高原, Deccan Plateau) is an outdoor dungeon-like location in the center-east portion of the island continent Indra, making it one of the earliest dungeons in Golden Sun: The Lost Age. It is a rugged, twisting mountain path that was rendered uncrossable to most people by the tidal wave that hit the content at the start of the game. Only Felix's newly formed party of Adepts, searching for a ship in Indra's south region, will possess the Psynergy-based capability to pass beyond the plateau's natural obstacles. Along the way, they will gain permanent access to the Pound Psynergy.
Contrary to popular belief, collecting the Lash Psynergy at Kandorean Temple is not required to pass this dungeon, and it will remain feasible to enter Osenia and reach the end of Yampi Desert, Alhafra, and Air's Rock to fulfill all mandatory stages of the party's main quest that take place at those locations. Lash only starts becoming mandatory for the main quest at Kibombo Mountains in southern Gondowan, which means it is possible for players to "erroneously" play through Dehkan Plateau as their first dungeon in The Lost Age and hold off on Kandorean Temple for a significant stretch of the game's early play time. This will leave the party incapable of solving several Lash-dependent side objectives along the way, and the party will eventually be required to head back through Dehkan Plateau to pick up Lash from Kandorean Temple in Indra's north half, then head back south by going through the plateau yet again.
Walkthrough
The party is expected to complete Kandorean Temple elsewhere on the continent and gain and equip the Lash Pebble to give themselves the Lash Psynergy before proceeding through Dehkan Plateau, though it will not strictly be needed to pass through the location from its west overworld icon in the center of Indra to its east overworld icon next to East Indra Shore. If the L button is held to zoom out the player's view of the overworld, Kandorean Temple's location is revealed to be practically directly north a short distance from Dekhan Plateau's west exit, separated by a diagonal mountain range. Therefore, the only way to reach the plateau is to head south from Daila to an upside-down "T" intersection and follow along with its east branch. (It should be noted that the first three main outdoor screens allows the party to get two powerful pieces of equipment before entering Kandorean Temple for the first time, which might help against the Chestbeater bosses at the end of that dungeon.)
In the first screen, upon climbing up several flights of stone stairs, you will find that walking over a cracked ground tile will turn it into a partially cracked-open ground tile and that stepping again onto the latter type of tile will make you fall through it into the cave underneath. When you land in the lavender-colored cave underneath, walk out the south exit and climb down the ivy to reach the chest, which contains the Full Metal Vest artifact. These Clothes offers an astonishingly high raw Defense boost to whichever Adept is wearing it and will likely stay on at least one of your party members for a large swath of the upcoming game. Return to the cave and go up the staircase, and exit into the next screen.
In the second main outdoor screen, you are faced with three gray pillars; hop across the upper one to the chest to see that it cracks under the weight of the first hop, then claim the Elixir from the chest, and then hop back onto the cracked pillar to see that it crumbles to dust. Each such gray pillar in the dungeon will rematerialize whenever a "puzzle reset" is performed by leaving and reentering the screen. Hop east across the screen and ignore the gray stake to your upper right.
Follow along southwest along a winding trail to a maze. Step over the lower cracked ground tiles so that you position yourself left of the lower right pre-opened pit tile. Unexpectedly, you want to then step up and step onto the partially cracked-opened tile at the top of the maze so that you then land on a cave ledge next to a chest with a Mint. Follow the route back out of the cave and upstairs and push the earth pillar left so that it drops onto the circular indentation on the ground, and return to the reset cracked-tile maze. Once again position yourself left of the lower-right open pit tile and press right against it to hop over it, letting you safely pass over the cracked ground tile at the upper right and head north into the next screen.
The third main outdoor screen features many gray pillars around various raised ledges to your upper left. To get to the chest above this puzzle area, hop onto the eastmost gray pillar left of the gray stake, then hop left onto the gray pillar to your upper left and north from it, then hop onto the gray pillar near the vine — and jump back and hop back onto it again to make it crumble. The chest contains the Themis' Axe artifact weapon for Felix, which will be a powerful upgrade for him. Climb up the stairs to the right and exit back out south to the previous screen to perform a puzzle reset, then return. Now, hop left across the lower-right gray pillar, then hop south to another gray pillar and hop left several times to reach the left ledge. Head up to the two small rocks north along this ledge, then hop right twice across two gray pillars to hop into a thin raised ledge above them, then hop left across one more gray pillar to the upper left. Follow along the obstacle-free trail clockwise around the perimeter of this screen and exit into the next screen.
The fourth main outdoor screen will lead you to another set of cracked ground tiles strewn between rocks; purposefully fall into any of them and then follow along with the cave trail to climb into the enclosed northwest area of this screen. A Mars Djinni will express surprise at your approach and fall into a partially cracked ground tile; fall into the only partially cracked-open ground tile to follow it, and follow a linear trail southeast and back north to approach the Mars Djinni again, which will then flee to the east. Moving and dropping the earth pillar visible to your northwest onto the circular indentation left of it opens a retroactive shortcut, but follow the Djinni east.
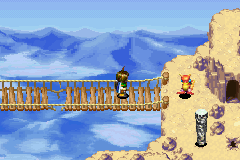
The fifth main outdoor screen features a wooden bridge against a mountainscape. Chase the Mars Djinni across the bridge until you watch it cast a Psynergy called "Pound" to flatten a gray stake into the ground, allowing it to flee off to the east again while permanently turning the lone cracked ground tile it crosses over into a partially open cracked ground tile. Falling through any of the four ground tiles drops you into a small cave that makes you climb back up through the staircase above them, so head back west across the wooden bridge. Climb down the ivy south of them and follow along with the linear route, walking east across two tightropes, until you reach two earth pillars that have climbable ivy attached to them. Move the lower earth pillar two tiles right, climb it, and cast the Lash Psynergy on the coiled rope to climb up to the chest containing a Nut, then push the upper earth pillar off the left ledge and climb down it. Now follow along through the lower level of this screen counter-clockwise until you climb up the ivy wall at the lower right corner, and take the east exit out.
In the sixth and final main outdoor screen, the Mars Djinni turns two gray pillars into their permanently cracked states as it flees from you, preventing you from following it into the cracked ground tiles at the north corner of the area. Climb down, push the ivy-covered earth pillar two spaces right, climb up that, and hop east onto both gray pillars to the right of that; when you hop back onto the left of those two pillars, it will crumble, letting you head north and around the elevated ledge clockwise until you reach another ivy-covered earth pillar. Move that left and climb up it, and hop left onto the remaining cracked gray pillar to make that crumble, letting you climb the wall-mounted ivy above that. Push the lone earth pillar above the ivy off to the left, then climb down the ivy and Move that pillar one space left, then climb back up the wall-mounted ivy so you can hop left across the earth pillar you dropped and moved. This lets you reach a downstairs staircase in the cliff wall.
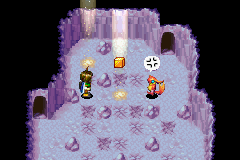
Follow along through the lavender caves to a room where the Mars Djinni is waiting; if you fall through any of the cracked ground tiles in front of it, you will have to climb up back through the staircase left of the Djinni, and stopping directly on the cracked ground tile underneath it will cause it to Pound you straight through the ground. Therefore, from the open, uncracked space south of the Djinni (reached by walking across the middle-left cracked ground tile from the left to the right), step onto the cracked ground tile to your right, then onto the cracked tile below that, then onto the southeast cracked tile east of that so that you can take the room's southeast exit. Ignore the gray stake below you as you follow along upstairs back outside, and reach the two partially opened cracked tiles northwest. Fall through the right of the two cracked tiles to land directly on top of the Mars Djinni, making it angrily scamper down the upper-right staircase and drop the Pound Cube. From where you landed, walk up through the cracked ground tile to pick it up from the left, then walk down through the cracked tile just southeast of that so that you can follow the Djinni downstairs.
You will find the Djinni standing left to both a gray stake and a gray pillar. If you approach it from west on the ledge, it will hop right two spaces, cracking the gray pillar and ensuring that the pillar will crumble beneath you; you will have to perform a puzzle reset if this happens. Before approaching the Djinni from the left, climb down the ivy and cast your new Pound Psynergy on the gray stake to flatten it, then approach the now-alarmed Mars Djinni and engage it in a battle to finally add the Mars Djinni Cannon to your collection. (If it runs away during the battle, you will once again have to perform a puzzle reset by going through the nearby door.) Climb up the stairs at the east end of the chamber where you got the Djinni, once again ignore the gray stake as you climb up two flights of stairs, and follow along the winding mountain trails south to exit out of Dehkan Plateau's east overworld icon.
Available route back
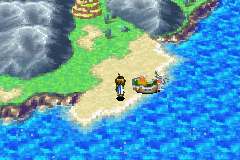
It is possible to play through all of Dehkan Plateau without having gotten the Lash Pebble from Kandorean Temple first, and the main campaign of the game can be played up until Lash becomes mandatory to pass the Kibombo Mountains in southern Gondowan. In that case, proceeding back through Dehkan Plateau will be necessary, and several retroactive shortcuts can be made use of to make the trip easier in both directions:
- From the cliff stairs at the bottom of the sixth and final screen, head northwest and push an earth pillar left so you can climb the short ivy behind it. Hug the left edge of the screen until you can exit it.
- In the fifth screen with the bridge, fall down the partially cracked-open ground tiles to land in the cave that lets you climb back out of the staircase just above the tiles, letting you traverse the bridge back west. (When traveling back through to the east exit of Dehkan Plateau, you will once again have to deal with the area underneath the bridge instead of crossing east along it.)
- In the fourth screen, an earth pillar will be immediately visible to your upper left, waiting to be dropped and locked onto a floor indentation if you hadn't pushed it already. Hop left from it and follow along south through several cracked but safe ground tiles to exit off the screen's southwestern edge.
- In the third screen, Pound the gray stake in front of you so you can head south from it.
- In the second screen, Pound the gray stake visible below you and hop left across two gray pillars to exit off the west edge.
- In the first screen, slide down the cliff slide near the various cracked or open ground tiles and climb down the stairs southwest of them.
The above route also makes it hypothetically possible to bring Piers to Daila and play through all of the Shrine of the Sea God, getting the Right Prong at the end, before starting the Lemurian Ship "dungeon" at East Indra Shore south of Dehkan Plateau's east exit.
Bestiary
| Bestiary of Dehkan Plateau | ||||||||||
| Monster Name | LVL | HP | ATK | DEF | AGI | EXP | Coins | Weakness | Drop | Drop Rate |
| Angle Worm | 6 | 37 | 40 | 9 | 14 | 12 | 10 | 1/32 | ||
| Ghost | 7 | 56 | 38 | 12 | 12 | 9 | 9 | 1/16 | ||
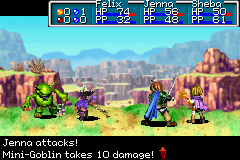
| Mini-Goblin | 8 | 62 | 61 | 16 | 25 | 25 | 28 | 1/16 | ||
| Rat Soldier | 8 | 69 | 56 | 13 | 19 | 17 | 19 | 1/16 | ||
| Skeleton | 8 | 60 | 46 | 14 | 18 | 10 | 11 | 1/16 | ||
| Mars Djinni (Cannon) (unique) | 8 | 203 | 43 | 10 | 32 | 58 | 93 | N/A | ||
Enemy Formations
- Group 1: Angle Worm x1-2
- Group 2: Angle Worm x1, Ghost x1
- Group 3: Skeleton x1, Ghost x0-1
- Group 4: Skeleton x1, Angle Worm x1-2
- Group 5: Mini-Goblin x1, Angle Worm x0-2
- Group 6: Rat Soldier x1
- Group 7: Rat Soldier x1, Ghost x1
Collectibles
 Full Metal Vest: In the chest visible in the first screen.
 Elixir: In the chest coming into the second screen.
 Mint: In a chest reached by dropping into a cave late in the second screen.
 Themis' Axe: In a chest in the third screen reached by jumping on a certain collapsing pillar twice.
 Nut: In a chest in the screen with the wood bridge, reached by using Lash.
 Pound Cube: In the sixth and final main screen, falling down a specific pit outside will drop you onto the Mars Djinni you've been chasing, making it drop this item onto the ground.
 Cannon: Chased through the entire plateau, Cannon is only fought and earned in a cave after using Pound to flatten a pillar-sized stake in advance; it will jump across it to escape you otherwise.
Trivia
- Dehkan Plateau's name is a reference to the Deccan Plateau that comprises most of the real-world country of India's central landmass.
