Belinsk Ruins
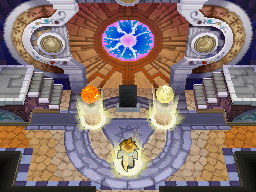
The Belinsk Ruins (ベルフネ遺跡, Verkhne Ruins) are the man-made underground area under the city of Belinsk. The ruins are home to the Alchemy Dynamo.
Description
The Belinsk Ruins were built in ancient times by the Jenei, the precursors to the Adepts. The Ruins were the location of the Alchemy Dynamo, an Alchemy Machine that controlled Luna Tower, a structure designed to absorb Light. After the Jenei realized Luna Tower's threat to the world, they sealed the Ruins away. Unlike the Elemental Lighthouses, the Jenei tried to ensure that the Ruins could never be breached.
The ruins themselves contain large gates at various points, which require various puzzles to be solved in order to progress past them. Many puzzles in the ruins revolve around the Sun, Moon, as well as the four elements, which are represented by the Growth, Whirlwind, Fireball, and Douse Psynergies.
In modern times, the city of Belinsk was built on top to the Ruins, and so several secret entrances are accessible around town. One entrance links the upper portion of the Ruins with Belinsk's castle. Another entrance is located just outside of the city walls. The main entrance to the Ruins is located in the center of town underneath a giant statue. This particular entrance could only be be entered by means of Arangoa Prelude, an ancient song that, coincidentally, was known by Belinsk's minstrel band.
In Dark Dawn, Matthew and his party enter the Ruins, with the goal of infiltrating Belinsk's castle to rescue the Sanan princess, Hou Ju, and the pirate Eoleo. Along the way, the Adepts use Magma Shards to open doors that lead them further into the ruins. Just before entering the palace, they meet with Sveta, who plans to lead them to the palace. However, they find that both the way to the palace and their earlier entrance have been cut off, due to the Magma Shards changing the layout of the dungeon. At that point they meet with Ryu Kou and Hou Zan, who had entered the dungeon via one of the other entrances to rescue Hou Ju. Like the Adepts, the Sanans were trapped when their return path suddenly became inaccessible. Both groups are forced to travel together into the depths of the dungeon, as they are unable to turn back.
Eventually, they come to the Alchemy Dynamo, where Arcanus, Blados, and Chalis confront the group. Chalis and Blados engage in battle with the Adepts, with Matthew's party proving victorious. Meanwhile, Arcanus manipulates Ryu Kou into activating the Dynamo, which triggers the Grave Eclipse. The ruins become dangerous, however, and everyone is forced to flee for their lives.
After the Eclipse is reversed, Sveta, now Queen of Morgal, forbids the performing of Arangoa Prelude, a measure taken to ensure that the ruins were never breached again.
Walkthrough
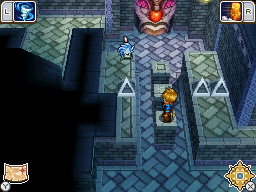
The first time Belinsk is visited, a very limited part of Belinsk Ruins is accessible from the stairwell at the east end of the screen with the main plaza. This leads to a statue with a red round nose similar to what was seen in Teppe Ruins, which was opened up with the Slap Psynergy. After meeting with Ryu Kou and Hou Zan, and getting the Slap Glove that bestows Slap to its wielder, you can eventually open this door, but you can't go any further without a Magma Shard. And since you can't go back there before the activation of the Luna Tower, this door is here only for plot reasons (explaining how the Sanans managed to get into the Ruins without requesting Arangoa Prelude).
The Mercury Djinni seen at this spot can be accessed by entering another secret entrance into this part of Belinsk Ruins, found elsewhere in the town above. Go into the town's Sanctum, and go downstairs into the library; use Move on the right two bookcases just below the teal stairwell and move them right to reveal a doorway behind the center bookcase, and follow the path to the Djinni to claim it, the Mercury Djinni Spout, without having to fight.
Later visit: Cutscene areas
Later in the game, when the song Arangoa Prelude plays and the horseman statue in the center of the town's plaza has shifted up to reveal a stairwell going down, climb down the stairs to begin the true dungeon. In the first hallway you enter, when you have a choice between going up stairs to the left and a doorway up, take the stairs up to enter the enclosed western area of the town, and open a chest containing the strong Storm Gear. Then take the doorway up, where a Glyph tablet will tell you to place a Magma Shard onto an open pedestal. Another doorway opens up for you to go through.
In the room with hoppable platforms above an abyss, hop the trail of paths that starts immediately northwest of your starting point and get to another open pedestal to place another Magma Shard on. Several other hoppable platforms rise, so hop back down, hop to the lower right to get to a chest containing a Vial, and then go east into a four-way intersection. The south and east routes lead to dead ends (the visible magma shard pedestal at the end of the eastern route, much like the red-nosed statue from earlier, is impossible to interact with and only exists for plot purposes), so go north. In the next area, both the west and east ends are dead-ends for now, so go to the north end and place a third Magma Orb on a third pedestal. This triggers a lengthy cutscene, after which you go through the newly opened door, trigger another cutscene at the dead-end beyond, and then go back down to where the four-way intersection was and go down the newly formed stairwell at the south end.
You will arrive in a gate-like area that triggers another lengthy cutscene. Following this, read the Glyph tablet, then move the pedestal to your left two spaces right, move the pedestal to your right two spaces left, and stand on the red circle south of the glyph tablet to open the gate.
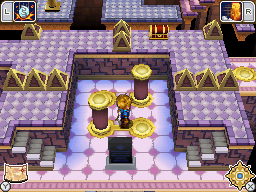
In the giant mazelike room to follow, go up to the center square-shaped are, where you will see gold-topped pillars; when you cast the Crush Psynergy on one of these pillars, it is driven into the ground while the gold circle on the ground connected to it by a line rises up to become another gold-topped pillar. Crush the lower left gold-topped pillar so that you have a path to the visible chest with a Sacred Feather. Then Crush both pillars to make a path to the left part of the room; follow it southwest until you can either go down stairs to the left or hop to the lower right; go down the stairs and go up to where the Venus Djinni is. Crush the gold-topped pillar here to elevate the Djinni and make it Hop right, and then without moving, cast Crush again to hit the other pillar. Now, when you go to the Venus Djinni from the right, it won't hop away when you approach, so you can battle it and earn the Venus Djinni Chasm.
From where you got Chasm, follow the vertical path straight down to the exit at the lower left corner of the room, and climb up stairs to get to a dead-end that was seen earlier, where a chest contains a Lucky Pepper. Go back down the stairs, and then retrace your steps to the southwest part of the giant room where you could choose between going down stairs and hopping one space right. Hop one space right, then follow the winding path all across the eastern section of the room until you can Crush a gold-topped pillar to the right of the northeast corner of the central square area. Then, hop down across the purple platforms immediately southeast of your position and follow the path to the exit at the room's southeast corner, where a chest containing a Water of Life is located. Go back down the stairs and use the Grip Psynergy on a yellow spire to return to the central vertical path of the giant room. Go back to the central square area, Crush the two gold-topped pillars again, and use them and the third pillar northeast of them as a path to the exit at the top of the room.
After another cutscene in the next room, read the Glyph tablet to set up the next puzzle: one white soldier will stand on a chessboard-like area riddled with tiles occupied by pyramid blocks and black soldiers, and each time you use the Move Psynergy to remotely move the white soldier in a direction, it will move all the way in that direction, automatically removing any black soldiers in its way. Each time the white soldier is Moved, the eight tiles around each black soldier will flash pink, and if the white soldier is in one of these tiles, it will be struck down and the puzzle will immediately be reset. The goal is to Move the white soldier along a path that will not let it get struck down by black soldiers while it is able to attack the black king at the top end of the board. The solution is to Move it right, then up, then left to destroy a black soldier, then left again, then up, then left to destroy a black soldier, then left again, then up, and finally right to defeat the black king. The gate to the next room opens, but before entering it hop right to get to the chest containing a Psy Crystal.
Later visit: Elemental areas
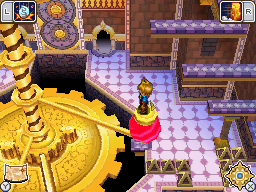
Climb down the long stairwell into the next enormous room, where a giant gold cog lies at its center. Hop onto it, hop left off it, and enter the doorway to your north. In the next room, use your last Magma Shard on the last pedestal, then return to the giant chamber to see that the cog is now turning counterclockwise. Hop onto it and use this motion to hop right off it, and then go into the other doorway to your north. Press against the rotating gears to ride them similar to the gear puzzles in the Gabomba Statue from The Lost Age, then in the next room, stand on the upper right of the three purple platforms extending from the north end, hop down onto a gold cog, hop right form it, hop down across one purple platform and across two gold cogs, hop left three times, hop up once, and hop left to return to solid ground and exit the south end of the room.
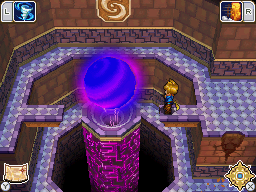
In the southeastern corner of the giant chamber, push the purple-topped pillar four spaces left so you can hop left and claim a chest containing a Mist Potion. Then climb up the stairs above the doorway you just exited out of and enter the doorway above that. In the next room, push the Zol cube right, then push it all the way to the left end of the screen. Cross the gold cog at the left end of the screen so you can hop onto the zol cube and get the chest containing a Quality Zol. Push the Zol cube back right, then down, then left, then up, then right, and then up, and then cast Whirlwind on it to elevate it so you can climb the ladder and reach the door to the upper right. In the subsequent screen, stand facing the large gray sphere and cast Whirlwind on it, then slide down to the ground level and exit two doors down back into the big chamber.
When you get out of the Jupiter portion of this dungeon, run left and press left so that when an elevated platform revolving around the center of the room passes by, you jump onto it. Ride it all the way to the west end, then press left to jump off. Before entering the leftmost door, go down the stairs, push the purple-topped pillar three spaces right, and claim a chest southwest of the giant gold cog to get 600 coins. Now go into the door, and now in the Mars portion of this dungeon, go up the left stairs and go through the doorway at the upper right corner of your screen. The next puzzle is a maze of gold-topped pillars. To get to the chest, Crush the top three pillars, which creates a hoppable path to it and gets you the Hagbone Mace. Now, Crush the right of the three pillars in the middle row, then crush the two lower left pillars, creating the path that will lead you to another gray sphere in the room to the left. Cast Fireball on this, slide down and take the bottom exit, and then go through the elevated exit south to the right of the ground-level exit you originally entered through.
Like before, hop onto the newly rotating platform of this floor, and then hop right from it when it reaches the eastern end. Enter the next door, then climb the stairs right and enter the door above that. Get to a room full of rotating cogs, hop onto the right cog, then hop left, down, left, and up, and ride a cog to the ground level. Ride the cog immediately southwest of that right so that you get to the two small cogs at the top end of the room, and Crush the left one that is elevated. This reverses the direction of all the cogs in the room. Ride the cog now spinning to the left back left, but while you're at the top of that cog, hop up. This way, you can climb down the ladder below and ride a cog to the gray sphere room below. If you do not do this in time, then you can instead ride a cog to the southeast from left to right, then ride the cog southeast of that and drop down to the ground level, and enter the gray sphere room from the other doorway. Either way, cast Growth on this sphere, then ride the cog down left of that down to the exit, then climb up the stairs to the right, run left, and exit out the elevated door at the lower left corner of the screen.
Hop left onto the newly rotating platform and ride it west, and hop left off it so you can enter the Mercury section of the dungeon. Follow the path up the stairs into the first water-filled room, hop east across a bunch of orange platforms, then get to the door at the upper left corner of this room, and push the purple-topped pillar two spaces down into the water before going through the door. In the second water-filled room, cast Arid Heat on the bowl to empty the water, then climb down and move the lower right cube up two spaces, then climb up and cast Douse to fill the bowl and the water level back up. Push the purple-topped pillar two spaces left into the water, then Arid Heat the water bowl again, then climb down the ladder to the right into the gray sphere room. Cast Douse on the gray sphere, climb up the ladder, go through this room's exit out its lower right corner, and cross back into the giant chamber.
Once more, ride the newly (and rapidly) rotating platform east and hop off it at the right. Enter the next door, and you will get to a room where four pedestals with colored spheres lie on a square-shaped pattern of ground. A chest at the lower left corner of the room contains a Potion. Move the blue sphere two spaces up and one space left, move the Orange sphere two spaces up and two spaces right, move the red sphere one space up and three spaces left, and move the purple sphere three spaces right so that all of the spheres of the room are aligned in a straight line. Take the south exit into the giant chamber, hop down four times, and cast the Slap Psynergy on the giant gray sphere to be transported down into a basement level. (Doing this permanently locks off several of the upper elementally themed levels of this section, though enough of the lower levels can still be explored that the only treasure you can potentially miss is the Potion.)
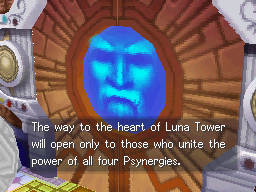
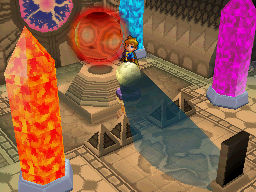
Hop left from your new starting point, and climb down and follow the path to the upper section of this room. Read the Glyph tablet here, then approach the gate at the north end, and answer "yes" in a brief cutscene, and four large crystals will emerge. The stairwell to the lower left leads to a small room where moving a torch around shows you which of the crystals should have which Psynergy cast on it, while the stairwell to the lower right contains a giant, renewable Psynergy Stone formation. Cast Growth on the upper left crystal, Fireball on the lower left crystal, Whirlwind on the lower right crystal, and Douse on the upper right crystal, and the last gate is opened.
In the final room of Belinsk Ruins, approaching the open pedestal here represents a point of no return that will prevent you from collecting any of the dungeon's treasures you may have missed up to this point. As soon as you step up to it, you will trigger a lengthy procession of cutscenes that will automatically trigger a boss fight with two enemies. After the long series of cutscenes that ensue after winning the boss fight, climb up the stairs to the right of the face, ignore all the warning messages, cast Whirlwind on the left Zol cube, go left across it and climb to a higher level, push the second Zol cube right, climb down and Whirlwind that cube, hop onto it and climb up from it, and take the stairwell up.
The next room with a spiraling staircase has an exit at the bottom that leads back outside into Belinsk, while climbing up the spiraling staircase to the top leads to an area where inspecting a Glyph tablet earns you the Eclipse summon sequence. As soon as you exit back out into Belinsk, a short cutscene happens, and it doesn't matter whether you go climb the stairs to Eclipse before or after this scene. Belinsk Ruins is now complete, so now the next part of the game will transpire back in Belinsk itself, mainly in its castle.
Collectibles
 Chasm
Chasm Vial
Vial Sacred Feather
 Lucky Pepper
 Water of Life
 Psy Crystal
 Mist Potion
 Quality Zol
 600 coins
 Hagbone Mace
 Potion
Enemies
| Bestiary of Belinsk Ruins | ||||||||||
| Monster Name | LVL | HP | ATK | DEF | AGI | EXP | Coins | Weakness | Drop | Drop Rate |
| Aqua Hydra | 28 | 264 | 296 | 74 | 93 | 1655 | 208 | 1/16 | ||
| Devilwisp | 28 | 233 | 278 | 104 | 138 | 399 | 129 | 1/16 | ||
| Ghost Mage | 28 | 294 | 287 | 115 | 180 | 628 | 158 | 1/16 | ||
| Mad Demon | 28 | 376 | 299 | 88 | 142 | 2169 | 172 | 1/32 | ||
| Virago | 28 | 284 | 293 | 105 | 159 | 628 | 144 | 1/8 | ||
| Venus Djinni (Chasm) (unique) | 28 | 660 | 269 | 108 | 174 | 2284 | 360 | N/A | ||
| Blados (boss) | 28 | 1931 | 394 | 122 | 180 | 7994 | 1152 | 1/1 | ||
| Chalis (boss) | 28 | 1830 | 382 | 120 | 160 | 7708 | 1728 | 1/1 | ||
Trivia
The final puzzle in the dungeon, despite being intended to test for the presence of Adepts from each elemental clan, can technically be solved by using only Tyrell, changing his class as necessary to give him the four particular Psynergies needed.
