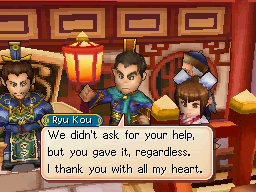
Ryu Kou
| Ryu Kou | |
|---|---|

| |
| Hometown | Tonfon |
| Relatives | Hinechou (mother) Unan (uncle) Hou Ju (sister) Lord Kuan (father) |
| Hair color | Dark Brown |
| Eye color | Dark Brown |
| Japanese name | リュウコウ Ryuu Kou |
Ryu Kou (リュウコウ Ryuu Kou) is the prince of the Sana region of Angara and one of the most important non-player characters in Golden Sun: Dark Dawn. He is a hot-headed youth who comes across as arrogant, but is ultimately selfless in his motivations.
Biography
Background
Ryu Kou and his younger sister Hou Ju were born to the Sanan royals Lord Kuan and Lady Hinechou at Tonfon, capital of Sana. During the reign of Sana's warlike Emperor Ko, Sana invaded the beastman nation of Morgal and took over its capital of Belinsk, and the previous king of Morgal was killed. Ko appointed Lord Kuan as ruler of Sana's new colony in Morgal, and he, Hinechou, Hou Ju, Ryu Kou, and his mentor, the aged martial artist Hou Zan, lived in Belinsk for at least part of the ten years it was under Sanan rule. Several years before the start of Dark Dawn, Ko passed away, and through a bloody civil war in Sana the throne was achieved by Kuan's scholarly brother, Emperor Unan. With this, Ryu Kou and Hou Ju were appropriately considered as Sana's prince and princess.
Later, however, while Hinechou was on a chance visit to Tonfon, the son of Morgal's previous king, Volechek, incited a beastman revolution to kill and drive out their Sanan slavers. Volechek killed Lord Kuan personally. The reason Unan was unable to provide assistance during this was because at that point in time, Unan was staving off a military attack by King Wo of Kaocho, who had been Emperor Ko's appropriate successor both ideologically and in terms of lineage. Ryu Kou, Hou Ju, and Hou Zan were forced to flee along with the rest of the Sanan survivors. To escape the Fang Tribe's wrath, the Sanans in Morgal were forced to adopt a nomadic lifestyle and follow their flocks of sheep toward the Khiren Glacier at the center of the continent. Ryu Kou and Hou Zan were also painted as fugitives, and had to learn how to cover their tracks.
A period of time later, in the aftermath of Morgal's revolution against the Sanans, Hou Ju went back to Belinsk for some reason, and Volechek immediately seized the opportunity to capture Hou Ju and imprison her in Belinsk's castle. She was slated for execution by boiling by the time of the next full moon. Ryu Kou and Hou Zan hired some mercenaries and attempted to infiltrate Belinsk Castle and get to Hou Ju, but they had no chance. However, they and their wounded mercenaries had a mysteriously easy time escaping from Volechek and the soldiers of Belinsk, and they proceeded to go back to where the other Sanan survivors had ended up settling, Te Rya.
Meeting Matthew
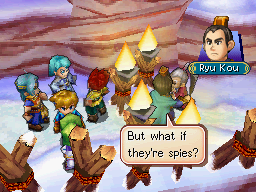
Ryu Kou and Hou Zan, while hiding away in Te Rya from Belinsk soldiers, are met by Matthew and his traveling group of Adepts, who are on a journey into Morgal to retrieve a feather from the giant Mountain Roc, Morgal's living symbol of divinity. Fresh from his past troubles, Ryu Kou is understandably hostile towards Matthew while it is yet proven that Matthew isn't a Morgal spy. But eventually, Ryu Kou settles down and opens up to Matthew, and explains his story more-or-less to him. Matthew's Adepts soon resume their journey into Morgal, using their powers to cross through the otherwise uncrossable Teppe Ruins nearby; since they are not Adepts, Ryu Kou and Hou Zan have to scale back down a sheer mountain face to return to Morgal.
Ryu Kou and Hou Zan hope to once again sneak into Belinsk Castle. While back in the Morgal region of Angara, Ryu Kou and Hou Zan are approached by the wayward sister of Volechek, Sveta, who was sympathetic to Hou Ju's plight. She is also known as the "White Deer" for being of Morgal's royal family, the Czamaral clan, but she has been away for some time and does not know much of Morgal's current state of politics. However, she had met Matthew's group while they were traveling through Teppe Ruins and found out about how they hoped to reach the Mountain Roc and and obtain a feather from it, and she knows that the only way for Matthew to be successful in this venture is for him to have the Slap Glove, one of Morgal's royal treasures. She and Matthew previously agreed to meet in the ruins under Belinsk after Matthew would successfully obtain his feather, and Ryu Kou and Hou Zan would also want to get into Belinsk Ruins because it provides a way to get into Belinsk Castle from the underground. Therefore, Sveta instructs the duo to go to the base of Talon Peak, the roost of the Mountain Roc, through which Matthew would obviously have to pass in order to get to the Mountain Roc, and give Matthew the Slap Glove and accompany him on their shared journey into Belinsk.
When Ryu Kou and Hou Zan arrive at the base of Talon Peak near Kolima Forest, they overhear Matthew's party nearby in a discussion with the legendary talking trees of Kolima Forest, Tret and Laurel. Through this, both Matthew's party and Ryu Kou's side end up knowing the following critical information: Matthew's party wants to go through Belinsk's ruins to get into Belinsk Castle because they want to rescue a second prisoner Volechek has slated for execution, the pirate Eoleo. Sveta has an inherent Slapping Psynergy, which the Slap Glove allows any Adept to emulate. The Slap Psynergy is very important because it is the only way to wake the Roc from its stone-like slumber. Also, magma power naturally forms small jewel-like shards within the innards of the Mountain Roc, and these shards can be used as power sources to open the way through previously sealed doors in Belinsk Ruins. However, there is also an ancient machine in Belinsk Ruins called the Alchemy Dynamo, which the trees insist must not be powered for a reason they do not fully explain.
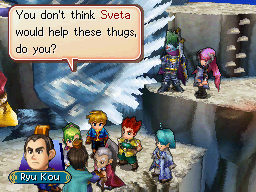
Matthew and his party leave their discussion with the trees and pass through Talon Peak as expected, and Ryu Kou and Hou Zan encounter them and show them the Slap Glove to make their proposal to accompany them. Matthew's group allows them to accompany them up the dangerous climb to the Mountain Roc's roost, and with the Slap Psynergy, they wake up and knock out the giant bird, and Matthew's group retrieves the Roc Feather they have always wanted.
Just then, coming out of hiding are the two enemies Matthew's group has crossed paths with before, the warriors and manipulators Blados and Chalis. They announce that they have waited for Matthew for a while to "help" him get the Roc's internal power source, and when Matthew and Ryu Kou's sides gossip that Sveta would not want to help these thugs, Blados and Chalis indicate that they know of Sveta's blood relation to Volechek of the Czamaral clan. This suddenly allows Ryu Kou and Hou Zan to put several twos-and-twos together: Volechek let Ryu Kou escape Belinsk Castle easily during their last attack on Belinsk Castle, knowing that Sveta, who would have wanted to go through Belinsk Ruins to enter Volechek's castle from underneath for her own reasons, would come to Ryu Kou and Hou Zan, give them the Slap Glove, and point them to Talon Peak where Matthew's group would have gone. Volechek and his two conspirators, Blados and Chalis, had set up this trap that Ryu Kou and Matthew's combined group has just walked into. Blados and Chalis also affirm that they and Volechek captured and imprisoned Eoleo as an additional measure to ensure that Matthew's group would be drawn into their plan.
Blados and Chalis proceed to do business with Matthew and Ryu Kou's group, now that they are all gathered: The two want them to get something called the Magma Orb, which the two can tell Tret and Laurel never elaborated on in detail. They state outright that it powers Belinsk's Alchemy Dynamo, something that the talking trees did not like, and that Matthew's Adepts must slay the Mountain Roc in order to obtain it. Blados and Chalis' parting words are that if the Alchemy Dynamo is not started soon, both Hou Ju and Eoleo are going to regret it. The duo leave as the Mountain Roc wakes back up and attacks, and the Adepts engage the powerful beast in a desperate battle. Ryu Kou and Hou Zan stay out of the battle, and Matthew's party manages to slay the beast.
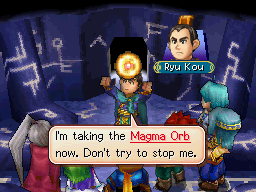
The Mountain Roc flops down onto the ground and turns back into lifeless stone, and everyone enters its open mouth and climbs up into its almost mechanical interior. Matthew picks up five of the shards of magma power Tret and Laurel had told them about, and they eventually find the Magma Orb that the talking trees did not previously tell them about, which is indeed a full, jewel-like sphere of the same magma power. The Adepts contemplate whether they should take this with them, because this, as the tool to turn on the machine under Belinsk, is precisely what Laurel was concerned about, and the Adepts made a promise to her previously that they wouldn't turn it on.
Ryu Kou somberly states out loud that he should have known better than to assume Matthew would have forgotten about his promise to Laurel, and then brazenly makes his move and takes the Magma Orb for himself. He proclaims his intention to power on this Alchemy Machine to save his blameless sister from execution by boiling, and demonstrates his desperation over the current circumstances by threatening that if the Adepts try to stop him now, he will smash the orb and have himself and everyone else killed by the release of energy. He angrily writes off Karis' hypothesis that he is preventing them from feeling the guilt of breaking their promise to Laurel by taking the orb out of their hands, and forces the Adepts to give him both the Slap Glove and one of the five Magma Shards so that he can go into Belinsk Ruins himself. He leaves the remaining four shards to the Adepts so that they can follow Ryu Kou into the ruins if they like. Hou Zan's somber statement that they don't have to do this falls on deaf ears, and he and Ryu Kou leave Matthew's betrayed party and proceed back to Belinsk.
The Alchemy Dynamo
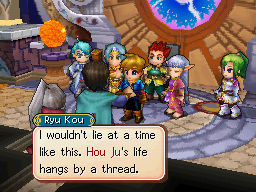
Ryu Kou and Hou Zan return to Belinsk at dusk, and tonight will be the full moon, which the people of Belinsk will celebrate with a festival that involves the public boiling of both Eoleo and Hou Ju and prayer for the revival of ancient civilization. The two enter the ruins underneath Belinsk to see about activating the Alchemy Dynamo so that Hou Ju will be saved from the castle above. However, they soon find that Matthew's party, who Sveta has joined, has entered the ruins before them, and both groups have been manipulated into going deeper into Belinsk Ruins together. Whether Ryu Kou decides to on his own or Hou Zan has a hand in convincing him, the duo present themselves to Matthew's party and apologize for their recent actions. The two groups discuss how they have been suspiciously grouped back together by Blados and Chalis, and are clearly being guided down to turn on the Alchemy Dynamo. Ryu Kou learns here that the duo are part of a group referred to as Tuaparang, and he and the others suspect that based on the festival going on outside, Volechek and the Tuaparang are perhaps intending to revive ancient civilization by turning on the Alchemy Dynamo within these ruins. Whatever would end up happening as a result of this they don't know, but Matthew and Ryu Kou agree that they are both here to rescue Eoleo and Hou Ju in the end, and once again form an uneasy partnership.
Ryu Kou and Matthew's group reaches the core of the Alchemy Dynamo at the bottom of Belinsk Ruins, which they find out apparently seals a structure underneath Belinsk called Luna Tower. With perfect timing, the Tuaparang duo appear, along with a third compatriot of theirs, a masked man who grants his name as "Arcanus". They demand the group insert Ryu Kou's Magma Orb into the Alchemy Dynamo, and Blados and Chalis quickly decide to show in advance what will happen if they don't comply by engaging Matthew and his Adept friends in battle. A fierce battle with the Tuaparang duo ensues, but while Ryu Kou and Hou Zan stay out of it, Arcanus suddenly knocks Hou Zan unconscious and brings Ryu Kou to the interface of the Alchemy Dynamo. The Adepts manage to best their two foes in combat, but when they find Ryu Kou being manipulated by Arcanus, they are unable to help him because Arcanus flexes his extreme powers as an Adept to keep them at bay.
Arcanus tells Ryu Kou to insert the Magma Orb, and when Ryu Kou hesitates because of how bad doing so supposedly is, Arcanus states that he is not forcing Ryu Kou to do it, but he reminds Ryu Kou of what will happen to Hou Ju if he does not. Therefore, amidst the Adepts' pleas not to do it, Ryu Kou makes the decision to comply. The chamber begins to shake as Luna Tower stirs and extends itself out of the ground behind Belinsk Castle. When Hou Zan wakes up and Ryu Kou says he didn't have a choice, Hou Zan accuses Arcanus of forcing Ryu Kou to trigger this calamity and attempts to attack him. Arcanus warps away with Blados and Chalis, and Ryu Kou and the Adepts understand from his haste that they ought to evacuate Luna Tower as well, so they climb up through it and end up returning to the surface of Belinsk outside.
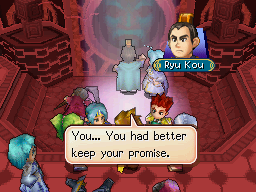
With the initial tremor of Luna Tower's emergence past, Ryu Kou and Matthew's group rush to Belinsk Castle to find that with this "revival of ancient civilization" having suddenly and miraculously taken place, the scheduled executions for both Hou Ju and Eoleo have been called off. Arcanus, as the warrior King Volechek favors, ordered the soldiers at belinsk to allow Matthew and Ryu Kou's group to walk inside it freely so that they can free and take the two captives. On Ryu Kou's insistence, everyone rushes to Hou Ju's holding cell first, where Ryu Kou and Hou Ju see each other for the first time in a long time. Just then, King Volechek himself steps into the room to thank his sister Sveta for turning on "his" tower for him. To "reward" everyone and convince everyone of his sincerity, he graciously unlocks Hou Ju's cell, despite being the murderer of the Sanan siblings' father and the imprisoner of Hou Ju. Ryu Kou reunites with his sister.
Just then, the scholar Kraden, who Matthew's group had been looking for previously, steps in to greet his young friends and to comment on Ryu Kou's touching reunion. Kraden brings dire news about "Luna Tower", which was originally named Eclipse Tower in the ancient past: setting it off was a terrible mistake, likely to bring calamity to everyone. Volechek angrily retorts that it is a weapon which he has sought to subjugate Sana with before it would return Morgal to slavery and storms off. Kraden explains that Volechek has been deceived by the Tuaparang into thinking that Eclipse Tower is a weapon he could use as a deterrent, when in fact its real function is something else that will likely bring calamity to the world. Kraden advises the three Sanans that they must flee Belinsk as fast as they can, because as non-Adepts they may not survive what's to come, despite Ryu Kou's proclamation that he ought to stick with Matthew to repay him for everything Matthew has done for him. The Sanans take Kraden's advice and bid farewell, and leave Belinsk Castle.
Emperor Unan has recently sent a Sanan rescue ship to Belinsk to save Ryu Kou and bring him back to Tonfon, so Ryu Kou, Hou Zan, and Hou Ju find a ship waiting for them. As they board and shove off on their ship, the cataclysmic phenomenon that Ryu Kou had a direct role in triggering finally manifests: the sun, Sol, rises up to assume an oddly static position behind the moon, Luna, and a colossal, hemispherical dome of dark energy reaches across much of Angara. The great calamity that would come to be known as the Grave Eclipse begins. Dark monsters suddenly and continually manifest everywhere within the shadows, killing people everywhere, and Hou Zan must use all of his martial arts abilities to defend the Sanan royals from monsters that appear on their ship.
Homecoming
The Sanan ship, for some reason, does not head southeast in the direction of Tonfon, but rather northwest, into the ice floes north of Mercury Lighthouse. The ship crashes onto one iceberg, apparently killing the crew, and Hou Zan and Ryu Kou set up a makeshift outpost on the iceberg to try to defend themselves from the monsters. The Grave Eclipse stretches all the way to where their outpost is located, so Hou Zan has to continue fighting off the monsters himself to protect Ryu Kou and Hou Ju. But then, one monster manages to mortally wound Hou Zan in the back, and the other two have to bring him with them into hiding in a hidden, dark room within their outpost to avoid continued monster attacks.
For generations, the Sanan royal family has been in possession of a matching pair of Echo Gems, each of which shines while its counterpart is in the possession of a living person, and one can be used to pinpoint where in Weyard the other is located. One had been kept in Tonfon while the other belonged to Lord Kuan, and Kuan's gem passed down to Hou Ju when he had died. Matthew's party obtains Tonfon's Echo Gem and uses it to locate Ryu Kou and Hou Ju, to both rescue them and to get a particular map from Morgal's oldest records that Kuan previously received from Unan when he first assumed governorship of Morgal, and which fell into Ryu Kou's possession after his death. Matthew arrives at Iceberg Outpost on a new ship of theirs and discovers the hidden room the three Sanans are hiding in, just in time for Hou Zan to say as his last words for Matthew to take care of Ryu Kou and Hou Ju. Ryu Kou and Hou Ju take Hou Zan's death hard, but calmly.
Matthew and Ryu Kou bury Hou Zan within the iceberg and place Hou Ju's Echo Gem as a marker. Upon Matthew's inquiry, Ryu Kou gives them the Umbra Map, which the Adepts need to find the set of ancient armor that is critical for them to stop the Grave Eclipse. Ryu Kou and Hou Ju board Matthew's ship, and they make the voyage back to Tonfon. Everyone arrives at Tonfon, which miraculously is just outside the perimeter of the shadow of the Grave Eclipse, and rushes into Unan's palace to present themselves to Unan and Hinechou, and both the Emperor and Kuan's widow are elated and reunite for the first time since so long. The entire Sanan royal family thanks Matthew and his Adepts with all their hearts and expresses that they can never truly repay them, and Ryu Kou apologizes for having been a thorn in Matthew's side all this time and proclaims that he would have joined them on the rest of their journey had he been able to use the powers of an Adept.
Ryu Kou and Hou Ju remain with their mother for the rest of Dark Dawn, while Matthew's group uses the map Ryu Kou gave them to guide their remaining quest to ultimately dispel the Grave Eclipse and save the survivors of the calamity.
Quotes
| In Golden Sun: Dark Dawn |
|
Trivia
- When Matthew makes a return visit to Kaocho with Amiti in his party, he learns the following gossip from the elderly couple at the northwest of town: Chalis, who had recently manipulated King Wo by posing as his advisor, helped him concoct a plan to threaten Emperor Unan by finding Kuan's two children, Ryu Kou and Hou Ju, in Morgal and using them as hostages to force Unan to do his bidding. King Wo apparently marched north into Morgal, but nothing ever came of this, for Wo encountered neither the Sanan children nor Matthew's party. Wo was eventually forced to flee back to his castle to take shelter from the Grave Eclipse, which Ryu Kou ironically had a hand in triggering.
- Ryu Kou seems references to two Chinese historical figures, Liu Bang (Ryū Hō) and Xiang Yu (Kōu), who are two hostile arms' leader in Chu Han Contention.
| Main characters in the Golden Sun series | |
|---|---|
| Playable Characters | |
| Golden Sun | |
| The Lost Age | |
| Dark Dawn | |
| Non-Player Characters | |
| Golden Sun & The Lost Age |
|
| Dark Dawn | |

