Venus Lighthouse
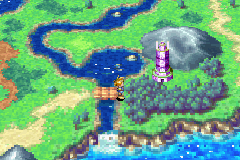
Venus Lighthouse (ヴィーナス灯台, Venus Lighthouse), the Venus-aligned of the Elemental Lighthouses, is the final storyline dungeon in the first Golden Sun. Located near Gondowan's northeastern coast and south of the village Lalivero, its "front entrance" on the overworld map is functionally a one-way exit out from the main tower behind it despite being visited first. The player properly scales this tower after progressing through Babi Lighthouse north of Lalivero and then back south through Tunnel Ruins underground. It is also the starting point in Golden Sun: The Lost Age.
As a lighthouse, casting the Venus Star jewel into its aerie will light the tower's respective Venus Beacon to expose the world to Venus elemental power. Should all three other lighthouses throughout Weyard have their beacons lit at the same time as Venus, the free use of the reality-bending force of Alchemy will be returned to the world via the Golden Sun event.
Walkthrough
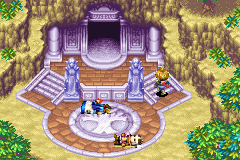
In Golden Sun, once you have proceeded east past Suhalla Gate on the game's overworld, you will unavoidably enter Venus Lighthouse's icon on the overworld. As you pass through a forest littered with wounded or dying NPCs, you can technically take the east exit back into the overworld and head to the final village of the game just up north, Lalivero. However, taking a detour into Venus Lighthouse's "front entrance" just north of the fork in the woods is best done now because this part of the structure, which is functionally Venus Lighthouse's "one-way exit out" from the "main dungeon" explored later, contains features that are mandatory for reaching the main dungeon "underground from behind."
Essentially, once you have acquired the Carry Stone Utility Psynergy item and activated a certain statue within the one-way exit out, it will be possible to meaningfully enter Babi Lighthouse north of Lalivero and proceed through the connected Tunnel Ruins, which will deposit your party into the main "dungeon" of the tower. Babi Lighthouse, Tunnel Ruins, and inner Venus Lighthouse compose the final "three-dungeon set" that ends with the final boss. Regardless of which portion of Venus Lighthouse is being explored, the Venus Adept Isaac will regenerate 4 PP at the end of every turn of battle.
Meanwhile, Golden Sun: The Lost Age starts the player off with a party composed entirely of Jenna fighting by herself, and the prologue sequence requires her to make it back out through the one-way exit.
Exploring the "one-way-exit out"
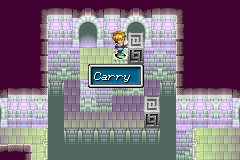
As you step into this part of Venus Lighthouse, immediately cast Reveal on the brown mural to expose a set of stairs leading directly to the Carry Stone, which grants the Carry Psynergy. Proceed up to a "T-intersection" and go down the stairwell to the right to find a black room of platforms to hop across; hop left across the platforms three times, then hop southeast to reach an upstairs stairwell that leads to a chest containing the Lucky Cap.
Return to the T-intersection and head through the door on the left; since the stairs going up in front of you only leads to an NPC, head behind the staircase along the hallway of statues and down into the top part of the T-intersection, where there is a gray, patterned cube blocking the way upstairs. Pushing this one tile right initiates a brief cutscene with Garet. Cast Carry to drop the cube off the ledge, and go up the stairs to what appears to be a dead-end, where a set of electric beams prevents you from going north. What lies beyond is the main dungeon of Venus Lighthouse, and this room amounts to the "one-way-exit out" from that part. Specifically, if you decide you want to leave the main dungeon later in the game, you would enter this room from the other side and deactivate the electric beams using the floor switch barely visible at that end.
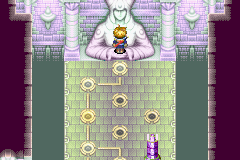
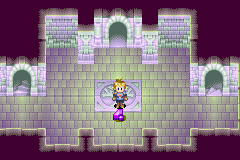
However, the wall with the gray plaque just right of the stairwell also conceals a hidden staircase leading further up that can be exposed with Reveal. The chamber you climb into features a giant statue of a goddess and various circles placed on the ground near a small-scale replica of Venus Lighthouse itself. When you interact with the statue, a portion of the circles light up, which unlocks Tunnel Ruin's "center route south," that being the route that contains the Asura's Armor along the way (which is in a chamber represented by the gray circle to the right). Interacting with the statue again toggles between this arrangement and another one that swerves more to the left, changing Tunnel Ruin's route south to the "left route" that contains the Oracle's Robe (which is in a chamber represented by the gray circle at the southwest corner).
You can freely leave Venus Lighthouse's "exit" portion once you have left this statue chamber in one lit-up configuration or another. Whichever route you have chosen, once you have explored that route in Tunnel Ruins and made it into the main dungeon of Venus Lighthouse, you are free to return to this part of the tower's one-way exit and toggle the route at the statue so that you can explore Tunnel Ruins' other route.
Main dungeon
When you go upstairs from the final puzzle room in Tunnel Ruins with the colored statue, you will enter the "lobby" of the main segment of Venus Lighthouse, with the more climactic music signifying that you are starting the game's final storyline dungeon that lies beyond the open doorway at the north end. There is a Psynergy Stone here that allows your party to fully replenish their PP, and casting the Retreat Psynergy from anywhere else in the main dungeon will bring you back to this room. Meanwhile, the staircase at the left end of this lobby brings you up to the north end of the room with the electric beams in the portion of Venus Lighthouse explored earlier.
If you want to leave the main dungeon at Venus Lighthouse, you can go upstairs to this part and cast Move on the statue to move it onto the floor switch that deactivates the electricity. Alternately, you can go downstairs into Tunnel Ruins, cast Retreat to return to its north end, go up into Babi Lighthouse, and cast Retreat again. (Oddly, casting Retreat in the room with the electricity will keep you in that room rather than return you to Venus Lighthouse's exterior forest.) Incidentally, since going up or down either staircase in the lobby counts as "changing dungeons" as far as the game is concerned, the Psynergy Stone in the lobby will immediately respawn, making this the game's ideal spot for level grinding.
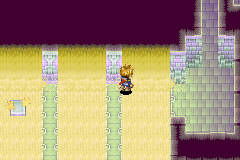
The first screen of the dungeon proper functions as a hub in its own right, though only the doorway far off to the left is not currently a dead-end. In a room with two Carry cubes, simply push the right cube left and then Carry it left into the pit to proceed. The next room has a massive "sand river" emptying out into a pit; ignore the stairs in front of you (which leads back up from said pit) and run across the river, making it to the right side of the room without getting pushed into the pit. Head out the doorway south of the staircase to get the Thunder Crown in a chest, then head up the staircase.
You will arrive at a room with three sandfall walls that operate similarly to the waterfall walls seen at Mercury Lighthouse, where pressing against a sandfall can bring you to a concealed room behind it. Go through the third sandfall at the end, then hop south past a set of platforms above an abyss (using the platforms flush against the right wall) to make it to a small room where pushing a "conduit block" into a square hole in the ground makes the statue shoot energy to the sealed door, opening it up. This leads to an area where stepping on the floor switch in front of you shifts a slab-like platform west, blocking off one sandfall feeding back into the main hub and opening up another. Go down the staircase to your left to step back into the main hub.
In the main hub, climb down to the grate-covered lower level using the ladder down south, and climb up the ladder next to the new sandfall to run east across it. In the next room, climb down to the two gray pillars and cast Move to shift the left pillar down, which will let you reach the lone pillar above and move it all the way to the left. This lets you climb back up and hop onto it and north from it to reach the next staircase. Follow along the linear route until you reach a screen with a more complex form of the conduit puzzle seen earlier. There are two solutions: One is to fit the "south-and-east" block into the upper-right hole, the "north-and-west" block into the lower-right hole, and the "east-and-west" block into the lower-left hole. The other is to fit the "south-and-east" block into the upper-left hole, the "north-and-west" block into the lower-left hole, and the "east-and-west" block into the upper right hole.
The next area with the single sand river running down its central "lane" can be labeled the "final hub." Hop left across the platform, run west across the sand river, and hop left across the platform at the top left. Since the staircase at the upper left corner leads to a dead-end, go down the door next to it to find two sandfalls, and walk through the right one to find the Dragon Scales. Then walk through the left sandfall to reach an area with multiple Carry cubes waiting; dropping a cube on one of the white platforms underneath will make it lower and cause the other one to raise. You cannot afford to drop more than one cube onto the right platform, so drop two cubes onto the left platform so that the right platform raises high enough to let you proceed down the door at the right end. (There is no purpose to the Carry cube at the north end of this area, far above the door.) In the next area, step onto the floor switch to your right to open up a sandfall, and go back downstairs to the final hub.
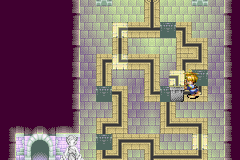
Back at the final hub, ride the newly filled-in left "sand lane" down to the lower-left corner with the staircase leading upstairs, and follow along until you reach a room with a maze of rushing sand trails and blocks. Step onto the sand to be quickly thrust along with it, and run through the gap south. Use this technique to navigate the room to the lone chest at the southeast corner, which contains the Gaia Blade for Isaac, and then reach the northeast exit by persistently running up once you step back onto the sand. The four white platforms in front of you do not lead anywhere, so proceed down the door to your right into the next room.
The last and most time-consuming of Venus Lighthouse's conduit puzzles is the obstacle of this room, and you must carefully push all four of the blocks at the north end of the room into the proper four square holes in the ground to complete the conduit. Move the "east-and-south" block into the northwest hole, then the "north-and-east" block into the hole south of that, then the "west-and-south" block into the hole southeast of that, and finally the "north-and-south" into the hole at the bottom right corner of the room. Once the door is open, step into the next area and step on the floor switch visible to your lower left to open up one more sandfall. Hop north and go down the stairs past the floating blue platform hovering above the abyss, and proceed until you walk back into the final hub by walking through the center sand river's sandfall feeding it.
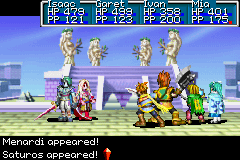
Immediately run up to the northeast corner of the final hub using the now-filled-in sand lane to your right, and you will climb up two flights of stairs to a final room with a Psynergy Stone and a narrow slide leading into a small pit. Falling down this slide constitutes the "point of no return" for this game because you will land on the floating blue platform seen a moment earlier, which will immediately deposit you atop the aerie of Venus Lighthouse in between long cutscenes. You cannot use Retreat once you are up there, and proceeding up the steps at the center of the aerie will automatically initiate the cutscenes that will force you through two final boss battles in a row — the first against two opponents and the second against one. The only way to leave Venus Lighthouse without being forced into to the game's ending sequence back at Lalivero would be to lose one of these two battles.
Golden Sun: The Lost Age prologue
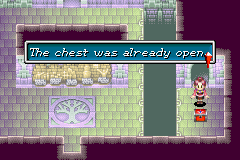
When a new game is started in Golden Sun: The Lost Age, the introductory cutscenes end with you in control of a party consisting solely of Jenna at level 5, and you start at a point in Venus Lighthouse's one-way-exit portion where Isaac's party had to use the Carry Psynergy to drop a gray cube off to the ground below. There are no random encounters. You cannot go back through the room with the electric beams, and you do not have the Reveal Psynergy needed to revisit other paths from the first game, so follow along until you reach the "T-intersection" south of your starting point.
To see what might count as an easter egg, take the right fork downstairs, hop south along the platforms above the black abyss the same way they were traversed in the previous game (three hops left, then multiple hops southeast), and find the chest that contained the Lucky Cap in the previous game. You will receive an Herb from the chest while the game tells you, "The chest was already open. But it looks like there's still an Herb inside!"
At any rate, head south from the T-intersection to step outside into Venus Lighthouse's "exterior forest" screen. A cutscene will transpire when you attempt to go south further, which will direct you to take the exit off to the left. If you attempt to take the right exit, Kraden will stop you and stress that you must head out left. When you approach the man shaking his head at the west edge, he will engage Jenna in the game's first battle, which is easily won by casting Jenna's Fume Psynergy. Leaving the west screen will immediately deposit you at the east exit of Suhalla Gate, and you will be strictly railroaded into entering its lower cave and heading out to Idejima, where the sunken ship lies.
Enemies
| Bestiary of Lower Venus Lighthouse | ||||||||||
| Monster Name | LVL | HP | ATK | DEF | AGI | EXP | Coins | Weakness | Drop | Drop Rate |
| Earth Golem | 23 | 298 | 299 | 114 | 70 | 218 | 183 | 1/128 | ||
| Gnome Wizard | 24 | 215 | 257 | 74 | 122 | 219 | 176 | 1/32 | ||
| Goblin | 24 | 268 | 289 | 91 | 83 | 221 | 170 | 1/32 | ||
| Horned Ghost | 23 | 236 | 268 | 78 | 116 | 199 | 166 | 1/32 | ||
| Nightmare | 24 | 258 | 287 | 89 | 138 | 241 | 198 | 1/64 | ||
Enemy Formations
- Group 1: Horned Ghost x1, Nightmare x0-2
- Group 2: Earth Golem x1, Horned Ghost x0-2
- Group 3: Gnome Wizard x1-2, Earth Golem x0-2
- Group 4: Nightmare x2, Goblin x0-1
- Group 5: Nightmare x1, Earth Golem x1, Horned Ghost x1
| Bestiary of Upper Venus Lighthouse | ||||||||||
| Monster Name | LVL | HP | ATK | DEF | AGI | EXP | Coins | Weakness | Drop | Drop Rate |
| Boulder Beast | 27 | 211 | 327 | 137 | 140 | 278 | 164 | 1/128 | ||
| Chimera Mage | 26 | 413 | 326 | 119 | 145 | 362 | 300 | 1/64 | ||
| Fenrir | 28 | 406 | 357 | 125 | 141 | 402 | 212 | 1/256 | ||
| Grand Golem | 28 | 476 | 367 | 149 | 80 | 412 | 208 | 1/128 | ||
| Ice Gargoyle | 26 | 304 | 319 | 150 | 100 | 307 | 170 | 1/64 | ||
| Manticore King | 26 | 348 | 317 | 106 | 134 | 342 | 240 | 1/64 | ||
| Recluse | 27 | 221 | 323 | 122 | 109 | 243 | 153 | 1/64 | ||
| Skull Warrior | 26 | 283 | 322 | 112 | 130 | 301 | 188 | 1/32 | ||
| Thunder Lizard | 28 | 456 | 347 | 133 | 134 | 422 | 221 | 1/128 | ||
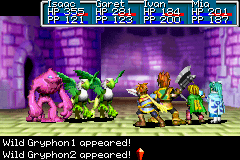
| Wild Gryphon | 26 | 370 | 332 | 112 | 170 | 322 | 290 | 1/128 | ||
| Willowisp | 25 | 209 | 279 | 87 | 121 | 227 | 160 | 1/32 | ||
| Saturos (boss) | 38 | 3000 | 409 | 140 | 160 | 3000 | 3600 | N/A | N/A | |
| Menardi (boss) | 38 | 2600 | 389 | 134 | 220 | 3000 | 4200 | N/A | N/A | |
| Fusion Dragon (boss) | 39 | 5000 | 439 | 150 | 190 | 0 | 0 | N/A | N/A | |
Enemy Formations
- Group 1: Wild Gryphon x1-2, Grand Golem x0-1
- Group 2: Manticore King x1, Skull Warrior x0-2
- Group 3: Chimera Mage x1, Fenrir x0-2
- Group 4: Recluse x1-2, Willowisp x0-3
- Group 5: Boulder Beast x1-2, Thunder Lizard x0-1
- Group 6: Grand Golem x1, Boulder Beast x0-4
- Group 7: Fenrir x1, Ice Gargoyle x0-2
- Group 8: Thunder Lizard x1, Chimera Mage x0-2
| Bestiary of Venus Lighthouse (The Lost Age) | ||||||||||
| Monster Name | LVL | HP | ATK | DEF | AGI | EXP | Coins | Weakness | Drop | Drop Rate |
| Ruffian (unique) | 3 | 29 | 24 | 6 | 11 | 5 | 5 | 1/1 | ||
Collectibles
In the "exit portion" in Golden Sun:
 Carry Stone: Down a staircase hidden underneath a mural close to the entrance, which Reveal exposes.
 Lucky Cap: Found a chest visible off to the right in the room with the mural, reached by heading past a hallway with five statues and hopping along platforms above a black pit.
In the "main dungeon" in Golden Sun:
 Thunder Crown: Found in a chest just south of a door reached when the party passes east of a thick sand river for the first time.
 Dragon Scales: Hidden behind a sandfall in a room with two sandfalls, reached by taking the "left sand river lane" once it is filled in and flowing.
 Gaia Blade: Found in a chest in the room with the maze filled with fast-flowing sand.
In Golden Sun: The Lost Age:
 Herb: Found in the chest the previous game's Lucky Cap was stored in previously.
History
Venus Lighthouse, situated near the coast of northeastern Gondowan, played a role in the Alchemy-focused affairs of Weyard's ancient past as a source of Venus Psynergy, much like the other three Elemental Lighthouses. The ancient systems in the structure are designed with the Elemental Star jewel containing the purified essence of the Venus element, the Venus Star, in mind. Should the Venus Star be cast into the well at the top of the tower, a powerful Venus-aligned sphere of energy will be established atop the aerie: the Venus Beacon. This will release Venus Lighthouse from its ongoing function of "stopping up" the flow of Venus-aligned elemental energy in Weyard.
North of Venus Lighthouse is the modern-day village of Lalivero, and north of that are ancient ruins left behind by a civilization that seemingly had direct ties to the tower. These so-called "Venus Ruins" connect to an underground path that leads directly into the interior of Venus Lighthouse from underneath; this is Venus Lighthouse's true entrance, whereas the conspicuous "front entrance" at the base of the tower itself is merely an exit that blocks attempts to get back into it. Only a group whose numbers include at least one Venus Adept may pass the door at Venus Lighthouse's front exit, and only Adepts may pass the door that otherwise seals the entrance into the underground path leading to the back entrance. Obviously, this has resulted in Venus Lighthouse successfully remaining inaccessible to both the Laliverans and the nation that would eventually take over it, Tolbi; even the scholars sent by Tolbi to study the Lighthouse up close have been stymied.
Late in Golden Sun, Saturos and Menardi, who have been on a quest with their allies Alex and Felix to light each Elemental Lighthouse with its respective Star, arrive at Venus Lighthouse's exit with three captives: Jenna, Kraden, and Sheba. Friction between Felix and his two masters has been building over the forced involvement of the seemingly uninvolved civilian Sheba in their efforts, which is what causes Saturos and Menardi to frustratedly attack every Tolbian soldier and scholar unlucky enough to be in their way. Felix uses his powers as a Venus Adept to unseal the front door of Venus Lighthouse for the party, but they are quick to realize that this is not the structure's true entrance. They carry forth toward the Venus Ruins to discover and make use of the underground tunnel leading into the heart of Venus Lighthouse.
Isaac and his party of Adepts, intent on stopping Saturos from lighting Venus, come across the now-opened Venus Lighthouse and investigate inside, quickly coming to the same conclusions about the structure as their enemies from earlier. As they depart north for Lalivero and the Venus Ruins, Saturos' party scales the interior of the tower — though Saturos and Menardi struggle greatly at trying to solve the ancient riddles within, which leaves Alex less than impressed. Once the way to the aerie is cleared, Saturos and Menardi take Sheba with them to the tower while ordering the rest of their group out of the Lighthouse's main exit and to the nearby peninsula of Idejima, where the Mars Adepts had previously moored their ship.
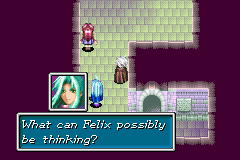
However, Felix rashly decides to storm back up to the aerie to question Saturos' continued hold over Sheba despite Saturos previously promising that they would only have needed her to get past the people of Lalivero, her hometown, and that she would be released shortly after. Jenna fears that a fight will break out, if not between Felix and Saturos then between Felix and Isaac, though Alex remains squarely focused on the lighting of the Venus Beacon. Alex passes off his active interest in this subject as him merely looking forward to the return of Alchemy and the lost age of mankind to the modern world, though he nearly lets slip his ulterior motives. At any rate, because Isaac is currently their side's sworn enemy, Jenna is talked out of going up to Isaac personally to talk with him, and she, Kraden, and Alex step out of the exit at the base of the tower.
Jenna's group find themselves faced down by large groups of Tolbi soldiers and workmen from Lalivero, all demanding that the villains release Sheba. After Jenna affirms that she is ready to fight her way through the workmen to Idejima using her Mars Psynergy, Alex flexes his overwhelming powers to hold off the soldiers for the time being. He eventually rejoins the other two on Idejima.
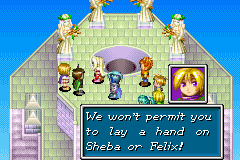
Meanwhile, at the aerie of the tower itself, Felix interrupts Saturos and Menardi just as they are about to cast the Venus Star down its shaft. Saturos confirms Felix's building suspicions: A given elemental lighthouse can only be unsealed and made accessible through the use of an Adept of that element, and Sheba is, in fact, a Jupiter Adept herself, meaning their group cannot afford to let her go until they have reached and lit Jupiter Lighthouse. While Felix concedes to this logic, he still proclaims that he will be taking Sheba back down with him to Idejima for safety's sake, but the Mars Adepts deny him this right on the basis of his defiant tone, claiming that they can no longer trust him for his attitude. Just as Felix is about to come to blows with his two masters, Isaac's party arrives at the aerie.
Though the Mars Adepts are exasperated, Saturos immediately shapes the situation to his benefit by making an offer not to "hurt" Sheba if Isaac's side hand over the Shaman's Rod they currently bear; this item is known to somehow be important for the successful activation of Jupiter Lighthouse in its own right. Saturos' crafty wording successfully deceives Isaac into handing over the rod under the mistaken presumption that Sheba would be let free in exchange. Furthermore, Saturos commands Felix to keep the rod on his person to ensure his continued loyalty to the Mars Adepts' mission. When Saturos soon clarifies he never actually said he would let Sheba go and declares that Isaac's party has meddled in their affairs for the last time, he and Menardi engage Isaac's party in a fierce battle, intending to kill them. Surprisingly to Felix, Isaac's group wins the initial engagement and leaves the antagonistic duo lying prone on the ground.
Felix then takes Isaac's party completely off guard by confirming that he fully intends to light the remaining two Lighthouses regardless of what happens to the Mars Adepts, destroying Isaac's impression that Felix had only been pressured into acting under the duo's yoke all this time. But then, Saturos and Menardi regain their footing and stun everyone by casually tossing the Venus Star into the Lighthouse's well. As the Venus Beacon begins to form, the Venus-aligned energy flowing from the well recharges the two Mars Adepts' fighting capacity (thanks to Mars sharing a symbiotic relationship with Venus), and they carry out their last stand against Isaac: transforming and merging together to form a massive two-headed dragon, which attempts to annihilate Isaac's party with its monstrous power. The drawn-out battle is fierce, but Isaac's side miraculously emerges the victors, and the defeated Saturos and Menardi separate and revert back to their human forms before plummeting backwards into the well of the lighthouse.
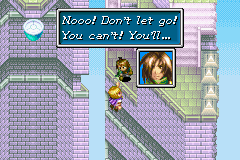
Isaac's astonishing victory over opponents as fearsome as the two Mars Adepts forces Felix to concede that he is currently no match for them and that he must leave with Sheba to begin his quest in the duo's stead. He still refuses to disclose his exact reasons for doing so. Just then, Venus Lighthouse generates a powerful and localized earthquake while materializing the Venus Beacon, and the tower — or at least the aerie — splits apart into four quarters to allow the swirling sphere the room to rise up and take its place. This causes Sheba to lose her footing and plummet off the edge of the open-air tower, despite Felix's desperate efforts to hang onto her. It would appear that Sheba has just fallen to her death, but the delirious Felix, shrieking that he will not let her die, leaps clean off the tower regardless, as if to share in the same fate. Once the aerie reforms itself and the temblor stops, Isaac's stunned group take some time to recompose themselves and consider how to leave the tower.
Jenna, Kraden, and Alex had only just arrived at Idejima when the earthquake began, and this suddenly tore a rift through the Suhalla Range separating Idejima from the Gondowan mainland. Idejima suddenly began floating east out to sea as, quite literally, a buoyant island. The same earthquake also caused the forest-covered ground at the base of Venus Lighthouse to break off and away into the ocean, allowing ocean water to flood the Lighthouse's base. In a miracle that some onlookers later suspect is connected to the supernatural fortune that apparently follows Sheba, the waters rushing into that area are what saves both her and Felix's lives; it is as if the sea itself rises to catch the two. Sheba is nonetheless rendered unconscious, but Felix keeps his wits and swims with all his might to bring himself and Sheba onto Idejima before it floats too far out to sea. Felix and Sheba eventually wash up on the floating island's shore.
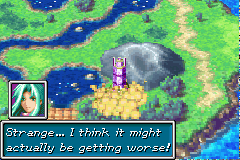
Isaac's party eventually makes it back to the base of the Lighthouse and comes across the flooding. Because they had previously agreed to do so on behalf of Tolbi's ruler, Babi, they gaze far out to sea in an effort to look for the fog encasing a particular span of the ocean in the Eastern Sea. Isaac had agreed that he would look for the Sea of Time and the mythical society that allegedly lies hidden within, Lemuria, once his business in Venus Lighthouse was over. His party then returns to Lalivero, and they spend the next long stretch of time conducting a strenuous search for Jenna, but to no avail.
In Golden Sun: The Lost Age, the activation of the Venus Beacon has a more noticeably profound effect on the world of Weyard than the isolated activation of Mercury Lighthouse far away up north. The aquatic demigod Poseidon awakens within the Sea of Time as if in direct response to the lighting of Venus and sets off a tidal wave that washes over much of the Eastern Sea, which results in Idejima and all of its "passengers" being driven into the continent of Indra below. Indra itself also gets sandwiched between the lower reaches of Gondowan and the southeastern island continent of Osenia. Much of Felix's initial search for a ship is shaped by the after-effects of this tidal wave, and they only manage to attain one by allying with the Mercury Adept Piers, a Lemurian who ended up unintentionally driven out of the Sea of Time by the same tidal wave.
Another immediate effect of the lighting of Venus, according to the Encyclopedia in Golden Sun: Dark Dawn, is to stir the Serpent awake within Gaia Rock on the island of Nihan, which begins terrorizing the nearby village of Izumo. Later in The Lost Age, the Jupiter Beacon ends up lit as well, and the combined influence of it and the other two Beacons suddenly exposes all of Weyard to an unnatural global chill that worsens by the hour. This is because the only element that remains unable to freely flow through Weyard's being is the heat-aligned Mars element. The ending of the game sees the Mars Beacon being lit up in time to avert a deep freeze for the world, and the four active Beacons atop their respective Lighthouses soon initiate the process that brings the power of Alchemy back to the world. Each shoots its respective beam of purified elemental energy into the airspace above Mt. Aleph and Sol Sanctum to cause the Golden Sun event, which breaks Alchemy's seal.
Trivia
- In the room in the exit portion of Venus Lighthouse where electric beams prevent you from heading back into the main portion, the plaque covering the door that can be exposed as a staircase with the Reveal Psynergy reads, "The true road can only be known by he who bears a true heart." However, this can only actually be inspected by Jenna in Golden Sun: The Lost Age, whereas nothing happens if Isaac's party attempts to inspect the wall with the plaque in the first game. Given that the above string exists in the code of the first game without any alterations, this is most likely a programming error because it would benefit the player to receive a hint at this stage that they should use Reveal.
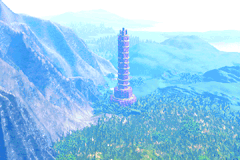
- While Venus Lighthouse's in-game depiction features the same "elevator towers" visible at its aerie as the other three Lighthouses, there is no apparent room for a drop-off point near the base of the lighthouse outside its main entrance, as the lighthouse seems built directly into a mountain in-game. This in-game representation of Venus Lighthouse's front entrance, which is actually a direct copy-and-paste of the entrance into Sol Sanctum at the start of the game (save for an altered color palette and the design of the circular pattern on the ground), is inconsistent with how Venus Lighthouse is depicted in the second game's title screen graphic pictured above.
- Venus Lighthouse, unlike the other three Elemental Lighthouses, does not house any Djinn whatsoever, let alone a Djinni of its respective element.
- Under unknown circumstances, parts of the cutscenes that take place on the aerie of Venus Lighthouse in Golden Sun will play the music informally called "Babi's theme" instead of the "Elemental Star Chamber theme".
- When the Venus beacon is shown on-screen in Golden Sun, it takes on a green color in-game despite yellow or orange being the color canonically associated with the Venus element throughout the series. All depictions of Venus Lighthouse contributing its energy to the Golden Sun event, such as in the credits of Golden Sun: The Lost Age, give the energy the proper Venus-aligned color.
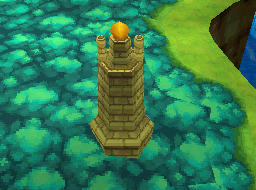
- A 3D model of Venus Lighthouse is placed at the spot in the overworld of Golden Sun: Dark Dawn where it would roughly be expected to be, but the barely modeled stretch of land representing Gondowan cannot be reached or seen in-game without cheats or the Endless Wall glitch, so it is unknown why the developers put it there. Its exact location is just one screen's worth of space west of the waterfall-like edge of the explorable overworld just west of the sandy islands where the Jupiter Djinni Simoom is fought. Interestingly, the orb at the top of the model that is supposed to represent the Venus Beacon is shown as a Venus-appropriate orange/yellow despite the anomalous green color shown in the first game. On the other hand, the yellowish-brown color of the tower portion of the model now contradicts the purplish color that Venus Lighthouse is consistently depicted throughout both GBA games as.
- When the Venus Star is tossed into the well of Venus Lighthouse and the Venus Beacon starts forming, the final boss encounter that takes place immediately afterward starts the party off with both Isaac and Garet having had their PP meters topped off. This plays into what is mentioned in between the two boss sequences atop Venus Lighthouse as the elements of Venus and Mars sharing a symbiotic relationship, meaning the Venus Adept Isaac and Mars Adept Garet are benefiting from the outpouring of the Venus-aligned energy just as their Mars-aligned opponents are harnessing it to assume their final transformation. A similar phenomenon occurs earlier in Mercury Lighthouse, where the Mercury Beacon is lit while Isaac's party is being transported to the aerie — which results in the Mercury and Jupiter Adepts Mia and Ivan having suddenly topped-off PP meters when they arrive. (However, no such PP-replenishing effect happens when Jupiter Lighthouse is lit later in The Lost Age.)
- Unlike the other three Lighthouses, Venus Lighthouse seems to lack either a clearly identified "Venus tribe" living nearby or a settlement that is known to descend from one. Likewise, it is the only Lighthouse not to have a known Adept corresponding to its element living nearby. The only vague allusion to the existence of such a tribe is the "Venus Ruins" located north of it, north past Lalivero, which is currently being used as the foundation for the construction of Babi Lighthouse.
