Konpa Ruins
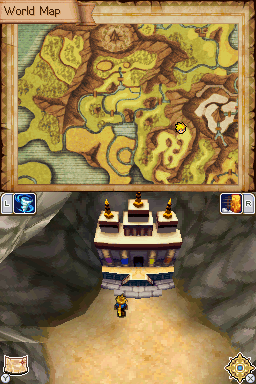
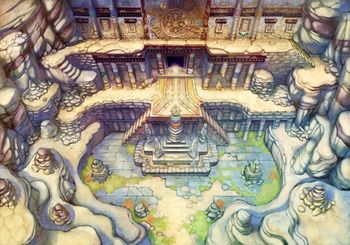
The Konpa Ruins (ゴンバ遺跡 Gonpa Ruins) are a dungeon in Golden Sun: Dark Dawn. It is located near Konpa Gate, which is how Matthew, Tyrell, and Karis get here.
Walkthrough
Glyph Book
Enter Konpa Ruins from the overworld map, and climb up the stairs into the open entrance, reaching the main lobby. The small door behind the wine-colored monument leads to a dead-end at the moment, so go up the stairs right of that, bypass the doorway at the top of these stairs, and go through the doorway at the lower right corner of the room. Follow the pathway east through a winding hallway, past a large stone door, until you get to the room at the right end. A message automatically ensues concerning the power of Earth; go up in front of the orange sphere and cast the Move Psynergy to move it down one space. This room lights up, and now go back to the large stone door and step on the now-glowing floor tile to open up the way north.
In a room with a lot of platforms above an abyss, use Move on the statue to remotely move it one space right onto the yellow floor tile to make some of the platforms rise up. Hop the platforms to the left to move the left statue one space left onto that yellow floor tile. Hop the way back to the northeast so to Move the rightmost statue one space left onto the yellow floor tile. Then hop up through where this statue just was to reach the right of the north statue, and Move it one space left onto its yellow floor tile. Now hop back southeast and hop left and up to reach the doorway at the northwestern corner of the room. Hop to the Psynergy Stone and replenish PP (if needed).
Past a hallway, you enter a room with two glowing floor titles, and a reddish block at the top. Push the reddish block down off its ledge, then use Move to push it into the abyss in the center, where it falls into the dead-end from earlier. Step on the floor switches to raise platforms that let you hop to the lower parts of this room, then go through either of the pair of doorways downward near the center bottom of the room to get to the knees of a giant statue in the main lobby. Step on the yellow floor switch here to raise stairs to the left. Go through the door above the right knee, then go down through the doorway right of that to return to the main lobby, and go down the stairs to your left so that you can go up the newly raised stairs. Enter the doorway at the lower left corner of the main lobby. Follow the pathway west to the next room.
The next room, like the room with the orange sphere earlier, has a purple sphere and automatically ensues a message concerning the power of Wind. Simply go up to the purple sphere and cast Whirlwind on it. The room will light up, and various glowing blue tiles on the floor light up. These tiles act just like the Wind Blossoms at Goma Highlands Road and Konpa Gate - casting Whirlwind on these elevates them and makes them serve as platforms temporarily. Position yourself left of the set of three tiles at the upper center of the area and cast Whirlwind to the right to make all three of them raise, then quickly position yourself right of the similar set of three tiles to the lower left of that and cast Whirlwind to the left to make all three of those raise. An elevated pathway is made, but only for a brief time, so rush up the stairs to the right and hop left across the platform path to reach the upper left doorway.
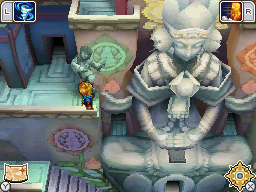
The next room has a similar floating-tile puzzle, with four independent sets of blue tiles. First, Whirlwind the southwest set of tiles so that you can hop across them to the elevated center area where there is a movable pillar, and move that right off the ledge so that it falls down. Slide down and Move the pillar one space right and one space down. Now, Whirlwind the southwest set of tiles, then immediately whirlwind the southeast set of tiles, and immediately go back up the stairs and hop right across these two sets to where another pillar is. Push that left to make it fall down, then slide down and Move that one space left. Also move the previous pillar two spaces up. Now, to get to the chest at the upper left corner of the room, Whirlwind the southwest set of tiles, then whirlwind the vertical line of three tiles at the northwest set of tiles, so that you can hop to the elevated center portion and then hop up from there to the chest. It contains the Elven Shirt clothing artifact. Now, to get to the doorway at the upper right of the room, Whirlwind the southwest set of tiles and the northeast set of tiles, and hop northeast across these, with the help of the two pillars you set up.
In the next hallway, stand on a "fan elevator" and it will transport you up. Go out through the doorway at the left end of the hallway to return to the main lobby. Ignore the fan elevator to your left and go through the doorway on your right to a room with a large chasm. Hop to the platform with a reddish block on it and push that right into the chasm. Now go back to the fan elevator and take that down, and then go to the fan elevator at the right portion of the main lobby and ride that up to another doorway. Enter that to arrive at the right end of the same chasm room, and push its reddish block into the chasm in the same way.
With all four reddish blocks now in the same room below, take the fan elevator back down, and enter the doorway behind the wine-colored monument to reach this room. Take the time to move each of these four blocks onto the four gray tiles nearest them, making them sink to the ground below. When the flower pattern on the ground is complete, a brief cutscene shows ladders raising in the main lobby, so climb up one of these and step onto the hands of the giant statue. Answer Yes when prompted, and in another cutscene you will obtain the Glyph Book, which allows you to read the ancient glyphs on tablets. Go back into the room with the flower design and approach its glyph, and another cutscene will have you automatically read it. Like other glyph tablets in dungeons, reading this glyph causes a puzzle-related effect to manifest; in this case, it makes four statues materialize. Push the upper left statue down four spaces, the lower left statue right four spaces, the lower right statue up four spaces, and the upper right statue left four spaces, so that they all face the flower design. Now, the flower design becomes an elevator that transports you up to Konpa Ruins' fourth floor when you step on it.
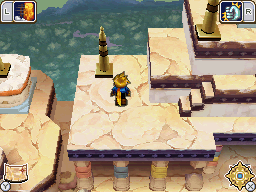
Go down through the left doorway in the room where the flower elevator has brought you, and follow its linear path to the outside, on the roof of Konpa Ruins. Climb up to the stone door and step on the yellow floor tile in front of it to open it up. In this room, go get the Grip Crystal from the chest, and this changes the room's layout. Equip the Grip Crystal onto Matthew to grant him the Grip Psynergy; as the two glyph tablets underneath each of the two yellow spires instruct, stand right of the left yellow spire and cast Grip on the right yellow spire to transport yourself to the right spire, and then stand below the blue object and cast Grip on that to obtain the Stone Key. Grip the left spire to return, and then go down to the gate and use the Stone Key to open it up. Exit back outside.
Back on the roof of Konpa Ruins, climb up stairs and a ladder to a lone grip spire right of the door you came out of, and grip the spire left of that. A Djinni on this part of the rooftop flees from you, so follow it by climbing to the highest point on the roof. The Djinni will run away from you for as long as you try to chase it, so make it park itself right next to one of the two spires, and then head back down so that you're parked next to the opposite facing spire. Remotely cast Grip on the spire next to the Djinni to propel yourself into the Djinni, knocking it aside and making it attack you. Defeat it in battle to add the Jupiter Djinni Jolt to your Djinn collection.
Backtrack to where you were on the roof before going out of your way to collect the Djinni, and then use Grip to transport yourself across the three spires that lead your way off the right of the screen. There is nothing you can do at this other screen with a giant chasm in it, so exit off the lower left part of the screen to return to the previous part of the roof, only now you're at the lower right part of it. Don't enter the black doorway yet; climb down the ivy left of that to get back to the front entrance of Konpa Ruins. You can now get the chest at the upper left corner of this screen, which contains a Psy Crystal. Climb back up the ivy and enter the doorway, and follow a linear series of hallways to a room that has yet another orb and projects another message, this time concerning the power of Fire. Go to the lower left spire here, grip your way right to the lower right spire, go to the upper right spire, and grip your way left to the upper left spire. Here, cast the Fireball Psynergy on the orb to make the orb light up and cause specific blocks in the main lobby to glow red.
Backtrack until you're on the rightmost part of the main lobby, near a now-red-glowing block, and cast Fireball on this block to destroy it. Follow the path northwest to the flower elevator from earlier, and take it back down to return to the floor level of the main lobby. Now stand in front of the wine-colored monument, which also is glowing red, and cast Fireball on that to destroy it and reveal stairways into the pit underneath. Go down, open the stone doorway below, and enter Konpa Cave.
Konpa Cave
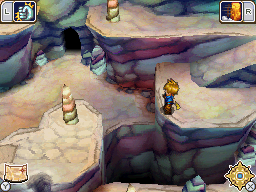
Konpa Cave (ゴンパ洞窟 Gonpa Cavern) is an ancient part of the ruins that seems to be a Psynergy Stone-rich cavern, similar to the Abandoned Mine. The first room you get to has a Psynergy Stone in it, and past this room is a second, much larger room. Go forward and Grip your way past the first gap. On the middle of the slope below the spire that you gripped, Grip a remote spire to your left so that you can reach an elevated portion with an earth pillar, and push that left so that it falls down. Slide down and Move the pillar one space left, then return to where you were on the slope and Grip your way to the elevated portion again. Now you can hop left, and be in distance to grip a spire next to a chest containing the Elven Rapier, a light blade artifact. Slide down, and proceed forward.
The next room is the site of a major series of cutscenes, including a boss battle. The battle against three Stealthy Scouts is easily one of the most difficult in the entire game because of being so early in the game, so be sure to save before this room. When you manage to defeat the boss battle, once all the cutscenes are over go out of the exit to the lower right.
Post-Boss Battle
In the last interior room here, roll a horizontal pillar in front of you down into the pit in front of you so that you can cross, then roll another horizontal pillar down into a lower level. Also roll the vertical pillars at the left and right ends of this lower level into the lower level. If you rolled the pillars into the pit in this order, all you should need to do is roll the lower vertical pillar left, then roll the horizontal pillar up, then roll the lower vertical pillar back right. The three pillars now comprise a path you can run across to reach the lower exit. Take note that once you cross through this lower exit, anything you did not collect in the game up until this point will be permanently missed, so this is a point of no return.
Step outside and trigger a cutscene, and after that go out the south exit and trigger another series of cutscenes, in which Rief will permanently join the party and bring the Mercury Djinni Sleet along with him. Now in the southern, exterior exit of Konpa Cave, walk up the stairs to the right to where the two trees are, and climb up and hop left from the upper right tree. Instead of entering the nearby entrance-way, cast the Growth Psynergy on the plant to turn it into ivy. Proceed west along the top of this screen, slide down the cliff slide at the upper left corner of the screen, interact with the Wise One stone to replenish HP and PP, and enter the cave entrance to the upper right of that to find a chest with a Cookie. Go back outside, slide down, and take the south exit back into the Ei-Jei region of the overworld.
Enemies
- Note: Amazes and Skeletons do not appear in areas accessible before obtaining the Glyph Book.
| Bestiary of Konpa Ruins and Konpa Cave | ||||||||||
| Monster Name | LVL | HP | ATK | DEF | AGI | EXP | Coins | Weakness | Drop | Drop Rate |
| Amaze | 10 | 108 | 86 | 27 | 46 | 68 | 56 | 1/16 | ||
| Skeleton | 10 | 112 | 112 | 32 | 46 | 98 | 51 | 1/16 | ||
| Spider | 9 | 78 | 67 | 25 | 27 | 44 | 38 | 1/16 | ||
| Zombie | 9 | 103 | 96 | 15 | 30 | 69 | 38 | 1/16 | ||
| Jupiter Djinni (Jolt) (unique) | 9 | 221 | 81 | 22 | 44 | 252 | 107 | N/A | N/A | |
| Stealthy Scout (3) (boss) | 10 | 354 | 117 | 29 | 42 | 266 | 142 | 1/1 | ||
Enemy Formations (Konpa Ruins)
- Group 1: Spider x1-3
- Group 2: Amaze x1
- Group 3: Skeleton x1-2
- Group 4: Zombie x1-2, Spider x0-1
- Group 5: Amaze x1-2, Zombie x1
Enemy Formations (Konpa Caves)
- Group 1: Amaze x1
- Group 2: Skeleton x1-2
- Group 3: Amaze x1-2, Skeleton x1
- Group 4: Amaze x1, Zombie x1, Spider x0-1
Collectibles
![]() Glyph Book:obtained in a cutscene from the large statue in the first room.
Glyph Book:obtained in a cutscene from the large statue in the first room.
![]() Grip Crystal: Obtained in a room in the upper portions of the ruins.
Grip Crystal: Obtained in a room in the upper portions of the ruins.
![]() Stone Key: Obtained in the Grip Crystal Room.
Stone Key: Obtained in the Grip Crystal Room.
![]() Psy Crystal: Found in a chest on the lower outside portions of the ruins
Psy Crystal: Found in a chest on the lower outside portions of the ruins
![]() Jupiter Djinni Jolt: Found at the very top of the Ruins
Jupiter Djinni Jolt: Found at the very top of the Ruins
![]() Elven Shirt: Found in a chest in the Jupiter portion of the ruins
Elven Shirt: Found in a chest in the Jupiter portion of the ruins
![]() Elven Rapier: Found in a chest in the Konpa Cave portion.
Elven Rapier: Found in a chest in the Konpa Cave portion.
![]() Sleet: Automatically obtained when Rief joins the party at the end of the ruins.
Sleet: Automatically obtained when Rief joins the party at the end of the ruins.
![]() Cookie: Found in a chest at the south exit, after Rief joins
Cookie: Found in a chest at the south exit, after Rief joins
Story
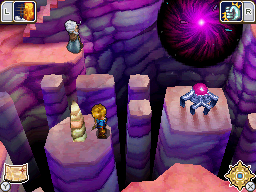
The Konpa Ruins are the remains of an ancient temple that appears to be dedicated to the elements. All four are prominent, though in its dilapidated state what would have been its space dedicated to the Mercury element is caved in and inaccessible. The Ruins not only house the Grip Crystal, which bestows the Grip Psynergy to a Venus Adept, but also the Glyph Book, which the ancients left so that future generations could read and translate their language, which is important to exploring many dungeons.
By the time Dark Dawn takes place, the Konpa Ruins have apparently been unearthed quite recently, and it is apparently the residents of the area west of the Goma Range, the territory of the refugees from Vale, who are officially understood to control it. This apparently makes it less likely that the Valeans will continue to enjoy their peace from the other countries of Angara, who do not like that the refugees are in control of such an ancient place.
Matthew, Tyrell, and Karis travel through the Ruins on their way to meet Kraden, as it was the only open way to cross into Bilibin. Along the way, Matthew collects the Glyph Book, which grants him the ability to decipher the ancient glyphs and progress further into the dungeon. They eventually enter the Konpa Caves, where they encounter not only Kraden and his two pupils, but two enemies, Blados and a mysterious masked man. Matthew and his party are forced to travel south, after Kraden's pupil Rief is kidnapped. Blados then triggers a trap, which seals off the exit, trapping the Adepts in the Ei-Jei region.
Name Origin
- Gonpa, the Japanese name of the place, is a word for the most exquisite Buddhist Monasteries throughout the Himalayas, stretching from western Tibet and Pakistan to Bhutan. The Gonpa Ruins, therefore, would simply be the ruins of a Buddhist Monastery, at least in name-origin. Seeing as Weyard doesn't quite practice Buddhism, but it has concepts similar to it that are understood as forms of Alchemy and Psynergy, the Goddess-like statue in the Ruins seems to be a worthy replacement for a central Buddha statue.
Trivia
- There is an inaccessible area with a gaping hole and a vine leading to it on the ruins' roof, and it's set up so a nearby puddle of water could in theory be turned into an ice pillar with Cold Snap, therefore granting access; but Cold Snap isn't acquired until later in the game, and by that point Blados has sealed the exit back into Konpa Ruins. If, however, you return using the Endless Wall glitch later in the game, you'll find that it actually can't be frozen at all. This area is intended to explain how Kraden, Rief, and Nowell reached the area of the Konpa Cave that they are found in in the actual game; interestingly enough, if you use a walk-through-walls Action Replay code to reach the ivy leading into the chasm and climb down it, you will be brought to the northeastern part of that cave room on the ivy that Nowell is standing south of; this route was programmed by the developers despite never intending the player to be able to reach it. Kraden, Rief, and Nowell will not respond to the player's attempts to talk to them, and if you try to enter the doorway to the upper left, you will reappear in front of the doorway. Also, while climbing the ivy at the northeast corner of this area, you can see the lift that Blados and Arcanus use in the cutscene, but without anyone on it yet.
