Altin Peak

Altin Peak (アルチンこう山 Altin Mining Mountain) is a major set of dungeon-style locations connected to the town of Altin in lower-central Angara. It is explored in Golden Sun, and is unique in its layout amongst dungeons in general; it is actually a series of similar dungeon-style areas separate from each other that the player explores one at a time. Altin is at first flooded, but as you defeat Living Statue monsters, the water levels lower and more areas of the Peak are uncovered. It is larger than many other dungeons in Golden Sun, and one of its rewards is passage into the area of Angara that the landslide at Alpine Crossing prevents you from crossing into previously.
Walkthrough
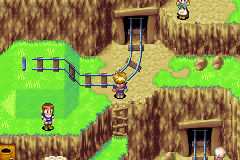
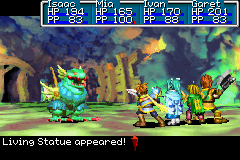
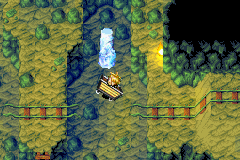
The small cave behind the Move-able statue at the top level of the town Altin is technically considered part of Altin Peak, having the same monster battles and music, and it contains a chest with a Psy Crystal. More importantly, climb down the ladder near the town inn to see a water-spouting Living Statue enemy run into another cave area, and when you follow it, you will see it get away from you by casting the Frost Psynergy on a puddle and using the subsequent ice pillar. Hop across this ice-pillar yourself, and continue chasing after it and slide down a cliff slide until you engage it in battle. Defeating it earns you the Frost Jewel, which grants any Adept the Frost Psynergy (merely a convenience, since Mia has always had access to the Frost Psynergy series in her default class series), and the water level in the cave lowers. Use Frost on the lone puddle to return outside, where you'll see the water level in the town has lowered, the mine shaft opening to the upper main dungeon can be entered, and the item vendor is open to the right of that. Enter the mine shaft which the mine cart tracks run into.
Upper dungeon area

In both this area you enter in and the area beyond, follow the mine cart tracks on foot where they lead exactly, for any of the forks you pass by are dead-ends. When you get to a room with a lot of water and the mine tracks immediately point right, go left and up to where a mine cart lies stationary; to the right of that is a switch above a red arrow sign pointing left, indicating that if this mine cart is rode now, it will take the left fork and not the right fork which you want, so flip the switch to make the arrow point right, then ride the mine cart; you will ride to an island where a Living Statue is located. Defeat it to lower the water level, and now you might as well cast the Retreat Psynergy to return to the dungeon entrance; at the right portion of this room is a now-open room containing a chest with a Cookie, but it is blocked off by a round boulder that can only be bypassed with the Lift Psynergy that is the reward for defeating the boss at the eventual end of the dungeon. If you want it, you'll have to come all the way back here later.
Return to the first room and now enter the doorway at the upper left end beyond where you previously followed the mine cart tracks to the right, and let that lead you linearly down a ladder into a room with another set of mine tracks. Ride the mine cart at the upper right end of the mine tracks to end up near a rail switch pointing right, flip the switch left, ride the mine cart back up and right, and now ride it again so that the new direction will take you to the doorway at the top end of the room. Let the subsequent twisting hallway lead you to a fork leading left and down, and at the fork leading left is a chest that reveals itself to be a Mimic, which rewards a Game Ticket when felled. Take the south fork, and in the next room, simply cast Frost on the puddle to gain access to the doorway to the upper left.
Now in another large room with a body of water being visibly fueled by a Living Statue monster, climb down the ladder, go left and up, and cast Frost on the puddle of water so that when you climb up the ladder to the lower left, you can hop right across it to get to the mine cart. Riding the mine cart now brings you to the chest below, which contains the useful Dragon Shield artifact item. Ride the mine cart back, hop back left across the pillar, and climb back down. Now go left to climb the left ladder to reach the rail switch above that, switch it to make the red arrow point right, and make your way back to the mine cart so that when you ride it, you end up at a northern portion of the room. Go and climb southeast to reach the next Living Statue, and fell it in battle to lower the water level further. Now you're complete with this dungeon area in general, so cast Retreat again to return to the town.
You'll find that the town is entirely dry now, and that the newest armor and weapons are available at their respective shops, the most considerable of which are Claymores and the Psynergy Rod artifact. Enter the now-accessible lower mine cart entrance near where an old man is wandering around to begin the second main portion of the dungeon set.
Lower dungeon area
Follow the mine cart tracks to a fork, above which is a brown boulder blocking a doorway. The left fork is a dead end, so take the right fork and follow the linear path to a point where there is a fork leading right and down; go down, and as you pass by, get a chest containing a Lucky Medal. Go right and follow a twisting, liner path up to a doorway leading up.
In the next room, a Mercury Djinni is immediately visible. Go right to where an earth pillar and a puddle are, and standing above the earth pillar, use the Move Psynergy to move it left one space and then use Frost on the puddle. Climb up the ladder above, flip the rail switch so the red arrow points left, then go down and hop left across your two pillars to reach the mine cart. Ride it twice in a row, and assuming that you flipped the rail switch left, you will end up near the Mercury Djinni. Save, then battle it to earn the Mercury Djinni Spritz. (If you have been playing the game perfectly thus far, each Adept should have already have three Djinn, and this would thus be your fourth Mercury Djinni; if all four Mercury Djinni are set onto Mia so that she is in the Cleric class, she will be able to use the very practical Wish Psynergy.) Ride the mine cart back to the upper left, and now go left along the elevated portion of the room so that you use Frost on two separate puddles of water; this makes the doorway that is barely visible to the upper left accessible when you go back right and climb up the ladder so that you can hop your way left over there.

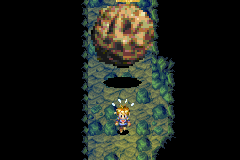
In the next hallway, the right fork is a dead end, so let the left fork linearly lead you to the elevated portion of a room you were in earlier. Above the lower doorway leading up is a long pathway straight up littered with rocks; go all the way up the pathway to get to the end, where there is a log and a sign with a warning. Use the Force Psynergy on the log; however, if you did not get the Orb of Force in Fuchin Falls Cave, then upon inspecting the sign a hidden cutscene with Garet will occur where he will cause force to be applied to the log for you by kicking it in frustration over it being a dead-end. Either way, the game takes over as a gigantic boulder comes rolling down and Isaac makes a mad dash back down the hallway, diving out of the way just as the boulder crashes into the lower ground below and creates a gaping hole in the ground. A loud monstrous roar is heard out of the abyss, and control shifts back to you, so climb down the ladder to the left, slide down the cliff slide, and now climb into the new hole using the mine tracks that now serve as a ladder.
In the tiled room you enter, go up enough along the hallway and the boss battle with the Hydros Statue will automatically trigger. It features a lot of Mercury-aligned area-of-effect Psynergy and abilities, but if you have collected all possible Djinn by this point and Mia is able to use the Wish Psynergy, it should be quite manageable. After defeating the boss and getting a Lucky Medal, a cutscene occurs, after which you can grab the chest to get the Lifting Gem, which bestows the Lift Psynergy. Cast Retreat to get out of the dungeon.
You're not done with Altin Peak yet; now you are able to get the Cookie in the upper dungeon area by using the Lift Psynergy on the brown, circular boulder blocking your way to it. Whether you decide to fetch the cookie or not, reenter the lower dungeon area and get to the point where there is a round brown boulder above a red arrow pointing left. Use Lift to pass under the boulder and enter the door, and the subsequent room essentially has three pathways leading up. The right pathway is a dead end, but first go along the left pathway to get to an earth pillar that you should Move out of the way. A chest containing a Vial is found. Now go up the center pathway, use Lift to get beyond the Liftable boulder there, and the rest of the linear path leads you out into the overworld into the area west beyond Alpine Crossing and near the Lama Temple. The dungeon is hereby complete.
Enemies
| Bestiary of Altin Peak | ||||||||||
| Monster Name | LVL | HP | ATK | DEF | AGI | EXP | Coins | Weakness | Drop | Drop Rate |
| Ape | 15 | 290 | 128 | 29 | 49 | 96 | 160 | 1/4 | ||
| Bone Fighter | 11 | 122 | 131 | 35 | 52 | 51 | 63 | 1/32 | ||
| Calamar | 13 | 104 | 130 | 34 | 46 | 59 | 79 | 1/16 | ||
| Dirge | 11 | 91 | 122 | 32 | 60 | 47 | 61 | 1/16 | ||
| Rat Fighter | 13 | 143 | 146 | 39 | 58 | 63 | 83 | 1/32 | ||
| Slime Beast | 13 | 99 | 134 | 27 | 54 | 51 | 77 | 1/16 | ||
| Tarantula | 13 | 108 | 144 | 30 | 52 | 58 | 81 | 1/16 | ||
| Mimic (unique) | 16 | 579 | 160 | 44 | 70 | 241 | 267 | 1/1 | ||
| Mercury Djinni (Spritz) (unique) | 13 | 361 | 140 | 32 | 84 | 190 | 226 | N/A | N/A | |
| Living Statue (3) (unique) | 17 | 540 | 149 | 44 | 56 | 377 | 900 | 1/1 | ||
| Hydros Statue (boss) | 19 | 1300 | 156 | 53 | 62 | 496 | 2400 | 1/1 | ||
Enemy Formations
- Group 1: Slime Beast x1-2, Ape x0-1
- Group 2: Tarantula x1-2, Bone Fighter x0-2
- Group 3: Slime Beast x1-2, Calamar x0-1
- Group 4: Tarantula x1-2, Slime Beast x0-2
- Group 5: Calamar x2-3
- Group 6: Rat Fighter x2
- Group 7: Rat Fighter x1-3, Ape x0-2
Collectibles
![]() Spritz: Found and battled in the low-level complex of the mine, as part of a cart-riding puzzle.
Spritz: Found and battled in the low-level complex of the mine, as part of a cart-riding puzzle.
![]() Cookie: In a chest behind a Liftable boulder on the mid-level complex of the mine. Can only be reached after defeating the Hydros Statue.
Cookie: In a chest behind a Liftable boulder on the mid-level complex of the mine. Can only be reached after defeating the Hydros Statue.
![]() Dragon Shield: Found in a chest in the mid-level complex of the mine, at the default fork of a cart-riding puzzle.
Dragon Shield: Found in a chest in the mid-level complex of the mine, at the default fork of a cart-riding puzzle.
![]() Frost Jewel: Automatically given as a reward for the first defeat of a Living Statue.
Frost Jewel: Automatically given as a reward for the first defeat of a Living Statue.
![]() Lifting Gem: In the chest that can be opened after defeating the Hydros Statue.
Lifting Gem: In the chest that can be opened after defeating the Hydros Statue.
![]() Lucky Medal: In a chest in the bottom-level complex of the mine.
Lucky Medal: In a chest in the bottom-level complex of the mine.
![]() Psy Crystal: The lone chest in the small room behind the statue at the top level of the town Altin.
Psy Crystal: The lone chest in the small room behind the statue at the top level of the town Altin.
![]() Vial: In a chest in a small room behind a log pillar at the bottom-level complex of the mine, accessible after Lifting a boulder.
Vial: In a chest in a small room behind a log pillar at the bottom-level complex of the mine, accessible after Lifting a boulder.
Background and story
Altin is known as "the Mining Village", and made a business of mining precious gems from the renowned mines in Altin Peak. It is widely known that deep within the lower levels of the mine is a passage that leads west out to the area where Lama Temple is, which in concept makes the mines an alternative path to a portion of the Silk Road caravan route to the south. The mines, however, hide more than just gemstones; hidden deep within the mine too far out of reach of typical miners appears to be leftovers of an ancient civilization that has since been forgotten. This includes a tiled room of carved stone under the ground, and miners have at times unearthed ancient relics that are apparently connected to this chamber. In addition, there are peculiar statues within the mine that the townspeople would view as the town's "guardian statues", which would later show mysteriously advanced design and thought on their own.
After the lighting of Mercury Lighthouse, the water Psynergy emanating from the beacon caused a reaction in Altin's guardian statues, bringing them to life in monstrous forms. The living statues, which the townspeople tentatively label "hydros creatures", emerge out of the mine and start projecting a foul-smelling water out of their mouths, far more water than could ever be stored in bodies of their size (one townsperson suspects they turn the air itself into water), and to the growing alarm of the populace the entire town and the mines they connect to are quickly submerged.
Isaac's traveling party of Adepts come to Altin in hopes of discovering this passage that leads to the region west of the Alpine Crossing because the group they are pursuing, led by Saturos, blocked off that area of Silk Road by causing a landslide to help shake Isaac off their tail. Of course, Isaac & Co. attempt to do something about the flooding of the town being facilitated by the strange, living statues, and after destroying one of the statues the water level starts to recede. The Adepts proceed to explore the mines in full, destroying all the Hydros Statues and removing the water from the village, and after they discover the tiled chamber and defeat the largest Hydros Statue of all, they find the passage out west and resume on their journey. The relieved people of Altin prepare to renew their mining ventures in the upper levels of the mine (though they are paranoid of the monsters and the mysterious chamber in the lower levels). At the same time, a girl from Xian, Feizhi (who previously predicted the flood in Altin with her newfound powers as an Adept along with other ominous occurrences, as a direct result of coming into contact with a Psynergy stone from Mt. Aleph's eruption), hears that Isaac passed this way and goes through the passage in the lower mines by herself to head toward Lama Temple.
