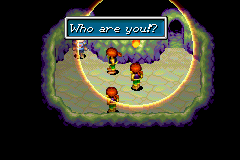
Lunpa Fortress
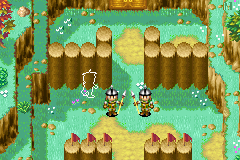
Lunpa Fortress (ルンパ砦 Lunpa Fortress) is an optional dungeon accessible from within Lunpa in Golden Sun. It becomes available later in the game when Isaac's party has attained the Cloak Ball in Tolbi at Gondowan, and subsequently used Gondowan Cave to return to the main continent of Angara where Lunpa is located. The Cloak Psynergy is integral to the stealth-based method of exploration the whole dungeon is designed around.
Walkthrough
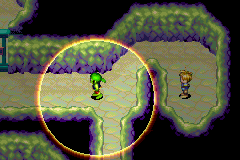
At the front gate of Lunpa Fortress, sneak past the guards by hugging the wall to the left of the screen, casting Cloak to conceal yourself from their vision as you go up and right along the shadow the wall casts down on the ground. Enter Lunpa Fortress, go through one small room, and in the first large series of hallways you get into, you may enter the open door immediately in front of you to interact with some NPCs. As you should be able to see, you can cast and keep up Cloak while in the darkened areas of the cave-like location, but various torches throughout the dungeon emit circular auras of light that automatically dispel your cloak when you walk into them. While cloaked, go right and up to where two guards in green clothing stand; green-garbed guards, should they detect you, automatically place you back outside Lunpa Fortress. Walk along the bottom wall below the green guard to the lower right and hug the wall in the darkness as you go right and upper-right. While entering the door above the guards will remove your cloak, you should be far enough away against the wall to the upper right that they won't see you.
In the next room, immediately recast Cloak to ensure the lone green guard near the torch doesn't see you walking up in the darkness. Go up along the dark path to a door lit by a torch, within which is a room containing an NPC and, more relevantly, a Vial in the middle of the three jars along the upper right corner of the room. Go back down,step into the darkness to the left, cast Cloak, and go into the door on the lower left.
The next room has a patrolling green guard that patrols from the lower left to the lower center, then to the upper center near where you are, then to the upper left before reversing his course - essentially, he patrols in a backwards "C" formation. Take note of the green cell door to the left; once you gain the key that opens such doors throughout Lunpa Fortress, you would have to remember to get all the way back here, in order to get to a room containing some often-missed treasures. At any rate, once the patrolling guard stops in front of this cell door, run down along the opening of darkness behind him to get to the lower left exit of the screen. In the next room, once again immediately recast Cloak lest the lone green guard near the torch detects you, and run along the darkness to the upstairs stairwell at the lower left corner of the room.
In the second floor of Lunpa Fortress, you can see the vision range of patrolling green guards above. After recasting Cloak, run up along the shadows that are briefly available when the guards are at their left end of their limited patrol path, and dive into the right end of the shadowy gap in the wall to the right so that their vision ranges barely miss you. As soon as they start walking left again, run up through the shadows to make it through the door to the top. In the next room, the door immediately in front of you leads to a room with a couple NPCs, so go along the path to the right of it and exit down to a room where all of a sudden, you're detected by three guards dressed in red - red guards do not automatically throw you back to the dungeon entrance, but rather fight you as enemies called Brigands. Defeat the three brigands in battle, then proceed to the next room, fighting another red brigand along the way. The door behind the brigand features an area with an NPC named Donpa that will become important much later, but for now go down to the next room, where a green guard patrols in a "U"-shape. As the guard patrols up the right branch of the "U", run down the left branch into the next room; you're now behind a green cell door where you can see a key on a table in the enclosed room below, so while pointing down, use the Catch Psynergy to retrieve the Cell Key item. Now, all green cell doors you walk through open, and defeat the red brigand here.
To get the often-missed treasures described earlier, go through the bottom cell door of this room and be led to another room where another red brigand is stationed. Defeat him, and go up to the NPC-filled room beyond that if you wish, but then go out of the lower left exit, then in the next room go down the stairwell to the left to return to the first floor. Cloak yourself, go back up along the shadowy left area, return to the room with the guard that patrols in a backward "C", and follow him while cloaked so you get into the upper right dark area. When he starts patrolling down again, enter the closed cell door to find a room with four chests, and they contain: 100 Coins, a Lucky Medal, an Elixir, and the artifact item Mythril Circlet, which should prove highly useful. Now cast the Retreat Psynergy to return to the dungeon entrance, and this time, from the first large hallway, go down the lower right doorway to get to a green cell door, beyond which are two stairwells leading up and leading down. You could have come down here from the second floor through the right stairwell, but now you can go down the left stairwell to progress further.
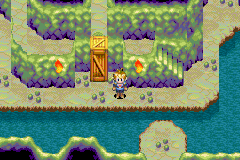
In a room with a bush and a closed door, use Whirlwind on the bush, then use Reveal to show that the seemingly flat wall behind it has a switch you can press to make the door open. Enter the door to find a more cavernous area with water. Go up and right to where a bush and a cell door is; the cell door leads to nothing, so Whirlwind the bush away and enter a door into a room that has three separate cells. Go into the middle cell to find a chest containing Power Bread, then leave out of the room's southwest doorway. Now go up to where a tall crate is, and push that all the way down until it falls to bridge a gap. Hop left from the crate and go beyond the cell door to the left, then whirlwind another bush and press another switch behind it to make another door open.
The final room of Lunpa Fortress triggers a cutscene leading to a boss battle as soon as you open the green cell door and go through it; the boss battle with Toadonpa, which has a lot of HP. When you defeat it, another lengthy cutscene eventually leads you back outside of Lunpa Fortress. Now you can shop for a variety of strong artifacts in the town's now-open vendors, and leave Lunpa through the cave to the west of it.
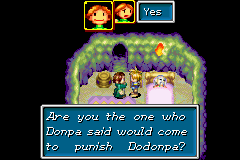
After all that, there still remains one last important collectible to obtain, so sneak back into Lunpa Fortress all over again, and make it all the way back to the room where Donpa is. The easiest way to return there is to get back to the room relatively close to the entrance room that has two stairwells, one going up and one going down, and take the right stairwell this time. From there, go in a northern direction, casting Cloak to avoid detection when necessary. Talk with Donpa, and the woman NPC will allow you passage into the door she was previously blocking. The room contains a Mercury Djinni, Tonic, which you don't have to fight. Lunpa Fortress is now complete, so either cast Retreat or let yourself get caught by a green guard to return to Lunpa. Another reward for completing this sidequest is given late in Golden Sun: The Lost Age if this save file is used for Password data transfer (specifically, an Orihalcon in Atteka Inlet).
Enemies
| Bestiary of Lunpa Fortress | ||||||||||
| Monster Name | LVL | HP | ATK | DEF | AGI | EXP | Coins | Weakness | Drop | Drop Rate |
| Brigand | 21 | 421 | 251 | 69 | 104 | 162 | 190 | 1/32 | ||
| Kobold | 20 | 220 | 230 | 62 | 75 | 107 | 154 | 1/16 | ||
| Rat Warrior | 20 | 208 | 226 | 49 | 121 | 100 | 160 | 1/32 | ||
| Vile Dirge | 21 | 173 | 228 | 56 | 120 | 75 | 98 | 1/16 | ||
| Toadonpa (boss) | 27 | 2800 | 266 | 52 | 82 | 999 | 3200 | 1/1 | ||
Enemy Formations
- Group 1: Rat Warrior x1-2, Vile Dirge x0-1
- Group 2: Kobold x1-2, Vile Dirge x0-1
- Group 3: Vile Dirge x1-2, Rat Warrior x0-1
- Group 4: Kobold x1, Rat Warrior x0-2
Note: The Brigands are only fought in the upper portion of the fortress, and not as random encounters. All the other monsters are found only in the basement.
Collectibles
![]() Tonic - After freeing Hammet, go back into the fortress and talk to Donpa, who will let you enter a storage room where this Djinni is found for free.
Tonic - After freeing Hammet, go back into the fortress and talk to Donpa, who will let you enter a storage room where this Djinni is found for free.
![]() Cell Key - On a barrel past a locked gate, use Catch to get it.
Cell Key - On a barrel past a locked gate, use Catch to get it.
![]() Power Bread: In a chest behind three green cell doors in the cavernous lower level.
Power Bread: In a chest behind three green cell doors in the cavernous lower level.
![]() Vial: In an upper-right pot in a small room with only one old man in it.
Vial: In an upper-right pot in a small room with only one old man in it.
When you get the cell key, backtracking will bring you back to a green door in the upper left area of one hallway. This door is easily missed, and behind the door is a room with four chests. These could represent the "ill-gotten goods" Dodonpa has acquired over his career. They contain:
![]() 100 Coins: In the left chest.
100 Coins: In the left chest.
![]() Elixir: In the top chest.
Elixir: In the top chest.
![]() Lucky Medal: In the right chest.
Lucky Medal: In the right chest.
![]() Mythril Circlet - In the bottom chest.
Mythril Circlet - In the bottom chest.
Background and story
The village of Lunpa was founded as a bastion for honorable thieves by its namesake, Lunpa the Righteous Thief. However, when Lunpa the thief went forever missing during the great flood while out sailing with Babi, Lunpa's son Donpa was aggrieved. Donpa was driven to spoil his own son, Dodonpa, which most certainly was not a good idea; Dodonpa grew to be a thoroughly amoral brigand who established lordship over the modern-day town through an iron fist and who turned Lunpa's legacy into an empire of ruthless thieves. Lunpa Fortress became the empire's bastion and Dodonpa's personal headquarters, and is also the place where Donpa - now an elderly man - is kept within his room. Also kept within rooms are the rest of Dodonpa's family and various maidens brought here as concubines against their will.
Early in Golden Sun, the wealthy merchant and lord of Kalay, Master Hammet, attempts to do business with the oppressed peoples of Lunpa because the eruption of Mt. Aleph and the subsequent shower of Psynergy Stones across the world destroyed the bridge that he would have needed to take in order to return to Kalay from Vault. Naturally, Dodonpa would not pass up this opportunity, and has his brigands take Hammet captive and place him in Lunpa Fortress' deepest catacombs. Dodonpa proceeds to use Hammet as, in his own words, his "little money tree" by extorting ransom from Kalay and Hammet's wife Layana.
Later in Golden Sun, Isaac's traveling party of Adepts may decide to put their pursuit of Saturos' group on hold and return to Angara to attempt to rescue Hammet themselves; this decision came about as a result of the concerns of one of Isaac's party members, Ivan, the servant of Hammet who originally joined Isaac's party because he was unable to save Hammet on his own terms. The Adepts arrive at Lunpa and use the Cloaking Psynergy they received from Babi in Tolbi to sneak past the patrolling brigands of the fortress. When they finally find Hammet's cell deep in the cavernous basement floor of the fortress, Dodonpa himself suddenly steps in to announce that he won't be giving Hammet up to little kids like them; he flips a switch to open up a chamber containing a massive, amphibious monster Dodonpa was vain enough to name after himself and directs it to crush them.
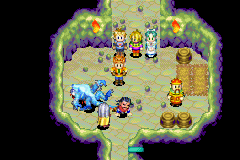
Isaac's party engages the monster and defeats it in battle, but are surprised to find its dead form has fallen onto Dodonpa's leg; Hammet explains that when Dodonpa saw his monster was losing, he attempted to attack the Adepts behind during the battle; while the Adepts certainly don't have any kind words to say to that, Ivan nonetheless has them lift the monster's body off to the side, but Dodonpa remains too wounded to stand up straight. Donpa himself arrives to talk down on his own son and propose to the others that Dodonpa be locked up in this very cell for a while so that he may reform. While he thanks the Adepts for the critical help they provided him and Lunpa as a whole, he warns that some of Dodonpa's henchmen are still loyal to them and would attack Hammet if they see him, so Isaac would have to escort Hammet out by the same means with which he snuck into the fortress. Also, if henchmen come down here and find Dodonpa locked up and free him, Dodonpa would attack Kalay in an act of revenge; Donpa, however, has spread the rumor throughout the fortress that "brigands" had snuck in to kidnap Hammet but failed and ran off, causing many of Dodonpa's men to leave the fortress in search of the intruders and causing the rest of them to let nobody down into the basement at all now. Thanking Donpa for his shrewd and effective help, Isaac's group successfully extract Hammet from Lunpa Fortress and return to Kalay.
Lunpa Fortress is left in a state of uproar over the rumor that warriors from Kalay somehow snuck in to attempt to extract Hammet; however, all of the brigands are nonetheless unaware that Hammet actually was extracted from the fortress and that it's Dodonpa now who resides in the cell in the basement. After Hammet is returned to Kalay, Isaac's group may once more decide to temporarily come back to Lunpa and sneak into its fortress to meet with Donpa. Donpa thanks them for their help and rewards them with a Djinni that he claims to have fought "long ago". If Isaac's group goes back down to the cell in the basement, they'll find Dodonpa locked in there, outwardly claiming that he'll "turn over a new leaf" but is shown by the Mind Read Psynergy that he'll get them all once he gets out.
