Mars Lighthouse
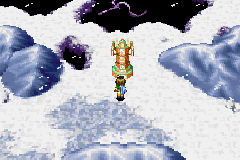
Mars Lighthouse (マーズ灯台, Mars Lighthouse), the Mars-aligned of the Elemental Lighthouses, is the final storyline dungeon in Golden Sun: The Lost Age. Located far north in the world of Weyard's snowy Northern Reaches, it is situated at the northern edge of the world, near a gaping abyss north of Prox. As a lighthouse, casting the Mars Star jewel into its aerie will light the tower's respective Mars Beacon to expose the world to Mars elemental power. Should all three other lighthouses throughout Weyard have their beacons lit at the same time as Mars, the free use of the reality-bending force of Alchemy will be returned to the world via the Golden Sun event.
Walkthrough
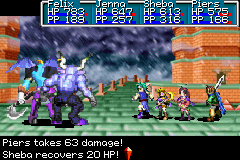
As the last of the dungeon-style locations the party is required to complete in the main storyline in Golden Sun: The Lost Age, Mars Lighthouse is a suitably large example of a dungeon, with challenging puzzles and opponents and strong gear that can be found. The labyrinth inside can be described as branching into upper and lower "halves," but the dormant and frozen-over status of the structure renders the upper route impossible to progress through until the lower route is completed. A battle against a pair of Flame Dragon bosses that takes place at the end of the bottom route will award the party the Mars Star and "reactivate" the rest of Mars Lighthouse so that the upper route can be fully explored, and the party will eventually be allowed to Teleport to the aerie of the tower to fight the final boss in three stages.
The tower can only be accessed once the eight-member party has used the Magma Ball from Magma Rock to cross into the Northern Reaches, entered the village of Prox from the south end, and exited it out of its north end. While battling in Mars Lighthouse, both of the Mars Adepts in your party, Garet and Jenna, regenerate 4 PP at the end of each turn.
Lower "frozen" route
The first screen you enter upon stepping into the overworld icon of the tower "hides" a chest containing an Apple at the upper left; before stepping into the small entrance, climb up the two short ladders to its lower right to claim the item.
The main "lobby" of Mars Lighthouse that you immediately step into is covered with chunks and masses of ice. Immediately go up the stairs to the right and cast Pound on a thin, icy-white pillar-like stake to reach the chest just underneath it, which reveals itself to be a Mimic that drops a Cookie when it is slain. Of the various exits lined along the north wall in the lobby, head through the doorway right of the central staircase that leads upstairs, and you will end up following along several winding screens in a linear route. Shortly after you have Pounded your way past a room with winding and broken pipes, you will end up next to a shaft of ice poking through the floor next to a Mars Djinni that cannot yet be retrieved; cast the Grind Psynergy on the ice to make a crack appear in the massive wall of ice you passed by earlier. You can either backtrack to that ice wall or cast the Retreat Psynergy and go to that wall again; either way, cast the Burst Psynergy on the crack to remove the wall.
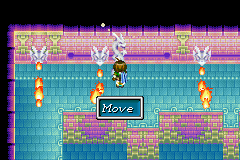
Now in what can be called the "sub-lobby" of Mars Lighthouse's lower "frozen route," ignore both the circular pattern on the floor and the first door to the left as you head past it to the other door at the far left end. You are now on the elevated portion of a horizontally aligned room, and various flamethrower-like devices mounted on the wall threaten to push you back to the bottom if you touch their fire spouts (and this will damage all eight of your party members for 10 HP each). Since there is a stationary flamethrower currently making it impossible to go into the downstairs stairwell at the east edge, you will have to cast the Move Psynergy on the narrow dragon statue at the northwestern corner of the room and carefully shift it one tile to the right at a time, eventually parking it in front of the rightmost spout.
Assign the Move Psynergy to a shoulder button shortcut to cut down on time and give yourself more control over the puzzle, for both of the moving flamethrowers will temporarily stop while the Move effect is in the midst of shifting the position of the statue. Two ledges along the bottom of the elevated portion can be helpful, but a general rule of thumb is to never move a statue while standing right under it and the flamethrower is immediately above it. It can also be helpful to purposefully bring up a menu with either A or Start because the perpetually flowing jets of flame will realign themselves and shoot straight down even while time is supposedly "frozen" from the fact a menu is open.
One you arrive downstairs to a floor with a sliding ice area, step left onto the ice and move up, right, down, and left to clear it, and head down and cast the Blaze Psynergy on the flaming torch to make the dragon head statue underneath it shoot a wide fireball that creates a crack in the ice wall to its right. Backtrack past the sliding ice section and now take the south fork from the stairwell you came down, and step down in front of the crack and Burst it open. Since you cannot do anything in the room beyond the wide doorway you have opened up, now head into the doorway at the right edge of the screen, climb up the small ladder behind the dragon head statue facing south, and cast Blaze to make this shoot a fireball that clears the icy route south.
You will end up stepping out of the left doorway in a hallway with three doorways; step into the center door first to claim an Orihalcon from a chest, then step into the right door to enter a puzzle room where another dragon head statue is regularly firing wide fireballs south (getting caught up in this drives you into the south end and deals 10 damage to all party members). First, head up the "route" left of the central "ice trail" and remotely Pound both of the left icy stakes down, then do the same with all three icy stakes that can be reached from the "right route up." Now run up the central ice trail and make use of the safe spots you pounded open to avoid the large fireballs. Following this room is a long, narrow hallway leading left.
The next room is a larger sliding ice puzzle with a Mercury Djinni standing in it. Before stepping into the ice, remotely Move the dragon statue just left of where you first entered the room so that it slides off to the left. Then slide down the ice and slide left, then down, then left, then up, then right, then up, then left against the dragon statue, then down, and then left so you end up above the Mercury Djinni standing in the room. Slide down and interact with it to try to fight and earn the Mercury Djinni Balm, then slide up and go upstairs. You will quickly drop down a wall slide to a chest granting you the Teleport Lapis Utility Psynergy item, which gives the equipped Adept the Teleport Psynergy. Using it on the detailed "teleport pad" just under the chest warps you to the connected pad back in the "sub-lobby."
Now that you have Teleport, you will have to enter the westmost door and get past the wall-mounted flamethrower puzzle again (though the dragon statue you had parked in front of the rightmost spout earlier will still be there, so using the two ledges to get back downstairs should be easy). Back at the floor with the smaller sliding ice puzzle to your left, go south and left into the wide doorway you opened up by blowing up the ice blocking it earlier, and cast Reveal on the empty space between the six blocks arranged in an oval. Cast Teleport on the exposed teleport pad.
From the elevated teleport pad you appear on, go downstairs to a highly cluttered, horizontally aligned hallway. Before dropping onto the floor switch in front of you, go down the steps to your lower right and head west along the lower perimeter to claim the extremely useful Valkyrie Mail from the chest at the far west end. Along the way, you will preview what will be a "timed obstacle course" filled with ice chunks. When you are ready, slide down onto the switch; this will cause a wall-mounted flamethrower to begin proceeding west toward the dragon head statue at the west end of the course. You will effectively be "racing" against this flame as you rush west through the ice-filled course, quickly casting Pound to get past the ice stakes. Hug the north edge of the course whenever possible to avoid getting caught up in dead-ends along the south edge so that you can make it to the door above the dragon head statue in time to avoid getting hit by its fireball, which will otherwise send you plummeting into the pit at the east end of the course. (This deposits you at a point where you can try the course again right away.)
After the icicle "race course," making use of the teleport circle visible to your right frankly saves time because it brings you to where a self-powered dragon head statue thrusts you directly into a pit next to your destination. Go upstairs and climb the ladder left of this statue and cast Move to move the narrow dragon statue at the upper left corner one tile right so that the statue no longer automatically shoots fireballs. Go south of this room and follow along until you get back to the teleport pad to your right, and you can now safely take it without getting blown into the pit this time.
Follow the linear hallways to a hopping puzzle above a large chasm; hop down the left platforms onto the six-tile platform, then hop up its northeast corner, then hop right onto the sliding ice tile, then hop south four times, and finally hop right and north to the lone chest. It contains the Sol Blade, the best weapon in the game for either Isaac or Felix to be equipped with. Step onto the sliding ice to fall into the large room below and go back upstairs, and now hop down the left stretch of platforms five times. Take the room's south exit.
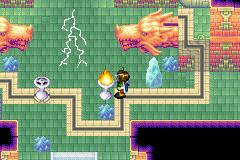
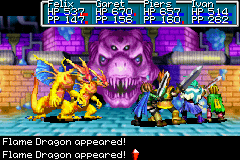
You will follow along a long and winding, linear route to a chamber where two large, orange dragons are trapped motionless inside a slab of ice. Cast Blaze on the flaming torch from the right to create a crack in the ice, then cast Burst to break open the ice and automatically initiate the boss battle with the two Flame Dragons inside. They will fight with similar abilities to the previous boss fight in the game, which took place at Jupiter Lighthouse. When you defeat them, a cutscene will take place, after which you must interact with the Mars Star to add it to your inventory in the form of a Mythril Bag. After the dragon head statue in the room "talks" to you, stand in front of it and use the Mythril Bag in your inventory to "reactivate" Mars Lighthouse, changing the color of the dungeon's overall tileset. Cast Retreat to return to Mars Lighthouse's exterior screen.
Upper "reactivated" route
Return to the main lobby of Mars Lighthouse, and go up the steps to your left and cast Blaze up on the flaring torch to have the northwest dragon head statue clear the upper swath of the lobby's ice. Head to the base of the ice that just got cracked and blow away that ice with Burst to open up the door at the northeast corner of the lobby. This leads you through several screens to the Mars Djinni seen earlier, Fugue, which you must battle to acquire.
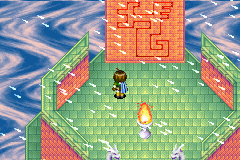
Regardless, head up the central stairwell in the main lobby and hop across the platforms above the lava to get up the next stairwell and reach what can be called the "hub" area for the "upper" segment of Mars Lighthouse. The dragon head statue imparts instructions and shows that each of the four patterned walls flanking it hides a door that manifests as you approach it. Each door leads to what can be called a "sub-dungeon" that lies in its own "side tower" across a bridge, and the puzzles inside said side tower are similar to previously explored Lighthouses in both this game and the first game. They can be done in any order, and at the end of each sub-dungeon is a colored torch that Jenna must cast Blaze on to "light up" a glyphic pattern behind it. In each case, you will then have to return to the hub either by backtracking through the sub-dungeon or casting Retreat and going up the stairs to the hub; the latter method is somewhat faster on average.
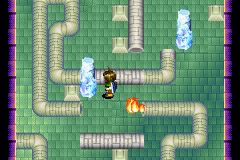
- "Mercury" branch: Head through the lower left entrance within the wall labeled "Fish," and follow the linear route into the side tower until you emerge upstairs into a room with a sliding ice puzzle. Step left onto the ice and press down, right, up, left, and up so that you can go downstairs into a room with rolling pipes. Head down the narrow trail to the left and roll the center pipe up, then cast Frost on both puddles in the room. Go back up left and roll the center pipe back down and the top pipe right, then roll the bottom pipe to complete the circuit without allowing the flame to melt either ice pillar.
- Go back upstairs and step south onto the ice to fall off the bottom edge, and then step left onto the ice from the right and press down, right, and up so that you can position yourself right of the now-lit torch and cast Blaze on it when the wall-mounted flamethrower is closest to the right, igniting the flammable gas it is spewing. This causes the dragon head statue to carve a swath through the sliding ice puzzle. Now slide off the bottom edge of the ice and step left onto the ice again, and press down, right, down, and left to reach the doorway that will eventually bring you to the tower's blue torch.
- "Venus" branch: Head through the upper right entrance within the wall labeled "Mankind," and follow the route into the side tower until you reach a room with three statues, which you must remotely shift out of the way using Move. Moving the "wrong" statues will get you a flame jet to the face that will damage the party for 10 HP each, so go past the right statue first, then go past the leftmost statue in the next, longer room. Go upstairs, hop onto the ledge with two gray cubes on it, and use the Carry Psynergy to insert them into the two elevated gaps in the wall so that the third cube at the upper left can be pushed all the way in front of the flamethrower to the right.
- Walk south along the tightrope, then push the dragon statue off to the right to create a shortcut back. To pass the two sliding flamethrowers, cast Felix's Sand Psynergy to let them harmlessly pass over you, and materialize back once they have passed over to your right. The sand tile in front of the second flamethrower lies closer to the right end of the flamethrower's course, so you will have to time your reemergence right as the flamethrower has just arrived at the far right end of its course. Climb down the ladder to the left and follow along to the yellow torch.
- "Jupiter" branch: Head through the upper left entrance within the wall labeled "Bird," and follow the route into the side tower until you reach a starting room with two "Cyclone portals," like what was prominently featured in Jupiter Lighthouse. Cast the Cyclone Psynergy to take the left portal into the floor above, then when you get to two more portals oriented back down, take the left one down. You will land next to a narrow dragon statue that you must remotely Move one tile right to block the flamethrower next to it. That way, when you take this chamber's southeast portal up and follow along back to the starting room, then take the left portal up again but take the right portal back down this time, you will not be automatically sent plummeting down by the flames.
- The upper half of the large chamber requires you to climb down the northwest ladder and cast Reveal on the circle of blocks, then cast Cyclone to take the portal that gets exposed within the circle and eventually make it to the chamber's northeast area. Head northwest and wait until the moving flamethrower at the northeast part of the room shifts up and left, letting you safely position yourself two tiles right of the conduit block and remotely Move it left into the hole in the ground. Deliberately let yourself get hit by the flamethrower to drop back down to the lower level with the circle so that you can climb back up the northwest ladder and reach the purple tile you just activated; cast the Hover Psynergy to float over the northwest moving flamethrower and take the central Cyclone portal up.
- Where you next emerge into is in front of a dragon head statue that is about to fire a fireball south, which will send you plummeting back into the starting room mentioned in the first paragraph. Immediately head left of it to find a chest with a Psy Crystal, then wait until the statue has just launched a fireball. Run south immediately to the chasm and cast Reveal to expose and hop onto a platform in the center of the circle of yellow tiles that the four floating platforms partially make up, and hop off to the right before the next fireball hits you. Proceed to the purple torch.
- The upper half of the large chamber requires you to climb down the northwest ladder and cast Reveal on the circle of blocks, then cast Cyclone to take the portal that gets exposed within the circle and eventually make it to the chamber's northeast area. Head northwest and wait until the moving flamethrower at the northeast part of the room shifts up and left, letting you safely position yourself two tiles right of the conduit block and remotely Move it left into the hole in the ground. Deliberately let yourself get hit by the flamethrower to drop back down to the lower level with the circle so that you can climb back up the northwest ladder and reach the purple tile you just activated; cast the Hover Psynergy to float over the northwest moving flamethrower and take the central Cyclone portal up.
- "Mars" branch: Head through the lower right entrance within the wall labeled "Dragons," and follow along to the side tower — but before you enter its interior, proceed further east past it to find an unexpected chest containing the Alastor's Hood. In the bottom part of this lava-filled room, cast Burst on the left, cracked wall and hop across the left swath of platforms in the lava to step onto a floor switch at the northwestern corner, which will cause a flamethrower to light a torch. Hop back and burst open the cracked wall to the right, and hop along the right swath of the platforms so that you can reach the torch from the northeast corner and cast Blaze to make the dragon head statue in the room create a crack in the center of the bottom part of the room. Hop back and burst open this central wall, and follow along the platforms and ladders until you can go upstairs.
- The next floor also features rolling pipes funneling flames. After rolling the pipe near you up to cover up the loose jet of flame, head to the "fork" just southeast of this pipe piece. Take the south fork, head through the red stairs underneath the flamethrower, and remotely Move the narrow dragon statue one space left. Return to the fork and take the right fork this time, and taking the red staircases above the flamethrower and narrow statue will position you above where the narrow statue now lies; remotely Move that one tile left again. Return to the fork once again, take the south fork again, and now go north past the narrow statue now blocking the flamethrower. Go to the northeast corner of the room past the horizontal flamethrower, take the red stairs way to the left, and push the left rolling pipe back down. Go back to the northeast corner and take the winding, linear route past the horizontal flamethrower you just shut off. At the south end of the chamber is a doorway to the red torch. (If you do not want to use Retreat to make it back to the hub, the pipe at the lower left corner of the room can be rolled out of the way.)
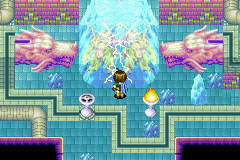
Once you return to the hub of "upper Mars Lighthouse" after having lit all four colored torches at the end of their respective sub-dungeons, the dragon head statue will speak to you again, and it will then create a Teleport pad on the ground by blasting the ground with a fireball. Casting Teleport on this Psynergy will bring you to the aerie of Mars Lighthouse itself; you can hop left and up along the floating platforms and still be able to Teleport back and leave the building. Be warned, however, that you will cross the game's point of no return while walking up the gray steps at the center of the aerie, just south of the open well; a long cutscene will transpire and automatically thrust you into the game's final storyline battle, which is against three forms of a monster named the Doom Dragon in a row without any break in between. If you can beat this, the gameplay portion of Golden Sun: The Lost Age is complete, and there will come a point when you can control Felix by himself and talk to his party members individually. Follow along with the remaining cutscenes of the game by approaching the well and selecting "Yes" when prompted.
Enemies
| Bestiary of Mars Lighthouse | ||||||||||
| Monster Name | LVL | HP | ATK | DEF | AGI | EXP | Coins | Weakness | Drop | Drop Rate |
| Aka Manah | 35 | 479 | 405 | 129 | 187 | 546 | 318 | 1/128 | ||
| Devil Frog | 35 | 282 | 347 | 102 | 173 | 417 | 248 | 1/32 | ||
| Doodle Bug | 35 | 202 | 329 | 109 | 173 | 417 | 176 | 1/32 | ||
| Fire Bird | 35 | 303 | 376 | 124 | 259 | 5838 | 304 | 1/64 | ||
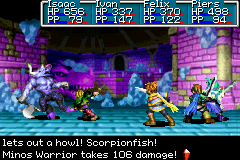
| Minos Warrior | 35 | 353 | 397 | 130 | 164 | 525 | 276 | 1/64 | ||
| Raptor | 35 | 366 | 354 | 96 | 180 | 521 | 295 | N/A | ||
| Mimic (unique) | 38 | 1008 | 397 | 126 | 224 | 1668 | 772 | 1/1 | ||
| Mercury Djinni (Balm) (unique) | 35 | 940 | 300 | 94 | 261 | 1112 | 720 | N/A | ||
| Mars Djinni (Fugue) (unique) | 35 | 950 | 304 | 95 | 267 | 1145 | 731 | N/A | ||
| Flame Dragon (large) (boss) | 45 | 5724 | 400 | 137 | 158 | 2502 | 1521 | N/A | ||
| Flame Dragon (small) (boss) | 45 | 5348 | 389 | 134 | 215 | 2502 | 1872 | 1/1 | ||
| Doom Dragon (three heads) (boss) | 48 | 5000 | 470 | 155 | 200 | 0 | 0 | N/A | ||
| Doom Dragon (two heads) (boss) | 48 | 4200 | 470 | 155 | 200 | 0 | 0 | N/A | ||
| Doom Dragon (one head) (boss) | 48 | 4000 | 470 | 155 | 200 | 0 | 0 | N/A | ||
Enemy Formations
- Group 1: Doodle Bug x1-3
- Group 2: Fire Bird x1-2
- Group 3: Raptor x1-2
- Group 4: Devil Frog x1, Raptor x0-1
- Group 5: Minos Warrior x1, Fire Bird x1
- Group 6: Minos Warrior x1-2
- Group 7: Aka Manah x1, Minos Warrior x1
- Group 8: Aka Manah x1-2
Collectibles
 Apple: Found in a chest in the first screen in the exterior.
 Cookie: Dropped by a Mimic in the southeast corner of Mars Lighthouse's "main lobby."
 Orihalcon: Found in a chest past the center door of a three-door hallway leading to an "ice trail" room.
 Balm: A Mercury Djinni found and battled in a large sliding ice room.
 Teleport Lapis: A utility Psynergy item found part-way through "lower Mars Lighthouse." It grants the Teleport Psynergy, which makes use of patterned, circular pads on the ground in areas other than the overworld. Its function changes in the overworld to instead instantly bring you and your ship near one of the previously visited "main" towns in the game.
 Valkyrie Mail: Found in a chest at the far west end of the "obstacle course race" hallway; it can be reached before initiating the race against the wall-mounted flamethrower.
 Sol Blade: Found in a room with many platforms, some of them covered in sliding ice, floating above a dark chasm. The chest is located shortly before the Flame Dragon boss battle.
 Psy Crystal: Dropped by the Flame Dragons.
 Fugue: A Mars Djinni that can be reached by clearing away the ice in the northeast corner of the main lobby after reactivating Mars Lighthouse with the Mars Star.
 Psy Crystal: Found in a chest in the Jupiter-based side tower.
 Alastor's Hood: Found in a chest hidden off to the far end of the exterior screen containing the entrance into the Mars-based side tower.
History
Mars Lighthouse, much like the other three Elemental Lighthouses, played a critical role in the Alchemy-focused affairs of Weyard's ancient past as a fount of its respective element in Psynergy. According to one villager in the modern-day incarnation of the village of Prox, which is located near the Lighthouse, the village originally flourished because "concerned Adepts lit the fires of the Mars Lighthouse." While the Mars Beacon remained in place atop the tower's aerie, Prox and its people maintained a degree of worldwide fame that had earned them the moniker, "the people of the northern flame."
Alchemy was sealed away within Mt. Aleph as an outcome of efforts to bring an end to the wars that the abuses of Alchemy gave rise to, and the beacons of the four Elemental Lighthouses were extinguished as part of the process. This caused each Lighthouse to effectively "stop up" the flow of elemental energy throughout the world. The ancients, however, left a system in place that allowed for each Lighthouse's Beacon to be reignited by casting its corresponding Elemental Star, a gem containing the purified essence of its element, into the well atop its aerie. Furthermore, should all four Beacons be reestablished, the Lighthouses were apparently programmed to shoot out beams of their energies into the airspace above Mt. Aleph and form a sphere of Alchemy-based energy called the Golden Sun, which would in turn break the seal within Mt. Aleph.
Mars Lighthouse is located close to a gigantic, seemingly bottomless rift that is gradually increasing in scale, and it will only be a matter of time before the lighthouse itself plummets into the abyss and Weyard is unexpectedly locked out of its own capacity to be saved. The ancients had not realized that Alchemy and the free flow of elemental energy were what physically held Weyard itself together. Realizing the existential threat to their own village first and foremost, the leaders of Prox decide to send out their finest warriors, headed by Saturos and Menardi, on a task to retrieve the Elemental Stars from Mt. Aleph's Sol Sanctum and reignite every Lighthouse beacon with them. This becomes a world-spanning quest involving multiple other parties both allied with and opposed to Saturos, and he and Menardi lose their lives as an outcome of the conflict. Nonetheless, efforts headed by their initially unwilling companion Felix to light the Lighthouses successfully result in the lighting of the beacons atop the Elemental Lighthouses of Mercury, Venus, and Jupiter.
The need for the Mars Star to be cast down into Mars Lighthouse becomes all the more urgent when it is found by the main cast that the warming influence of the Mars element is being suppressed on a global scale by the active Beacons of the other three elements. With the world now experiencing an unnatural global chill that is intensifying by the hour, it is up to Felix, his newfound comrade Isaac, and their respective parties of battle-hardened Adepts to finish the job in time to save the planet.
However, the omniscient guardian of the seal placed on Alchemy, the Wise One, had originally tasked Isaac and Garet with pursuing Saturos and putting a stop to his quest to light the Lighthouse beacons, claiming at the time that Alchemy was nothing more than a dangerous power that could be misused if let free. This was, in fact, a hidden test of Isaac and his companions' worthiness as protectors of the world. They were intended to find out for themselves that Alchemy is utterly necessary for the world's physical survival despite the risks of abuse, and the Wise One now intends to test how willing they are to accept grave personal sacrifices in the name of saving and guiding the world. To this end, he lures Isaac's father, Kyle, and Felix and Jenna's father and mother to Mars Lighthouse and merges and transforms them into a terrible three-headed dragon in advance of Isaac's arrival to the aerie.
Prior to Isaac and Felix's entry into Mars Lighthouse, two other warriors from Prox who were comrades to Saturos and Menardi, Karst and Agatio, had entered Mars Lighthouse intent on lighting the Mars Beacon themselves, having previously stolen the Mars Star from Isaac and Felix. However, as they wandered through the dormant structure, the Wise One appeared before them and supposedly appraised them as "lacking the will to go any farther" before transforming them into mindless dragons in their own right. When Isaac and Felix later enter Mars Lighthouse, they first seek out Karst and Agatio and intend to take the Mars Star from them, and they soon happen upon the dragons and dispatch them. The beasts transform back into the dying forms of Karst and Agatio in front of them; despite their prior antagonism toward Felix, the duo hand him the Mars Star and implore him and Isaac to finish the job. Felix immediately inserts the Mars Star into an ancient mechanism nearby to reactivate the heat-based systems of Mars Lighthouse, which allows his party to proceed to the aerie of Mars Lighthouse.
Felix and Isaac's full party soon reach the aerie, but the Wise One is waiting to confrontationally greet them as "betrayers" and demands Isaac and Garet explain why they disobeyed his command and are now lighting the Lighthouses on purpose. When they explain what they had learned about the world's physical reliance on Alchemy and its inevitable collapse into Gaia Falls should the Mars Beacon not be rekindled in time, the Wise One warns that mankind will inevitably bring about its own destruction with Alchemy's release regardless. To reinforce his point, the Wise One discloses to the Adepts something about their quest he had caught wind of: that the particular adept named Alex, who had been helping Saturos and Felix's side light the Lighthouse beacons up until this point, is now awaiting Alchemy's release at Mt. Aleph so that he can claim unimaginable power for himself just by being at the center of the process. The revelation of this deception on Alex's part staggers the Adepts, but Isaac says that this does not matter for now and that lighting the beacon must be done anyway.
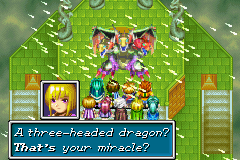
The Wise One stresses that he cannot directly stop the Adepts from lighting the final beacon's flame, but he nonetheless seems to exploit a loophole in the terms he is otherwise bound to and summons the three-headed dragon for them to fight through, passing it off as some incidental "miracle" that could feasibly stop everyone in their tracks. He disappears from view as the Adepts willingly wage their final battle, not realizing until after they have put the beast down that they unwittingly brought Isaac and Felix's long-missing parents to death's door. This, of course, drives everyone into an impassioned mixture of grief and rage, Jenna especially, but Isaac reveals to everyone that he knew exactly what he was doing from the very start but decided that the fate of the world ultimately came before his personal desires. He convinces everyone that this was a cruel sacrifice that was worth taking on in order to save all of Weyard and its peoples, and Felix soon casts the Mars Star into Mars Lighthouse and lights its beacon.
Shortly before the Mars Beacon emits its beam toward Mt. Aleph in tandem with the other Lighthouses, the Adepts atop Mars Lighthouse are communicated with via long-distance telepathy by both the children from Imil at Mercury Lighthouse and the oracle Hama at Jupiter Lighthouse. They explain that the Wise One came to them in their dreams and instructed them to keep away from the Lighthouses and Mt. Aleph to stay safe from the coming Golden Sun event. Naturally, the Adepts are incredulous as to the Wise One's seeming act of kindness at this point, but they realize they will have to follow suit and somehow get away from Mars Lighthouse themselves. Before they can even decide whether to take the nearly dead bodies of their parents with them, however, Mars Lighthouse emits a wave of energy that passes through everyone on the aerie, which results in all three parents regaining their life force just enough to survive. Everyone brings themselves and the parents back south to Prox, where the parents are nursed back to health.
Following this, the Adepts and the scholar Kraden can only speculate that the Wise One knew in advance that the three parents would be revived by the Mars Beacon, given that the parents were themselves Adepts capable of passively taking elemental energy into their own bodies. Kraden poses that the Wise One wanted to test the Adepts' resolve to complete their quest and prove themselves capable and willing of stemming the oncoming tide of conflict brought about by the free use of Alchemy.
By the time Golden Sun: Dark Dawn takes place 30 years later, Weyard has indeed undergone great geographic and societal upheaval that leaves its peoples split on whether to praise or blame Isaac and his allies for their efforts. Mars Lighthouse itself is not seen or visited in the game, so it is unknown what became of Prox situated just south of it. Incidentally, the energy that everyone was exposed to at the aerie of Mars Lighthouse has ended up slowing their rates of aging, causing them to appear as though they were in their early thirties despite being in their late forties.
Trivia
- If you cast Blaze on the torch after the fight with the Flame Dragons, the cracks previously seen in the iceberg that trapped them will reappear in midair. They can be walked through and can't be interacted with; attempting to cast Burst on the floating cracks fails, and casting Blaze again on the torch does nothing to change the floating cracks' appearance. Whereas the normal versions of the cracks remain embedded in the iceberg regardless of whether you enter a random battle or leave and reenter the room prior to the boss battle, the floating versions will disappear in those circumstances. It is unclear whether these coded behaviors of the floating crack relate to the two NPCs that are left behind on the ground after the boss battle. Once the key item near them is picked up, if you create the crack in essentially the same space as them, only the crack will disappear once a random battle occurs in the lower parts of the chamber, whereas both the crack and the NPCs will disappear once the room is left and reentered.
