Crossbone Isle (Dark Dawn)
- This article is about Crossbone Isle as it appears in Golden Sun: Dark Dawn. For the island's appearance in Golden Sun, see Crossbone Isle (Golden Sun).
Crossbone Isle (宝島 Treasure Island) is an optional and secret dungeon-style location in Golden Sun: Dark Dawn, much like how many Role-Playing Games feature one or more dungeons more challenging than the normal "final dungeon" that game features. It is filled with powerful and unique enemies and equipment, in addition to the two most powerful summons, within its ordered series of ten floors of puzzles, and is most notable for having the most powerful boss in the series that aspiring players can fight. Unlike other optional dungeons in Dark Dawn, Crossbone Isle is normally inaccessible until after players have defeated the game's final boss, although it can be reached before that point by means of the Endless Wall glitch.
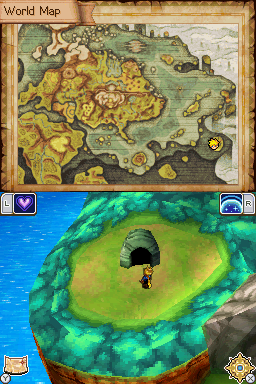
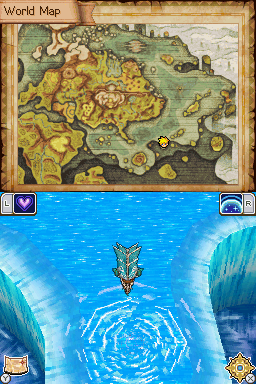
During the game's epilogue (when Matthew is in Belinsk after defeating the Final Boss), an NPC at the docks will mention a "special whirlpool" which is rumored to lead to a certain island. The NPC will also mention that someone has been there, and that person is currently in Yamata City. After loading the cleared game file, head to Yamata and find the man that the NPC in Belinsk was referring to. He will board Matthew's boat after he tells of the location of the whirlpool. Upon entering the Crossbone Isle cave, the man from Yamata will leave the party.
Walkthrough
Floors B1/B2
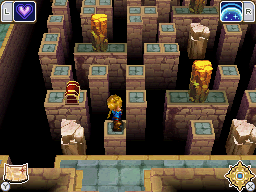
Proceed through the first screen and head down the stairs to the doors leading to the first pair of conjoined floors; the treasure chest immediately underneath you is a Mimic that drops a Psy Crystal when felled. Though each such pair of floors in this dungeon is set up so that falling from the floor above to the floor below is generally an outcome to avoid, going directly into the pillar-filled room below lets you collect two chests: Quality Zol and 220 Coins. Enter the floor above this to be presented with a puzzle that bears a strong resemblance to the first puzzle floor of the original Crossbone Isle.
First, head counterclockwise along the room's perimeter to reach a chest containing Ginseng, then come back down without stepping on the same crumbling earth platform you just used. Hop to the platform underneath the orange earth pillar and cast Move to move it left so that you can hop right one, up one, right twice, and down to the southeast chest, which has a Mythril Silver. Hop north twice, left once, north twice, and left twice, and Move the pillar below you in either direction. Hop down twice onto the crumbling earth platform, left one, down one, and left once, and push the western pillar left once so you can hop down, left, and down to the southwest chest, which contains 110 Coins. Hop back up and right once each, and cast Move on that earth pillar twice to move it to the right twice. From that platform, hop left once, up twice, right once, up twice, and left twice to make it onto the left edge of the room, and leave through the exit.
On the other side of the two earth pillars back in the hallway, it is possible to remotely Move both pillars right into the gap, and having them both fall in there results in a doubly long pillar that lets you easily move between floors without reentering the puzzle room.
Floors B3/B4
The second pair of floors, just like each pair of floors to follow, has a Psynergy Stone underneath your starting position. The puzzle room in the upper floor bears somewhat of a resemblance to the third floor in the original game's version of Crossbone Isle. Again, you should deliberately enter the lower room first to retrieve the contents of its two chests: 440 Coins and the Demon Mail.
From your starting platform, hop right twice to get to the nearby chest and claim 330 Coins. Return to the starting platform, and hop up once, hop left once, hop up four times, hop right once, hop down once, hop right once, hop down once, and hop right twice onto the crumbling earth platform. Hop down once from there, and now hop left, down, and right twice to get to the glowing blue southeast platform so that you can move the earth pillar off a floor switch. This makes both blue doors in this chamber lower. Hop back left twice, up, and right, and now hop right again and up to the bottom of the ring of platforms, where casting Search on the purple sparkles above the abyss makes a glowing red platform with its own earth pillar manifest in the center. Cast Move to shift that off its red floor switch and make the red door in the chamber lower. Hop down, then left twice, then up once, then left once, then up once, then left once, then up once, then left once, and finally up twice to make it to the top edge of the room. You can now claim the Rice Ration from the chest behind the blue door and the Apple from the chest behind the red door. Hop back down whence you came thrice, then hop left, to go through the other blue door and reach the exit.
Floors B5/B6
For the third time in a row, look into the pillar-filled room in the bottom floor first and empty the two chests here of their contents: 660 Coins and an Orihalcon.
In the room above this, hop onto the second platform to your right, hop up once from that, hop right, hop up twice onto the platform with the blue floor switch, and Move the earth pillar onto that switch to make dark-blue platforms rise from the abyss. Hop down once, right once, up once, right once, and all the way up to the chest in the northeastern corner, which contains a Plump Dumpling. Hop all the way back down to the lower blue platform and then left and down to make it back onto the platform right underneath the one with the red-orange floor switch, and Move the earth pillar right onto that to make dark-red platforms rise from the abyss. Hop up across the newly risen red platform at the lower right to get 550 Coins from the southeast chest. Then, head counter-clockwise along the room's perimeter and hop down to the platform just northeast of the one with the green floor switch, and remotely Move the earth pillar onto the switch to make all green platforms rise from the abyss.
Now position yourself back underneath the bottom earth pillar glowing red and move that right off the red-orange floor switch so that you can hop onto that long platform, then stand to the left of the floor switch and move the pillar right back onto it behind you. Hop left three times to get the southwestern chest, which contains Quality Zol. Green, yellow, red, and blue platforms should all be visibly elevated now, so hop all the way from the southwestern corner of the maze to the northwestern corner, hop right once, hop down once, hop right once, hop down once, and hop right once to the long platform with the yellow floor switch and the pillar on it. Move that pillar to the right so that you can hop up once and right once, then move the north pillar right off the green floor switch so that you can hop up. Stand left of the green floor switch and move the adjacent pillar left back onto it, and now hop northwest across the green, blue, and red platforms to make it to the pathway to the floor exit.
Floors B7/B8
This time, enter the top floor first, since hopping onto the left crumbling earth pillar in front of you, claiming the first chest's cache of 770 Coins, and hopping back down will unavoidably make you fall down into the floor below. Scour the lower floor of its chests before heading back into the floor above; doing so will grant you 880 Coins and a Dark Matter.
Starting from below the right crumbling platform, hop up twice, hop right three times, hop up twice, and hop left once to open a chest for a Dried Lizard. Hop up once, left twice, down once, and left once to a narrow platform two tiles "tall," and hop all the way north to the ledge at the top end of the wall. Step onto that ledge's east crumbling platform and hop down three times, right onto the "L"-shaped solid platform, hop once right of that, and now use Grip on the spire to your right. Move the orange earth pillar off its red glowing switch to lower the red door up north, then hop left once and hop up all the way to that red door. The chest way at the top contains the Iris Robe. Now hop back down and plummet back into the room below.
Revisiting the upper room once more, hop the right trail of crumbling platforms four times upward, then hop left onto the "two-tiles-tall platform", then hop all the way to the northern platform again. Now position yourself at the leftmost edge of that ledge and hop down four times, then left once onto a solid platform, and use Grip to transport yourself to the chamber's northwest ledge. You now have no choice but to hop down the entire western platform "route" to the exit at the southwest corner.
Floors B9/B10
In the hallway outside the final pair of rooms, the lone chest is another Mimic battle, and it drops a Cookie this time. Pick up 1010 Coins from the lone chest in the bottom floor. It is possible to get to the northwestern and northeastern corners of this chamber already and use Search to make teleport pads appear at those spots; create and use the pad at the northwestern corner first to reach the chamber that awards you the Charon summon tablet. Be warned, however: If you do the same at the northeast corner and get too close to its respective summon tablet, you will fight the hardest single enemy in the Golden Sun series thus far: this game's version of Dullahan. You will gain the Iris summon tablet if you win.
The floor above this one is essentially a floor you have to repeatedly engage with many times to collect all of its treasures and make it to a special chamber at the end, since it is impossible to collect everything in one "run" and you must climb back from the second floor to the first each time you fall. As the first example: Positioning yourself underneath the skull statue, remotely Move it onto the right floor switch; then, as fast as possible, hop up once, hop left once, hop up twice, and hop left once to get to the southwest chest, which contains 990 Coins. Here are the similar approaches to getting each of the other chests:
- Move the skull left, hop onto the crumbling platform right of that, hop up four times, and hop right to get to the southeast chest, which contains a Mist Potion.
- Move the skull right, hop onto the crumbling platform left of that, hop up four times, hop left once, hop up four more times, and claim the Orihalcon from the northwest chest.
- Move the skull left, hop onto the crumbling platform right of that, hop up north all seven times, hop right, and hop up once more to get to the northeast chest, which contains the Alastor's Hood.
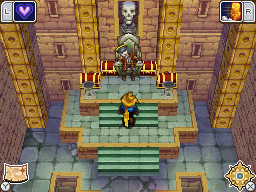
- Move the skull left, hop onto the crumbling platform right of that, hop up north all seven times, and cast grip on the spire to your left (be sure not to accidentally target the one way off to the upper right, so face left before you start casting), and immediately hop north the rest of the way to the chamber up north. This contains a pirate captain's corpse that you can use Spirit Sense on, and the chests surrounding him contain a Worn Bow that will get reforged into the Sagittarius Bow, the Cleric's Ring, the Bloody Claw, and a Dark Matter. If you plan on fighting Dullahan right after this, head back out and hop twice onto the crumbling platform underneath the right skull decoration. Otherwise, cast Retreat to return to Crossbone Isle's overworld entrance.
Collectibles
 Total of 5960 coins
 Psy Crystal
 Quality Zol x2
 Mythril Silver
 Ginseng
 Demon Mail
 Rice Ration
 Apple
Apple Orihalcon x2
 Plump Dumpling
 Dark Matter x2
 Dried Lizard
 Iris Robe
 Cookie
 Mist Potion
 Alastor's Hood
 Worn Bow
 Cleric's Ring
 Bloody Claw
 Charon Summoning Tablet
 Iris Summoning Tablet
Enemies
| Bestiary of Crossbone Isle (Overworld Ocean) | ||||||||||
| Monster Name | LVL | HP | ATK | DEF | AGI | EXP | Coins | Weakness | Drop | Drop Rate |
| Lizard Savage | 46 | 562 | 482 | 270 | 180 | 2744 | 204 | N/A | N/A | |
| Winged Dragon | 46 | 443 | 432 | 180 | 249 | 5684 | 130 | N/A | N/A | |
Enemy Formations (Overworld Ocean)
- Group 1: Lizard Savage x1-2
- Group 2: Lizard Savage x1, Winged Dragon x1
- Group 3: Winged Dragon x1
| Bestiary of Crossbone Isle (Overworld) | ||||||||||
| Monster Name | LVL | HP | ATK | DEF | AGI | EXP | Coins | Weakness | Drop | Drop Rate |
| Kobold King | 46 | 572 | 530 | 172 | 285 | 2030 | 191 | 1/16 | ||
| Warrior Bee | 43 | 361 | 463 | 234 | 249 | 1115 | 183 | 1/16 | ||
Enemy Formations (Overworld)
- Group 1: Kobold King x1-2, Warrior Bee x0-1
- Group 2: Warrior Bee x1-2, Kobold King x0-1
| Bestiary of Crossbone Isle (Interior) | ||||||||||
| Monster Name | LVL | HP | ATK | DEF | AGI | EXP | Coins | Weakness | Drop | Drop Rate |
| Great Dragon | 48 | 2108 | 708 | 330 | 265 | 11130 | 658 | 1/128 | ||
| Minos Knight | 48 | 1018 | 622 | 192 | 235 | 7350 | 215 | 1/256 | ||
| Recluse | 48 | 404 | 430 | 250 | 190 | 1155 | 156 | 1/16 | ||
| Red Wyvern | 48 | 685 | 576 | 197 | 275 | 5880 | 137 | 1/128 | ||
| Thunder Lizard | 48 | 1071 | 561 | 297 | 213 | 5250 | 411 | 1/128 | ||
| Warrior Bee | 43 | 361 | 463 | 234 | 249 | 1115 | 183 | 1/16 | ||
| Mimic (unique) | 48 | 1370 | 414 | 185 | 322 | 23100 | 1372 | 1/1 | ||
| Mimic (unique) | 48 | 1370 | 414 | 185 | 322 | 23100 | 1372 | 1/1 | ||
| Dullahan (boss) | 48 | 16000 | 657 | 325 | 297 | 58800 | 4732 | N/A | ||
Enemy Formations (Interior)
- Group 1: Great Dragon x1, Red Wyvern x0-1
- Group 2: Minos Knight x1-2, Red Wyvern x0-2
- Group 3: Recluse x1-2, Minos Knight x1
- Group 4: Recluse x1-2, Warrior Bee x0-1
- Group 5: Red Wyvern x1-2
- Group 6: Red Wyvern x1, Warrior Bee x1-2
- Group 7: Thunder Lizard x1-2
- Group 8: Thunder Lizard x1, Recluse x1
- Group 9: Thunder Lizard x1, Warrior Bee x1
Trivia
- Unlike its appearance in the first game, Crossbone Isle is shaped like a skull in Dark Dawn.
