Snowdrift Shrine

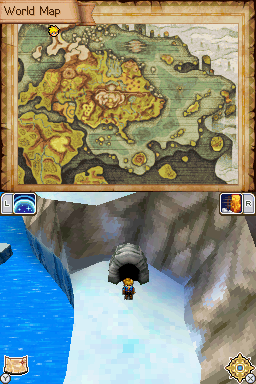
Snowdrift Shrine (イミル北西の雪山, Snowy Mountain Northwest of Imil) is a small dungeon-style location in Golden Sun: Dark Dawn. It is located at the northernmost point of Angara, to the northwest of Imil and Mercury Lighthouse. Its entrance is in a mountain ridge on the west coast, which can be reached by foot after landing on a beach on the east coast. It can only be entered once Himi uses the Search Psynergy. Its main feature is a sheer wall of snow which must be descended at the correct points in order to access a number of treasure chests, as well as reaching the central room where the Umbra Goggles are found.
Walkthrough
The dungeon becomes accessible as soon as Himi is recruited in Yamata City with the help of the Third Eye from Warrior's Hill, and it will be circled on the world map as the location of one piece of Umbra Gear once the nearby Iceberg Outpost has been completed. Given the two locations' mutual proximity, it is recommended that this dungeon be completed before sailing all the way back southeast to bring an important NPC to Tonfon. To permanently open up the cave icon on the map, cast Himi's Search Psynergy in front of it.
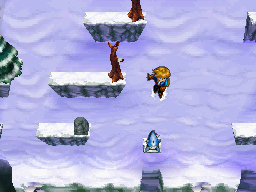
The brunt of this dungeon is centered on a unique sliding mechanic in which you must regularly head to the top screen (via either the leftmost or rightmost ladder on the bottom screen), jump down a cliff slide, and slide down the snowy slope to land on platforms below, which contain relevant items. It is possible to angle Matthew's course off to the designated side while sliding, and a Mercury Djinni initially standing in the center of this top screen will give a visual demonstration of this level of control when it uses the slope to escape you. You can immediately slide down after it and ram into it from behind to make it fall into the first screen. Hop off its former ledge to the right and climb down the wall ladder to fight and earn the Mercury Djinni Geyser.
To comprehensively collect the remaining treasures, first slide down the rightmost slide onto the small ledge immediately underneath it, then hop off to the left and wait until you have cleared the larger ledge right underneath it before making a hard right. If you have started holding right early enough, you should just barely make it onto the southeast ledge with the tree and the chest containing a Mist Potion. Go back up and slide down the leftmost slide, holding left the entire time so that you fall into the leftmost part of the cavernous pit. You should land near a chest containing the Phaeton's Blade. After you slide down from this chest, but before you go back upstairs off to the east, check the southwest dead-end to find a chest that reveals itself to be a Mimic, which will drop a Hard Nut when it is felled.
Go back up to the top screen and slide down the second slide from the right, hop off left once, and hop off right to a ledge just above a chest containing a Crystal Powder. Given how underwhelming this reward is, you might want to deliberately ignore it and hop off left instead, where you can climb down to the center of the south screen, make a warp pad materialize with the Search Psynergy, and claim the Umbra Goggles. This saves having to make another trip to the top of the screen on the Crystal Powder's account, so you can cast Retreat to leave the dungeon without any further delay.
Enemies
| Bestiary of Snowdrift Shrine | ||||||||||
| Monster Name | LVL | HP | ATK | DEF | AGI | EXP | Coins | Weakness | Drop | Drop Rate |
| Grisly | 39 | 483 | 434 | 200 | 185 | 2395 | 119 | 1/128 | ||
| Skinwalker | 38 | 332 | 380 | 128 | 218 | 1485 | 151 | 1/128 | ||
| White Wolf | 38 | 270 | 356 | 111 | 190 | 1188 | 117 | 1/16 | ||
| Mimic (unique) | 39 | 1110 | 336 | 148 | 253 | 17567 | 1190 | 1/1 | ||
| Mercury Djinni (Geyser) (unique) | 39 | 925 | 369 | 180 | 253 | 6388 | 425 | N/A | N/A | |
Enemy Formations
- Group 1: Grisly x1-3
- Group 2: White Wolf x1, Grisly x0-1
- Group 3: Skinwalker x1, White Wolf x0-2
- Group 4: Skinwalker x1, Grisly x2
