Air's Rock
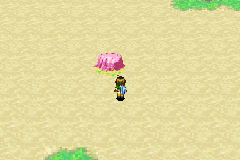
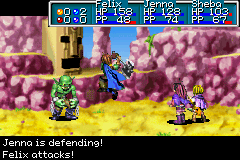
Air's Rock (エアーズロック Air's Rock) is a dungeon-style location that is explored in Golden Sun: The Lost Age. It is the Jupiter-aligned representative of four mountainous "Elemental Rock" dungeons scattered throughout Weyard, and it is located in the more central of Osenia's two prominent stretches of desert, north of Garoh and southeast of Yampi Desert. It can be explored as soon as Felix's party touches down on Osenia early in the game and will reward Sheba with innate knowledge of the Reveal Psynergy introduced in the previous game.
However, it can be held off on until the party has recruited Piers and acquired the Lemurian Ship to sail the seas with. Some players would recommend bolstering the party's ranks and PP reserves in this manner because the dungeon is infamously large and drawn-out enough that it lasts roughly twice as long as the final dungeon of the first game.
General information
About 10% through the game, Felix's party will step onto the island continent of Osenia. The two thirds of the landmass that can be explored at this point are non-linear enough that it is feasible for the party to ignore the first dungeon-style location they are expected to explore on the continent, Yampi Desert, and make a beeline toward Air's Rock. This can be done by traveling counterclockwise, south past Yampi Desert's west entrance, past Mikasalla to the south and toward Garoh to the east, and then north to Air's Rock, entering its surrounding desert from the east end.
Given the length of the dungeon and the relative strength of the random monsters within, it is far preferable to clear Yampi Desert first, which will grant you the Scoop Psynergy, the Jupiter Djinni Blitz, access to the town of Alhafra north of that, and useful gear like Blow Mace and Leather Boots. While Scoop is not used in Air's Rock itself, it is useful for picking the rest of Osenia clean of its secrets, like the Mars Djinni Spark in Mikasalla, to prepare for the dungeon. A boss battle that takes place on Alhafra's sailing ship is designed to be difficult for players who do not immediately depart Alhafra and develop their party pursuing said secrets and then clearing Air's Rock before coming back for it. Regardless of whether this boss is defeated at this early stage anyway, it is easy to depart Alhafra and head toward Air's Rock by stepping back into Yampi Desert through its northeast exit and taking its one-way southeast exit, which will deposit Felix's party next to the central desert.
The dungeon itself makes liberal use of the Whirlwind Psynergy that can only be used by Sheba while she is in the mono-elemental Wind Seer class series, which effectively forces her into having no Djinn other than Jupiter Djinn set onto her. This will likely strain her PP reserves over time, so it is a feasible option for the player to ignore Air's Rock and proceed with the main story of the game until they have added the Mercury Adept Piers as the party's fourth member. By that point roughly 30% into the game, the party will have easier access to the Avoid Psynergy (though either setting two Mercury Djinn or equipping the Mysterious Card on either Felix or Jenna will make Avoid possible to cast even without Piers in the party), and they will all be at higher levels, which will give Sheba more PP reserves and make Avoid more effective at preventing any random encounters whatsoever. Bringing the larger party into Air's Rock is easily done by sailing the ship south around Osenia and mooring it at the small river and twin beaches east of the thick mass of rocks preventing you from sailing into the western sea.
However, putting off Air's Rock until the ship is gained disadvantages the player at several points over the interim. The Reveal Psynergy that will ultimately be awarded to Sheba at the end of the dungeon only becomes imperative to progressing through the game early in the Eastern Sea segment of the game. Nonetheless, the following rewards will be locked off from the player until Air's Rock is completed and the Psynergy is claimed: a Cookie, the Storm Brand, the Fujin Shield, the Clarity Circlet, and the Flora summon tablet from completing Air's Rock itself; the Jupiter Djinni Ether and the Hypnos' Sword at Garoh; an Apple that can be gotten from Madra Catacombs the second time it can be visited; and a Mist Potion and the Moloch summon tablet from a third visit that takes place even later. The player would have to backtrack to acquire all these collectibles if they decide to wait until they have added Piers to their ranks.
Air's Rock itself has earned no small degree of notoriety for the sheer length and complexity of what it puts the player through in order to attain the Reveal Psynergy at the end. Despite it primarily featuring at the 20% mark of the game's overall play time, it lasts longer than any other dungeon in the entire Golden Sun series and is longer than even some of the dungeons in The Lost Age positioned as the game's biggest challenges, like Jupiter Lighthouse and Magma Rock. Between the rather large opening maze at the base of Air's Rock and the multiple screens worth of vertical climbing that follow, reaching the summit of Air's Rock takes roughly as long as playing through the previous game's final dungeon, Venus Lighthouse. Perhaps even more time will end up being spent inside the mountain because the interior branches out into two intertwining "dungeon routes," though the first route to the right lasts longer than the second route to the left.
Walkthrough
It is recommended that you set the Move and Whirlwind Psynergies as your shoulder-button shortcuts because both are frequently used throughout the dungeon.
Initial sand maze
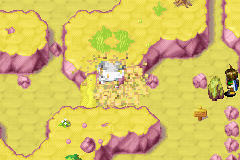
As you enter Air's Rock, the screen you step into is a rather large and complex maze of sand at the base of the mountain. The brown stone nearby is described by the wooden sign as a Wind Stone, and it causes any cast of the Whirlwind Psynergy on it to pass through itself and shoot out as a larger, stronger whirlwind in the direction Felix is facing. Casting Whirlwind on this Wind Stone while facing north from underneath it, for example, fires a strong whirlwind northward that clears away a sandy obstruction blocking your path. From the "T-intersection" just above this, head southwest and have the western Wind Stone blow a large Whirlwind south to clear away a sand obstruction near a barely visible chest at the bottom. Return to the T-intersection and proceed north until you get to a chest sitting to the right of an arrangement of purple rocks surrounding a large, whirlwind-shaped purple stone; this chest is the game's second Mimic, and it will drop a Lucky Medal when felled.
From the area of the purple "Whirlwind stone," follow along east to another "T-intersection" pointed east where there are four rocks, then head southwest to another fork. Head northeast toward the northeastern corner of the maze and cast Whirlwind west through the Wind Stone there to clear away a sand obstruction blocking a chest that will be gotten later. Hug the eastern edge of the screen as you go all the way south to the southeast corner of the maze and cast Whirlwind west through that Wind Stone to clear another sand obstruction. Now head counter-clockwise past and around the mass of scattered purple rocks a short ways north of that Wind Stone so that you can get down to the area left of it and head west through the route you just opened up. You will be standing underneath another Wind Stone, and this time, send two Whirlwinds flying north in a row to clear two sandy obstructions in a line.
To get back to where you fought the Mimic, head northward while hugging the left wall so that you reach the horizontal T-intersection near the northeast corner, then head back west. Head directly south from the purple Whirlwind stone and proceed south, ignoring the first branch to the left that visibly leads to a rocky dead-end, until you get to what can be described as a "slanted T-intersection" branching east and southwest; head east first, ignoring the path back down to the starting area, to a T-intersection branching into narrow paths north and south. Claim the Cookie from the treasure chest in the north fork, then head down the south fork and then west to the original Wind Stone near the starting sign, and blow open the sand obstruction off to the left. Proceed counter-clockwise so that you approach this same Wind Stone and sign from above, and now head west through the path you just opened and get a Smoke Bomb from the chest in the southwest corner.
From the chest at the southwest corner of the maze, use the Wind Stone north of it to send a whirlwind flying up to clear a sand obstruction, then head east to the starting Wind Stone, go north above it, and take a few steps west into the "slanted T-intersection. Taking its southwest fork will bring you north along the west edge of the maze and bring you to the purple Whirlwind stone seen earlier. Cast Whirlwind on this to make an enormous tornado clear away the sand encrusted into the wall behind it, exposing a winding wall-ladder that brings you up to the first screen of Air's Rock's exterior climb.
Climbing the exterior
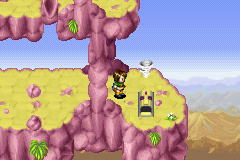
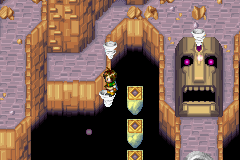
In the first screen of the mountainous exterior, head left and climb up, and then climb up the long wall-ladder to the left. At the northwest corner of this screen, drop down a cliff slide, and a moai statue regularly spewing traveling whirlwinds will automatically transport you east to a spot where you can then drop down another cliff slide. Drop down one more cliff slide after that and position yourself so that you can be picked up by another whirlwind-spouting moai and transported far to the east. Push the nearby earth pillar onto the gray tile underneath it to open a shortcut, then do the same for another earth pillar off to the right. Walk right across this earth pillar to the east edge of the screen where a lone rock lies near two wall-ladders going above and below, then climb down the south one to claim the Storm Brand long sword from the chest that you had cleared the way to earlier.
Climbing up either wall-ladder from the long ledge with the lone rock at its east end will bring you to a rocky upper ledge with an empty gray tile at its west end. Climb down the short wall-ladder off to the right, near a trio of rocks, so that a moai statue off to the right will deposit you far to the west, at a long and somewhat narrow ledge with two cliff slides down. Ignore these, and don't bother going left unless you have Piers in the party and are willing to make quite a winding detour to get the Vial in the chest above this ledge's two very small ladders, which requires first casting Frost on the puddle next to the chest. Instead, climb up two wall-ladders above the right cliff slide and push the northeastern earth pillar off so that it falls way down onto the gray tile mentioned earlier. The point of doing this is to expose you to the moai head at the far northeast corner of this area, which will then carry you a short ways left to a wall-ladder that leads up north to the next screen of the climb.
The next screen is shorter horizontally but taller vertically, and you will have to carefully climb up the winding wall-ladder without getting sent falling back to the ground by the whirlwinds being spewed by the four moai heads placed along both sides of it. Once you reach the top, you can exit into the next screen off to the right immediately, but you can optionally jump down the cliff slide, move an earth pillar off to the right to open a shortcut, open up a chest near a Sleep Bomb, and stand on the moai head on the ground and ride its whirlwind all the way back up before doing so.
You will now step into a screen with an open background showing off the landscape. Climb up the wall-ladder and climb along its first left fork, then climb to the second fork and take the right wall-ladder down to touch back down on the ground, right next to two earth pillars. Cast Move to shift the left pillar over to the left. Now climb back down to the first fork underneath and step onto the ledge underneath the one with the earth pillars, and drop down the cliff slide right of a rock. Walk to the grounded moai head at the southeast corner of this screen and ride its whirlwind up to the ledge underneath the highest ledge, and walk west past the pillar-like pink support rocks to reach the two earth pillars and remotely shift the right pillar left. Drop down the wall slide right underneath the two earth pillars so that a whirlwind from below brings you up to the top ledge of the screen. Climb the wall-ladder off to the left and exit the screen along the upper of two narrow "exit ledges" at the northwest corner.
Proceed up to an area where a glowing fog covers the screen; so long as this fog remains in place, climbing either of the wall-ladders next to the purple Whirlwind stone will only bring you back to this screen. Therefore, stand to the right of the lone earth pillar and Move it right into the gray tile. Now you will have to climb back to the outdoor screen with the sky background, slide down two cliff slides in a row at the far right end, head left to the winding and branching wall-ladders, and climb to their north end, and now you can exit the screen along the lower of the two "exit ledges" at the northwestern corner. This will bring you to the foggy screen from more to the left than the right, and now you can permanently clear away the fog by casting Whirlwind on the purple Whirlwind stone. Climb up the wall-ladder left of it to the summit of Air's Rock, and cast Whirlwind on another purple Whirlwind stone at the north end of the screen to permanently bore an opening into the interior with lightning strikes.
Before you head down the stairs, you may decide to go for the chest visible off to the right and get the Fujin Shield from it — but some players may recommend ignoring it because of how much backtracking it will take to both get to it and then get back from it. You would have to climb all the way back down to the screen with the sky backdrop and climb down to the ledge underneath the one with the two earth pillars, slide down the cliff slide, ride the southeast moai head's whirlwind up, hop back west to the two earth pillars, ride the whirlwind of the moai head underneath them up further, and climb up the top wall-ladder to take the upper "exit ledge" out again. (Note that the two earth pillars will have reset their positions if you went down the stairs into the interior and climbed back out, since the game categorizes the exterior and interior as separate "dungeons". If this is the case, Move the left pillar left while you are on your way back down so that you can Move the right pillar left once you approach that from the right.) Follow along and climb up the formerly foggy screen's right wall-ladder to get to the Fujin Shield chest. To get back the main part of the summit, climb down once more to the screen with the sky backdrop, drop down two cliff slides off to the right, head left to the branching wall-ladders, and climb upward once more to proceed out of the lower "exit ledge" a final time.
Exploring the interior
When you first step into the top floor of the interior, you can use the Psynergy Stone to your right to fully replenish your PP and, by extension, your HP — and this will respawn whenever you walk back up and down the stairs, since you are effectively changing "named locations" each time you do so. Because this is considered a different "dungeon" in the game's coding (despite both the interior and exterior causing the name "Air's Rock" to flash on the screen when they are first entered), so long as you are anywhere inside the interior, casting Retreat will bring you back to this top floor instead of the sand maze outside. Follow along the sharply winding routes through this floor while ignoring all puzzle-related features so that you can go down the stairs left of the giant, dormant moai head.
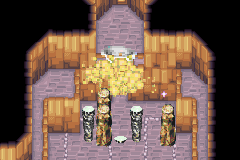
You will step down onto the top ledge of an enormous, multi-story chamber that you will leave and reenter from different directions on multiple occasions as you explore the interior, and on either side is a door with a colored pad in front of it (and each pad displays two dots to signify that you are currently on the second floor from the top). This ledge can be called the "crossroads" of Air's Rock's interior because each of these doors leads you down its own lengthy, puzzle-filled "dungeon route" that intertwines with the other route at various points despite remaining an otherwise entirely separate affair. The "blue route" to your left, which will eventually lead to the Reveal Psynergy reward at the end of the dungeon, cannot be explored until you have first completed the longer "red route" off to your right, in which the objective is to turn on all of the dormant moai statues scattered throughout the interior. Therefore, head into the right door behind the red pad first.
The "red route"
Still on the second floor from the top, follow the path east and take the top fork, and you will find a particularly complex puzzle involving earth pillars and gray stakes waiting for you. Your goal is to create a path of pillars and stakes you can hop east across so that you can reach the Wind Stone at the bottom. Complicating matters is that driving down the leftmost stake — either by casting Pound on it or standing on top of it — causes the second stake from the left to rise, and vice versa, but this will not happen if one of the depressed stakes in question is currently being weighed down by an earth pillar. The two stakes off to the right share the same relationship. Finally, any solution that involves the second stake from the left being raised is no good because that will block the southern Wind Stone's ability to shoot a whirlwind into the sand obstruction just north of that stake.
The solution is to move the bottom-left earth pillar two tiles right and one tile up, then Pound the rightmost stake and move the right earth pillar onto that. That way, you can hop across to the narrow ledge on the right, go down to the Wind Stone, and cast Whirlwind on it to clear the sand obstruction. Head through the cleared doorway and climb up to another Wind Stone, and send a whirlwind flying south to clear a sand obstruction far to the south. Make your way down to that area and follow along until you can move an earth pillar left onto a brown tile. Proceed back counter-clockwise so you can hop down onto the earth pillar from above, and go left and down the stairs.
Now in the third floor, proceed northeast along the sole, winding trail available to you until you get to an earth pillar and a wind spout blocking your path further northeast. Move the earth pillar to free up the spout behind it and therefore stop the other spout from spewing wind. Proceed to the northeast corner of this area and remotely Move the earth pillar one tile right, then position yourself one tile right of the wind spout that was just shut off — and remotely Move that pillar back to the left so that you can hop left from it. Follow the raised path southwest until you get to an earth pillar you should push south onto a brown tile. Go a short ways southwest from this "shortcut pillar" and move an earth pillar near the southwest corner one tile right to affect the wind spouts in that area, then hop right across the shortcut pillar and head south from it, sliding down the lone wall slide. Head west through the mass of rocks the wind spout originally blocked off and take the exit doorway out.
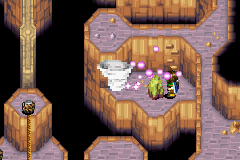
Hop west across the "floor 3" segment of the multi-story chamber to enter the next puzzle room, which lies within the blue side of the interior. Head to the Wind Stone and have it shoot a Whirlwind left to rotate a pathway 90 degrees, and head far to the west and hug the perimeter of the area clockwise until you can reach a Wind Stone up north and fire a whirlwind south; this will rotate the center path back into a vertical alignment. Backtrack to the spot with the two tiny wall-ladders close to each other and head north from there; you can walk right across a tightrope and push an earth pillar onto a brown tile if you wish, but you will need to hop and walk south along the rotated pathway, and continue south along a vertical tightrope, to head downstairs to the fourth floor.
Now in the fourth floor from the top, still in the left "blue" side of the interior, you can take a detour left into the southwest part of the area for a chest with an Elixir if you wish. Take the north fork and follow along a very long, winding route through this floor until you hop left across a gap near a Wind Stone and a tightrope leading up. Cast Whirlwind to have the Wind Stone push the rotating pathway up north into a vertical alignment, then walk north along the tightrope and the rotated pathway and climb down to another Wind Stone east of it. Shoot out a whirlwind west to align the rotating pathway horizontally again, and hop west across it. Do not slide down the cliff slide you soon reach as you approach the earth pillar and tightrope just left of it. Follow along with another fairly long yet linear path until you exit the screen.
Now you are back in the multi-story chamber at the fourth story level of its left side. Climb all the way down the ladders running along the left side of this chamber and go down the stairs into a purple, crystalline basement-level chamber. You can hop toward a gigantic blue Psynergy crystal that does not disappear when used to replenish PP, but take the room's north stairwell back up into the base of the multi-story chamber. If you want, you can first hop right from the gigantic, dormant moai head and then hop south along the rightmost trail of floating platforms to step back outside into the first cliff screen of the exterior portion, where you can move the earth pillar to your left onto the gray tile to its left. This opens a shortcut connecting this screen to the base of the interior, which would be useful if you wish to return inside at a later point in the game without having to deal with the immense climb from earlier. Note that when you step back through this small door and "change locations" again, casting Retreat inside the interior will now deposit you at this spot in the base of the multi-story chamber.
At any rate, hop down the floating platforms flanking either side of the giant moai head until you reach a purple Whirlwind stone south of the head, and casting Whirlwind on it will cause the small moai head just underneath you to start spewing whirlwinds that will bring you all the way back up to the first floor of the interior. You will be brought to another purple Whirlwind stone up there, and activating this will turn on all dormant moai head statues throughout Air's Rock. Now you can hop left, Move the earth pillar left, and hop south. To get the chest in the room, position yourself in front of the now-active small moai head at the room's northeast corner and ride its whirlwind south; the chest contains a Vial. Remotely Move the right earth pillar onto its brown tile so you can hop right behind it to get back onto the main ledge. If you had stepped back into the exterior as described in the last paragraph but wish to reassign the northeast staircase in this room as the spot where Retreat deposits you onto, go back to the northeast staircase and go up and down it; this makes the Psynergy Stone there respawn. Regardless, go back down the northwest stairs to return to the second-floor "crossroads" at the top of the multi-story chamber.
While the reactivated moai statues inside Air's Rock now allows you to meaningfully explore the blue-side pathway to your left, if you wish to acquire the Flora summon tablet, you will have to enter the red-side path once more and go through a potentially long backtrack across ground that was already covered. Getting to the third-floor, red-side area where this takes place is a simple matter of heading southeast toward an earth pillar you had moved into place much earlier and hopping left from it.
Back in the third floor of the red side, progress northeast to the area's central-eastern earth pillar and wind spout — but rather than take the north fork from it like before, go down the southwest fork to the area with a lone wall slide and an unassuming earth pillar that can be moved along a narrow, horizontal area four tiles long; move this one space right. Since the shortcut earth pillar above remains locked onto its brown tile, use it to head to the north edge of the area, where the formerly gray moai head at the top is now spouting whirlwinds to the left; use it to get to the Wind Stone near it and fire a whirlwind all the way south through the screen, which will pick up the "unassuming" earth pillar along the way and deposit it all the way at the bottom edge of the map. Now head all the way back south and slide down the aforementioned wall slide, and head further southwest to get to where the pillar now lies; simply push it off to the right to gain the Flora summon. You can cast Retreat to teleport either to the top floor's staircase or base floor's doorway and bring yourself back to the "crossroads" easily.
The "blue route"
You can now finally enter the left door with the blue pad in front of it at the top crossroads. Before letting the reactivated moai in this room transport you west across a horizontal pit, Move an earth pillar onto the brown tile left of it, letting you proceed up to a room with a massive black chasm and a moai head that can be moved along a long, vertical line. Move it either six or seven spaces up (or one or two spaces from the top tile), then step onto the narrow pathway in the center of the chasm to let its whirlwind carry you left to the chest in the upper-left corner, which contains the Clarity Circlet for Sheba. Slide down and make it back to the moai, and move it three spaces down so that its whirlwind will deposit you onto a spot where you can proceed south through a doorway near an earth pillar.
The earth pillar here can be dropped right onto the floor tile to create an incidental shortcut, but you will want to take the left fork from the black doorway and wind around to the floating platform puzzle at the southwest area of this room. This will let you stand two tiles south of the earth pillar obstructing the wind funnel and remotely Move it off to the left, cutting off the other wind spout to the right that was previously blocking the stairwell to the next floor. Backtrack to the junction and take the south fork to reach this stairwell. You will now end up back in the third-floor blue-side area you explored during your time on the "red route" earlier, but you will be entirely restricted to a linear route across several tightropes leading you to another stairwell at the southeast corner of this area.
Now that you are in the fourth floor of the "blue route," head left from the stairwell you came down from to reach a Wind Stone, and cast Whirlwind twice on it to both remote a sand obstruction east of it and change the position of a moai statue south of it. Now head south from the stairwell until you reach the area where the statue now lies, and climb up to it and let it bring you to a chest off to the right containing 666 coins. There is little point in heading up right past the southeast stairwell in this room to push another earth pillar and create another incidental "shortcut," so head downstairs.
In the fifth floor of the "blue route," any attempt to head up the fork you first see will be defeated by a moai statue shooting whirlwinds at you from far away at the top of the screen, so proceed left and then north to first reach a chest containing a Vial. Travel all the way north and remotely Move the moai statue off to the right so that you can go all the way back down and travel all the way back north to the downstairs stairwell right of it. From here, you must go through another rather linear stretch, which involves letting a moai head transport you east across the multi-story chamber so that you can climb up and hop to the small entrance at the giant, geometric gray structure embedded into the wall of the chamber.
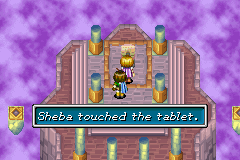
The final room inside Air's Rock consists of platforms floating above a thick, purple fog. Hop straight up along the platforms (which disappear behind you) to reach a tablet that will teach Sheba the Reveal Psynergy in a short cutscene. Now hop across the west trail of platforms, approach the circle of floating platforms, and cast Reveal to make a platform hovering in the empty space in the center materialize (all such circular arrangements of objects in the game will expose secrets when Reveal is cast on them in this manner); this brings you to a chest in the southwest containing a Psy Crystal. Since Retreat does not work in this chamber specifically, now hop back to the main platform and take the right trail of floating platforms to get back to the exit, again using Reveal to get past the "empty" circle of six floating platforms in your way. As soon as you step back out into the multi-story chamber, Retreat can be used to deposit you next to where you can step back out into the exterior, and casting Retreat again will deposit you at the bottom of the initial sand maze.
Enemies
The exterior and interior portions of Air's Rock feature separate bestiaries.
| Bestiary of Air's Rock (Exterior) | ||||||||||
| Monster Name | LVL | HP | ATK | DEF | AGI | EXP | Coins | Weakness | Drop | Drop Rate |
| Dino | 10 | 82 | 84 | 23 | 35 | 40 | 39 | 1/16 | ||
| Emu | 11 | 98 | 89 | 21 | 46 | 53 | 51 | 1/32 | ||
| Ghoul | 12 | 99 | 93 | 20 | 16 | 34 | 42 | 1/16 | ||
| Harpy | 12 | 105 | 104 | 25 | 46 | 38 | 53 | 1/16 | ||
| Kobold | 10 | 77 | 80 | 17 | 47 | 40 | 45 | 1/16 | ||
| Mimic (unique) | 17 | 431 | 126 | 33 | 77 | 272 | 241 | 1/1 | ||
Enemy Formations (Exterior)
- Group 1: Kobold x1, Dino x0-1
- Group 2: Emu x1, Dino x0-1
- Group 3: Emu x1, Kobold x0-2
- Group 4: Ghoul x1, Dino x0-1
- Group 5: Harpy x1, Emu x1
- Group 6: Harpy x1, Kobold x1
| Bestiary of Air's Rock (Interior) | ||||||||||
| Monster Name | LVL | HP | ATK | DEF | AGI | EXP | Coins | Weakness | Drop | Drop Rate |
| Creeper | 12 | 89 | 79 | 19 | 29 | 32 | 38 | 1/32 | ||
| Emu | 11 | 98 | 89 | 21 | 46 | 53 | 51 | 1/32 | ||
| Ghoul | 12 | 99 | 93 | 20 | 16 | 34 | 42 | 1/16 | ||
| Harpy | 12 | 105 | 104 | 25 | 46 | 38 | 53 | 1/16 | ||
| Mummy | 14 | 113 | 116 | 30 | 44 | 72 | 102 | 1/32 | ||
Enemy Formations (Interior)
- Group 1: Emu x1-2
- Group 2: Emu x1, Ghoul x1
- Group 3: Harpy x1, Ghoul x1, Emu x0-1
- Group 4: Creeper x1, Emu x0-1
- Group 5: Harpy x1, Creeper x0-1
- Group 6: Mummy x1
- Group 7: Mummy x1, Ghoul x1
- Group 8: Mummy x1, Harpy x1
Collectibles
Exterior
 Cookie: Found in a chest in the center of the initial sand maze, made accessible by casting Whirlwind at it through the Wind Stone under it twice in a row.
 Smoke Bomb: Found in a chest at the southwest corner of the sand maze, late into the screen's exploration.
 Storm Brand: Found in a chest at the upper right corner of the sand maze; the obstruction blocking it off must be cleared using the Wind Stone right of it before climbing up the mountain, and that area must then be climbed back down into from the bottom right of the screen above.
 Vial: Kept in a chest in the first mountainous screen above the sand maze, right of a small door leading into the bottom of the interior. It can only be reached by casting Frost on the puddle right next to it, which means Piers must be in the party; you will have to backtrack for this after recruiting him in Kibombo unless you waited until recruiting Piers to start exploring Air's Rock to begin with.
 Sleep Bomb: Found a chest in the second, narrower cliff screen above the sand maze, requiring you to drop a long way down to it and then ride a moai's whirlwind up from it.
 Fujin Shield: Found in a chest off to the lower right of the screen at the summit of Air's Rock. Getting to this after reaching the peak the main way involves climbing back to the screen with the visible landscape background and then climbing back up from there, and returning to the main part of the peak involves climbing back down to said open-air screen and from it yet again.
Interior
 Elixir: In a chest in the lower-left corner of the fourth-floor chamber of the left "blue" side, reached by taking a fork left instead of up.
 Vial: In a chest in the top floor of the interior, reached only after riding a whirlwind all the way from the base floor of the multi-story chamber to the top floor and activating all formerly dormant moai. Use the moai to the right to get to the chest.
 Flora: A summon tablet located in the third-floor area along the "red route". However, you must reactivate all the dormant moai in the dungeon by proceeding to the end of said route, meaning you would have to backtrack to this part before taking the "blue route." It involves moving a stand-alone earth pillar one tile right and shooting a whirlwind from a Wind Stone far north of it to bring it to the south edge of the screen, where you can use it to reach the tablet.
 Clarity Circlet: Found in a chest early in the "blue route" in a room where you have to push up a left-facing moai along a massive chasm. Move it one or two spaces under the top possible space and ride its whirlwind to the chest.
 666 Coins: Found in a chest at the fourth floor of the "blue route," which requires you to use a Wind Stone to thrust a right-facing moai a short ways down so that you can use its whirlwind to reach the chest.
 Vial: Found in a chest in the fifth floor of the "blue route," which you must pass by on your way to reaching the moai statue blocking you from progressing further.
 Reveal: The final reward of Air's Rock is taught to Sheba as soon as a stone slab in a purple area inside a gray structure is inspected.
 Psy Crystal: Found in a chest at the southwest corner of the purple room containing the slab that teaches Reveal, the Psynergy that is needed to reach it.
History
Air's Rock is one of four mountains believed to have stood on the world since its very beginning. Each is directly associated with one of the elements that make up reality; befitting its role as the Elemental Rock of Jupiter, it is constantly wind-ridden and contains an extensive network of labyrinthine tunnels and ancient riddles that require mastery over wind Psynergy to complete.
The village of Garoh nearby is home to a population of locals who are secretly werewolves that change their forms in the light of the full moon. At least some of them, particularly their leader Maha, have Adept-like powers of Jupiter Psynergy, and Maha himself is said to have traversed Air's Rock's innards.
Felix's party explores the mountain during their time spent in Osenia on an unrelated errand, largely motivated by the need to broaden their aptitude in Psynergy in order to compete against Isaac's pursuing party of Adepts, who are set on stopping their efforts. During Felix's exploration, the party will pass by an especially large Psynergy stone residing deep within the mountain's core. Eventually, they will reach the final chamber containing a stone slab that imparts the following message: "Wielder of Wind's might... Lay your hands upon this stone. We bestow upon thee the power to see the truth unclouded..." When the Jupiter Adept Sheba touches the stone, she is infused with the power to perceive hidden truths about the surrounding environment.
If Felix's party elects to travel to Garoh, they can use their newfound power to intrude upon Maha's domain and earn a private audience with him. Their talks wander to various subjects about philosophy and nature, during which it is theorized that the people of Garoh owe their Jupiter Adept-like powers to the large Psynergy stone stored within Air's Rock. Specifically, the strong winds perpetually emanating from the mountain are suggested to carry particles of the stone across the winds to the village.
Trivia
- Air's Rock is also referred to as Windy Peak among residents of villages in Osenia because clouds are never seen near it.
- In Alhafra, if you go upstairs to the highest room in the southwest "tower" of the mayor's mansion, a male NPC will ask if Felix can see Air's Rock; if the player answers with "Yes," Felix will walk over to a window, and the game will change to a view of the overworld that shifts the camera to the overworld icon of Air's Rock in the desert.
- Air's Rock very clearly references both the name and the geographical location of the Australian fold mountain popularly called Ayers Rock but more officially referred to by its native name, Uluru. Osenia itself is an in-universe equivalent to Australia, given that "Oceania" refers to the geographical region encompassing Australia, New Guinea, New Zealand, and many other islands. The name Air's Rock is a play on the name "Ayers Rock" that also references the wind-elemental magic powers associated with the place in-universe.
Early Sol Blade glitch
The "Retreat Glitch" is a method of temporarily scrambling the game's inner workings to cause various exits to take the player into unintended areas and various interactions with objects to perform entirely different effects. It is possible to use this with the Psynergy Stone in the top floor of the interior to grant the party an extremely easy Sol Blade, one of the best and most financially valuable weapons in the game.
First, proceed through the dungeon's interior until you can walk out the bottom floor's small entrance back outside, then walk back in and use the moai whirlwind system at the base of the multi-story chamber to ride back to the top floor. Once you get back to the Psynergy Stone in question, set Retreat to either shoulder button shortcut and lower the PP of the Venus Adept with the Retreat spell down to 5 or less. Then try to use Retreat by pressing its shoulder button shortcut, and fail on purpose on account of the lacking PP. If done right, interacting with the Psynergy Stone will grant you a Sol Blade instead of refill PP. It is possible to have this Psynergy Stone give you more Sol Blades by going back downstairs and upstairs (but not upstairs and then downstairs, as "changing dungeons" between the exterior and interior portions will disrupt the setup and require you to exit and enter the base-level doorway again), purposefully failing to shoulder-button-cast Retreat again, and then interacting with the Psynergy Stone again. See this video on how to reproduce the glitch.
