User:Plexa
Hi. I am a Golden Sun speedrunner and know quite a bit of stuff about the games. I was the person who found things like instant-death methods for bosses like Toadonpa and Storm Lizard as well as finding the majority of retreat glitch applications. The two I'm most proud of are very early Iris and the Airs Rock Sol Blade. I also discovered Moloch (Djinni) which is one of my favorite discoveries to date. Other misc. finds are the magic river glitch and instant ladder climb. At the time of writing, I have the world record in all main categories of Golden Sun (Any%, All Djinn, No Save & Quit) and Golden Sun: The Lost Age (Any%, All possible Djinn/Summons, No Save & Quit) and Golden Sun: Dark Dawn Any%.
I try to update the wiki as much as possible with my findings, although I'm often lazy so these things can take time.
As a boss in The Lost Age
The boss fight with Dullahan (who is level 50) at the end of Anemos Inner Sanctum automatically ensues the moment the player casts Hover on the glowing purple circular portion of a bird-like pattern that a puzzle requires arranging six white blocks to form.
Dullahan easily qualifies as the game's equivalent to many JRPGs' "optional superbosses", in that it is a much more deadly foe than any other individual enemy in the game, including the final boss. Dullahan has access to some of the most powerful abilities in the game including Formina Sage (an enormously powerful single-target attack), Charon (the second strongest summon sequence in the game with a chance to instantly down any number of adepts), and Djinn Storm (which puts every Djinni on every currently-alive frontal party member into recovery mode). It's unrelenting barrage of abilities makes using a conventional battle strategy difficult and greatly tests the players depth of knowledge of the battle system.
Note that in the Hard Mode, Dullahan does not receive as large a boost to his difficulty as other enemies because there is a hard cap of 16,383 HP on enemies in The Lost Age, so Dullahan's 16,000 base HP will only gain 383 HP extra. However, the boost to his Attack statistic and Defense statistics will not be inhibited, which will cause his Formina Sage attacks to be all the more likely to down an Adept in one hit, and will cause physically-aligned attacks used against him to be somewhat lower in damage output.
Dullahan in this game is especially likely to be affected by Attack-lowering effects. His statistics are as follows:
| Name | HP | PP | Attack | Defense | Agility | Luck |
| Dullahan | 16000 | 300 | 676 | 269 | 241 | 59 |
| Elemental Resistances and Levels | Exp | Coins | Item Dropped | Drop Rate | ||
| 15600 | 6775 | N/A | N/A | |||
Dullahan regenerates 200 HP and 100 PP at the end of every turn, effectively granting him infinite PP.
Dullahan acts three times per turn and uses these battle commands with high intelligence:
| Command | Chance to use |
Elem. Stats used with * |
Description |
|---|---|---|---|
| Attack | ?? | -- | Standard physical attack. |
| Bind | ?? | Psynergy costing 4 PP that displays a glowing symbol onto a targeted Adept. There is a chance that the target's Psynergy capabilities will be Sealed for a period of time. | |
| Break | ?? | -- | Psynergy costing 5 PP that removes any statistical buffs from the current battling party. |
| Charon | ?? | Summon sequence that deals a Venus-aligned attack that hits the whole party with medium damage distribution exclusive to summons. Its damage is equal to 500 base damage plus an amount equal to 30% of the target's total health, meaning this ability gets stronger on a higher-leveled party. Each hit target has a chance to be instantly downed by this attack. | |
| Condemn | ?? | Psynergy costing 8 PP which attempts to instantly down a party member. | |
| Curse | ?? | Psynergy costing 6 PP that may afflict the target with a 7-turn Death Curse status ailment. | |
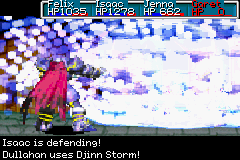
| Djinn Storm | ?? | -- | Enemy ability that forces all of the current battling party's Djinn into Recovery mode. |
| Element Swap | ?? | -- | Enemy ability that does nothing. |
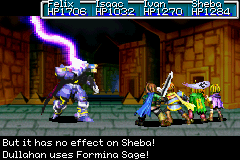
| Formina Sage | ?? | Enemy ability where Dullahan wields a huge beam of purple lightning fashioned in the shape of a long sword and slashes through an Adept with extreme power while stationary. Deals a Jupiter-aligned standard physical attack with the end result multiplied by 2.8. | |
| Haunt | ?? | Psynergy costing 5 PP which attempts to afflict up to 3 party members with the Haunt status condition. | |
| True Collide | ?? | Enemy ability where Dullahan remotely siphons energy in the form of masses of dark-purple energy orbs out of multiple enemies and into himself. Deals a Venus-aligned attack with 180 base damage that is spread out across 3 enemies with low damage distribution, and for each enemy hit by this attack, Dullahan has a chance to restore HP equal to the damage dealt. |
Battle Logic
Unlike most other enemies in the game, Dullahan's moves are not determined at random and instead he will use a pre-determined sequence of attacks. Once the fight starts, he will pick a random move and then proceed to pick moves in order based on the following pattern:
Condemn, Charon, Curse,
Djinn Storm, Haunt, Formina Sage,
True Collide, Attack, Formina Sage,
Break, Attack, True Collide,
Elemental Swap, Haunt, Curse,
Charon, Bind, Break,
Attack, True Collide, Formina Sage,
Attack, Elemental Swap, Attack
Once reaching the end this sequence Dullahan will loop around to the start and begin cycling through the pattern once again.
Unique to Dullahan, a Hard Reset will not guarantee that Dullahan will select the same starting point in it's pattern. For any battle random number seed there are three possible starting points in it's pattern. Dullahan will follow it's pattern unless the action would have no effect. For example, it will skip Break if none of your party members have any stat buff, it will skip Haunt if all party members are already haunted, and it will skip any Psynergy-based attack if his Psynergy is blocked. Sealing its Psynergy forces it to enter a glitched turn order state with a reduced action pool. In all other cases where it skips a move it will use the next move in the sequence instead.
When under the effect of Psynergy Seal Dullahan advances through its pattern skipping any Psynergy action (Condemn, Curse, Haunt, Break, Bind). However, due to a bug the action sequence will get stuck looping through either the Attack - True Collide - Element Swap - Charon section or the Attack - True Collide - Formina Sage - Attack - Element Swap - Attack section when Dullahan reaches either of these parts in its pattern. The glitched turn order will remain in effect as long as the Psynergy seal remains in effect. As soon as the seal wears off Dullahan will continue on in its pattern. A popular strategy for this fight involves sealing Dullahan's psynergy at the right time to lock it into the second loop so that it never uses its most dangerous abilities.
As with other pattern based enemies, using Ground or Petra will prevent Dullahan from using its first action and make it skip over an action in its sequence. For example, if Dullahan's next turn will be Djinn Storm - Haunt - Formina Sage then using Ground or Petra will prevent Djinn Storm from being used and its next action will be Haunt. Dullahan has to at lesat attempt to use the ability for it to advance through the pattern. This is important to keep in mind when Lull is used as it will skip all remaining actions for that turn and not advance the pattern. For instance, if Dullahan's next turn will be Curse - Djinn Storm - Haunt and Lull is used after Dullahan uses curse and before it uses Djinn Storm then Djinn Storm will not be skipped and the ability order for the next turn will be Djinn Storm - Haunt - Formina Sage.
Strategies
Being the ultimate challenge in The Lost Age, Dullahan is a popular discussion topic for how to best defeat it.
This erases a large fraction of the entire party's necessary statistics for a fairly long time, for only one Djinni will restore itself per turn, and it will take nine turns for all Djinn to return. Even if a party is developed enough that they could weather the proverbial storm of Dullahan's other powerful abilities on their own (which would actually not be all that hard assuming well-distributed healing and reviving measures like Pure Wish, Revive, and Water of Life across many party members), occurrences of Djinn Storm will mean that these other abilities can easily pick off severely weakened Adepts, and the lack of raised-class-stages will remove much of the party's access to the aforementioned Pure Wish and Revive Psynergies, as well as other potentially helpful options.
You can also force him to skip any action by using the Djinn Ground or Petra; this way, you can prevent him from using his most dangerous abilities, such as Djinn Storm or Charon. Because the Djinn prevents only the first move he uses, you should make sure Djinn Storm will be the first move he uses in a turn; there is a 1/3 chance this will be the default. There is also an 1/24 chance that he will use Djinn Storm as his first move in combat, and an 1/12 chance that he will use Charon. If he ends his turn casting Curse, you know his first move next turn will be either Djinn Storm or Charon; so switch in a party member with either the Djinni Ground or Petra and use it to prevent the move. If you then make sure he doesn't skip any other action by making sure you reapply buffs after him casting Break and dispel haunts, you can easily prevent him from ever casting Djinn Storm, which makes the fight significantly easier.
Granted, it is still entirely possible that a party that has been level-grinded into extremely high levels (with the help of the Wonder Birds at Islet Cave) and put into powerful classes - most popularly a setup where Isaac, Felix, Jenna, and Garet have all been placed into the Ronin class, which is both very durable and has access to a very powerful and consistent move in Quick Strike - can defeat Dullahan, assuming he never randomly selects Djinn Storm to essentially cripple half the group and turn them into sitting ducks (or at least only uses it when his HP has already been brought down to a fairly low level. At level 99, each Ronin can deal a Quick Strike amounting to 500 damage or more, and four Ronins can deal over 2000 damage a turn, which means Dullahan can be defeated in 7 or 8 turns). But obviously, this is highly dependent on the luck factor that Djinn Storm introduces into what would otherwise be "just" a very damaging and stat-intensive battle. Most of Dullahan's other abilities are comparatively weak, and the fact Dullahan has so many such abilities helps reduce the likelihood of a Djinn Storm being fired off.
But in the much likelier scenario where the party's levels are around 50 or below, it simply becomes no longer quite viable to attempt to fight Dullahan traditionally at length, because Dullahan's abilities would likely be too powerful to contend with even if the party is lucky enough never to get hit by a Djinn Storm. Therefore, the most common method of battling Dullahan is to basically go into the battle with all eight Adepts having almost all of their Djinn on Standby, so that the extremely vulnerable Adepts use what little time they have alive to fire off as many high-powered Summons as possible. Summons will deal thousands of damage points because they deal additional damage proportional to how high the enemy's maximum HP rating is, and Dullahan has the highest HP in the game to begin with. Furthermore, summons deal the same damage regardless of the party's levels and are only affected by the party members' Elemental Power ratings, so the only method of making summons even more effective is wearing equipment that boosts elemental power, like the Feathered Robe, Big Bang Gloves, and Triton's Ward (though in general, Mercury-aligned summons will be the least effective because Dullahan's highest resistance is Mercury). This method essentially treats the battle as a coin flip, where the player is hoping that at least one of the second party's Adepts remain standing when Dullahan finally falls (and is also hoping that a Djinn Storm does not hit the current party before the current party can use all of their Djinn for summoning), and the player simply reloads the game file when defeated and tries this approach again until their victory.
One of the most important ingredients in raising the chance that this Summon-rushing approach against Dullahan will be a success is that the party's Agility ratings are high; Dullahan has 241 Agility, so each surviving party member that has more than 241 Agility will be assured their chance to fire off a Summon against him at the start of the turn, while each party member close to the 241 Agility mark will at least be able to take their action before Dullahan's second and third actions for the turn. Therefore, Quick Boots, Running Shirt, Feathered Robe, Wild Coat, and various other pieces of gear that raise Agility can be more useful to use for this battle than equipment that increases power or survivability. If Agility is a particular problem for the party, Moloch can be used as one of the mass of summons being unleashed against Dullahan, for its side effect will halve Dullahan's Agility for several turns (note that this Agility-halving will only start coming into effect on the following turn).
Assuming that each Adept only has Djinn matching their element, there are several established setups for both the front and back parties that allow party members to try to summon all they can in the most efficient manner:
- One party has both Venus Adepts and both Jupiter Adepts, allowing them to summon Charon twice and Thor multiple times, while the other party has both Mars Adepts and both Mercury Adepts, allowing them to summon Ulysses many times.
- One party has both Venus Adepts and both Mars Adepts, allowing them to summon Daedalus and others, while the other party has both Jupiter Adepts and both Mercury Adepts, allowing them to repeatedly summon Eclipse.
In a rarer setup, if every frontal party member's Agility rating is higher than Dullahan's even without there being Djinn Set to increase each of their class stages, then the Jupiter Djinni Lull can effectively allow an entire free turn worth of summons against Dullahan for the first turn of battle. If the party member with the lowest Agility rating among this super-fast group has Lull Set onto them while most or all of their Djinn are on Standby, then after each of the other three faster party members perform their summons, the fourth member can use Lull to end the turn before Dullahan can perform any of his own moves. Then, for the second turn, since all four of the party members will assuredly be both untouched and be able to act before Dullahan's actions that turn, they will all be able to deliver another full-powered round of summons. Remember that a party member that performs a summon receives a large temporary boost to their Elemental Power rating, which will cause another summon performed by the same Adept to be even more powerful than it would have been the first turn. Depending on the setup of the party, which summons each Adept is allowed to use, and which pieces of Elemental Power-increasing equipment the Adepts can wear, it is possible to have Dullahan defeated by the second turn, before Dullahan can execute a single battle command.
Note that in the Hard Mode, Dullahan does not receive as large a boost to his difficulty as other enemies because there is a hard cap of 16,383 HP on enemies in The Lost Age, so Dullahan's 16,000 base HP will only gain 383 HP extra. However, the boost to his Attack statistic and Defense statistics will not be inhibited, which will cause his Formina Sage attacks to be all the more likely to down an Adept in one hit, and will cause physically-aligned attacks used against him to be somewhat lower in damage output.
Dullahan in this game is especially likely to be affected by Attack-lowering effects. His statistics are as follows:
| Name | HP | PP | Attack | Defense | Agility | Luck |
| Dullahan | 16000 | 300 | 676 | 269 | 241 | 59 |
| Elemental Resistances and Levels | Exp | Coins | Item Dropped | Drop Rate | ||
| 15600 | 6775 | N/A | N/A | |||
Dullahan regenerates 200 HP and 100 PP at the end of every turn, effectively granting him infinite PP.
Dullahan acts three times per turn and uses these battle commands with high intelligence:
| Command | Chance to use |
Elem. Stats used with * |
Description |
|---|---|---|---|
| Attack | ?? | -- | Standard physical attack. |
| Bind | ?? | Psynergy costing 4 PP that displays a glowing symbol onto a targeted Adept. There is a chance that the target's Psynergy capabilities will be Sealed for a period of time. | |
| Break | ?? | -- | Psynergy costing 5 PP that removes any statistical buffs from the current battling party. |
| Charon | ?? | Summon sequence that deals a Venus-aligned attack that hits the whole party with medium damage distribution exclusive to summons. Its damage is equal to 500 base damage plus an amount equal to 30% of the target's total health, meaning this ability gets stronger on a higher-leveled party. Each hit target has a chance to be instantly downed by this attack. | |
| Condemn | ?? | Psynergy costing 8 PP which attempts to instantly down a party member. | |
| Curse | ?? | Psynergy costing 6 PP that may afflict the target with a 7-turn Death Curse status ailment. | |
| Djinn Storm | ?? | -- | Enemy ability that forces all of the current battling party's Djinn into Recovery mode. |
| Element Swap | ?? | -- | Enemy ability that does nothing. |
| Formina Sage | ?? | Enemy ability where Dullahan wields a huge beam of purple lightning fashioned in the shape of a long sword and slashes through an Adept with extreme power while stationary. Deals a Jupiter-aligned standard physical attack with the end result multiplied by 2.8. | |
| Haunt | ?? | Psynergy costing 5 PP which attempts to afflict up to 3 party members with the Haunt status condition. | |
| True Collide | ?? | Enemy ability where Dullahan remotely siphons energy in the form of masses of dark-purple energy orbs out of multiple enemies and into himself. Deals a Venus-aligned attack with 180 base damage that is spread out across 3 enemies with low damage distribution, and for each enemy hit by this attack, Dullahan has a chance to restore HP equal to the damage dealt. |
This page is dedicated to Out of Bounds methods that allow a player to circumvent points of no return in Golden Sun: Dark Dawn. Using glitches, only the trio of Mercury Djinn in Belinsk is permanently missable. Brick, Eclipse and Crystallux require a special method in order to obtain while every other permanently missable Djinn / Summon can be obtained using Bridge Clips or the Endless Wall Glitch.
Almost every bridge in Dark Dawn can be clipped off of placing Matthew out of bounds. Matthew can freely walk on water and mountains once he is out of bounds. Rivers act as virtual highways for out of bounds movement since rivers that terminate against a mountain range often permit Matthew to walk onto the mountains from the river (and vice versa). This allows near-unrestricted movement and allows the player to circumvent almost all points of no return. While bridge clips should not cause the player to corrupt their save file or soft lock, general caution is advised as doing certain things will cause a soft lock - these are outlined in the warnings section.
The general procedure for a bridge clip is to wedge Matthew into the corner of a bridge such that when pressing the stylus in the "locking region" Matthew does not move. The locking region is roughly on the line starting with Matthew and running through the opposite diagonal of the bridge to the edge of the screen. Pressing the stylus slightly below the locking region will cause Matthew to clip out of the bridge.
Goma Region
Lookout Cabin Bridge
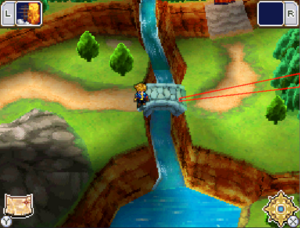
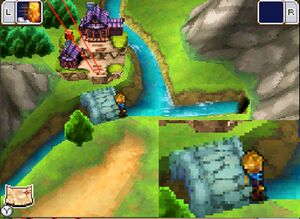
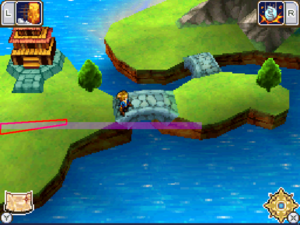
Move Matthew into the bottom left corner of the bridge. Press Down and Matthew's shadow can clip past the bridge edge (as depicted in the image). This isn't guaranteed and may take some readjustment before the shadow clips through. Once the shadow clips through, pressing in the red area in the image should clip Matthew out. The locking area is above the red area.
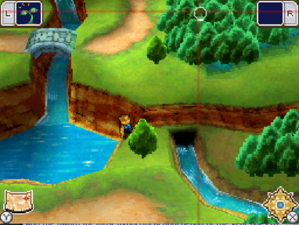
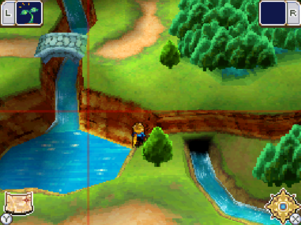
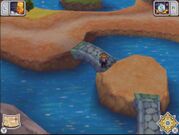
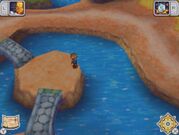
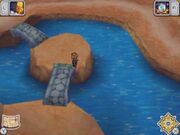
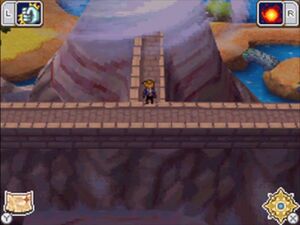
Once Matthew is out you can move to the left to get to Goma Highlands, but to escape into the rest of the world there is a small movement sequence that you should follow. Move Matthew to where the edge of the land meets the cliff (as depicted in the first image below) so that the left edge of his shadow is off of the water. With the stylus pressed against the top of the screen, slide the stylus right until Matthew moves and locks into position - this should happen approximately in the depicted location. Now press the stylus at the top of the left edge of the cliff (where it meets the river) as indicated in the second image. Slide the stylus down from this position until Matthew walks onto the cliff. You can now walk Matthew off to the mountain range to the right by moving Matthew along the cliff face to this point.
A video demonstration of this whole sequence can be found here.
Carver's Camp Bridge
There is a guaranteed setup to get this clip to work using the fact that Matthew's position after leaving Carver's Camp is always the same. The sequence is as follows:
- During the screen transition leaving Carver's, hold Down + Left (without holding B). Hold this until Matthew stops moving.
- While still holding Down + Left, let go of Down (so you are just holding Left) and then let go of all directions.
- Press and hold the B button, then press Right and hold this until Matthew stops moving. He should move to the bottom right corner of the bridge.
- Let go of all buttons.
- Press Right (without holding B), Matthew should clip a fraction off of the bridge (as depicted in the image).
- Press in the red area for Matthew to clip off.
A video depicting this sequence can be found here.
It is possible to just move Matthew into the bottom right corner and have the clip work. The image depicts Matthew partially clipped off the bridge, once Matthew is in this position the clip is possible.
The locking area for this clip is to the left of the red region.
Ei-Jei Region
Harapa Bridge
There is a guaranteed setup that uses the fact that Matthew's position is the same when leaving Harapa through the right exit. The setup is as follows:
- Hold Right (without holding B) during the screen transition leaving Harapa, and hold this until Matthew stops moving.
- Press in the red region with the stylus and as soon as Matthew clips out move the stylus elsewhere to avoid Matthew from hitting the Harapa loading zone.
A video showing this setup can be found here. Note that this clip will work regardless of the state of Ei-Jei (desert state, green state, Eclipse state).
The locking area for this clip is below the red region.
Khiren Mountains
Te Rya Bridge
Move Matthew into the top right corner of the bridge closest to Te Rya. Try and get Matthew as high as he can possible go. Now use the stylus and tap below the red region - if Matthew is correctly positioned then he will be locked. Now slide the stylus up until Matthew clips off of the bridge.
Once Matthew is on the glacier, with slow movements, partially embed Matthew part-way into the cliff on the right side as depicted in the image below. Once this is done, either save the game and reload or read the Sun Saga and cancel it to make Matthew fall through the terrain. From this position, holding Down will eventually clip Matthew onto the southern Khiren mountain range and will be free to roam the world.
A video demonstrating this clip can be found here.
Morgall Region
Teppe Ruins Bridge
This clip is one of the most precise and is extremely difficult to perform without using a setup. The following setup is extremely reliable.
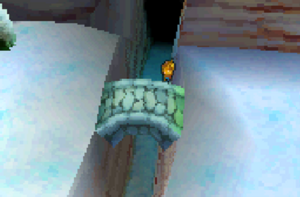
- (Optional) When running to the bridge, allow Matthew to be pushed by the terrain immediately north of the bridge. This is depicted in the first image below.
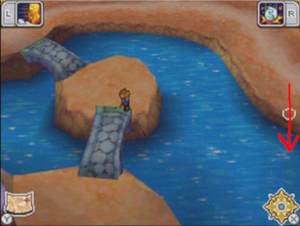
- As soon as Matthew comes around the bend, hold B and press Down until Matthew gets caught on the edge of the bridge, as depicted in the second image. Let go of Down then ilghtly tap Down a few times - Matthew should stay in position throughout this. If Matthew slips out of the position you will need to start over.
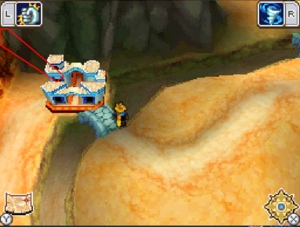
- While holding B, hold Right until Matthew stops moving. This should take Matthew to the position in the third image.
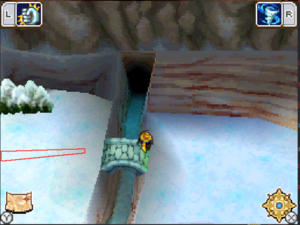
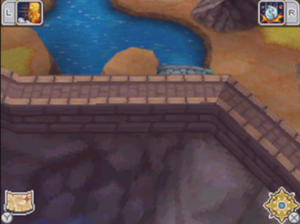
- While holding B, hold Down until Matthew stops moving. This should wedge Matthew in the top right corner of the bridge as in the fourth image.
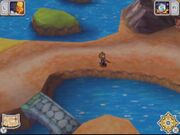
- Without holding B, press Right so that Matthew faces right. Now roughly following the arrow in the fifth image (or the image to the right), drag the stylus down the screen. Matthew should take a small step forward and his shadow should disappear as in the sixth image.
- In this state you can Save / Reset or read the Sun Saga to reload the world map and have Matthew fall through the map.
Once Matthew falls through the world map we need to enable a no-clipping state to allow Matthew to reach other areas. To this end, south of Furrow's bridge there is a place where Matthew can walk up the cliff that leads to the Endless Wall. Walking sufficiently far up this cliff - as is depicted by the image to the right - and back down again will disable collision in a large area in the Morgal overworld. For instance, after performing this movement Matthew can move freely through the island where most of the Teppe Bridge clip was done, or Matthew could run north past Belinsk and fall into the ocean surrounding the Belinsk area.
Note that this method can be used both before and after the Grave Eclipse.
A video showing the entire sequence of setting up the clip, performing the clip, and then enabling noclip can be found here.
Eastern Sea
Yamata Bridge
Place Matthew into the bottom-left corner of the depicted bridge. Hold Down + Right; Matthew should not move when you do this (if he moves, start again). As you are holding Down + Right, tap the stylus in in the red region repeatedly. The camera may not align exactly as in the image, the purple band on the image can be used to work out the appropriate position to tap relative visual cues on the map. If done correctly, Matthew should clip out onto the sea. See this video for a demonstration.
The locking region for this clip is above the red area.
Endless Wall
Endless Wall Glitch
Just outside Apollo Ascent, there is a small region where the vertical path connects to the horizontal path that Matthew's shadow disappears. This position is indicated in the image. Save / Reloading or reading / cancelling the Sun Saga will cause Matthew to fall through the world map. While the player can go in many directions from this point, simply holding Left until Matthew clips onto the mountain range is probably the easiest way to begin navigating out of bounds.
Warnings
Bridge clips permit near unlimited overworld movement as soon as Matthew can access the world map. However there are a few things that a player should be wary of while exploring out of bounds as these could cause softlocks.
- The right side of Carver's Camp is a different loading zone to the normal Carver's Camp loading zone. Hitting this will cause the player to load into the right side of Carver's Camp and there is no known way to escape this area if this happens.
- Once the boat has been acquired, it is impossible to leave Belinsk. If the player decides to enter Belinsk from the Eclipse world then the player will be soft locked.
- Above Passaj there is a flat plateau. It is possible for Matthew to walk into this area from out of bounds but the player cannot leave this small area once this happens (there are no encounters to death warp off of) and hence this soft locks the player.
- If the player explores areas of the world map away from the 'main' explorable areas it is possible for the player to encounter geometry which soft locks the player. For instance, the player can 'hover' over the sea surrounding Crossbone Isle but if the player walks over one of the islands in that sea the player will fall onto the island and be trapped.
- Walking onto an area without a bridge (such as the island where Simoom can be found) will require the player to death warp in order to avoid being softlocked. It should be noted that the only way to death warp out of Okta Island before the Sol Blade has been acquired is by death warping on Lull which requires search.
- Entering Tonfon, Iceburg Outpost or Harun Village before the Ship is unlocked will cause a softlock.
Returning to Belinsk
Normally once the boat has been accessed it is impossible to return to Belinsk without softlocking. This makes Spout, Pincer, Torrent, Chasm, Eclipse and Crystallux permanently missable in normal gameplay. Using the following method it is possible re-enter Belisnk ruins in a way that allows the player to collect Chasm, Eclipse and Crystallux without softlocking. The only requirements for this method is that Tyrell has the Crush Tusk and that the end of the game can be accessed. The method utilizes the epilogue sequence to do this and the summons/djinn that are collected from this sequence are preserved when loading the post-game save file (that loads you into Tonfon).
Re-entering Belinsk Ruins
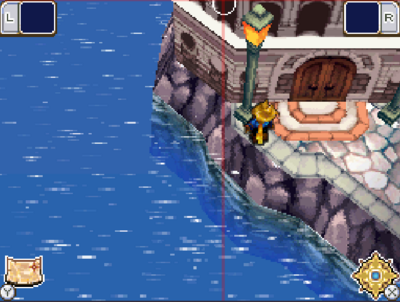
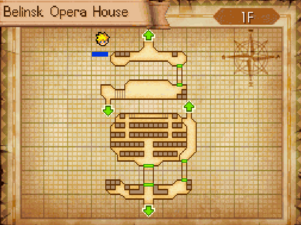
First, the player must defeat the Chaos Chimera and enter the epilogue sequence in Belinsk. Instead of heading to the exit of Belinsk, head to the Opera house and wedge Matthew below the lamp post on the left of the door. The stylus should be pressed and held above Matthew against the edge of the screen and slightly to the left - the position is indicated in the image below. If the stylus is pressed in the right location the player should observe the stone path leading to the Opera House shimmer and the camera very slowly shift to the left.
Hold the stylus in place as the screen slowly shifts (it does not need to be readjusted once the movement starts) and watch Matthew's shadow. As soon as Matthew's shadow disappears he has clipped out of bounds and you can move freely. At this point we want to enter Belisnk ruins - which cann be achieved by running straight down from the clip position and into the area where there is a staircase leading to Belinsk Ruins (the area where the Storm Gear can be obtained). The player can now proceed through Belinsk Ruins as before (albeit, only with Matthew, Karis and Tyrell). Chasm can be obtained at this point. Eventually the player will arrive back in the Alchemy Dynamo room and Luna Tower can be accessed. Ascending Luna Tower allows the player to obtain Eclipse.
Exiting Luna Tower from this point will return the player to Belisnk during the Grave Eclipse. Note that entering any loading zone except Luna Tower from this point will return the player to the post-Eclipse Belinsk state (and the Epilogue can be continued as normal).
Obtaining Crystallux
It is possible to get Crystallux after leaving Luna Tower but the method is difficult and watching this video outlining the technique is highly advised. To obtain Crystallux the player will need to enter the back entrance of the Opera House and following the following steps.
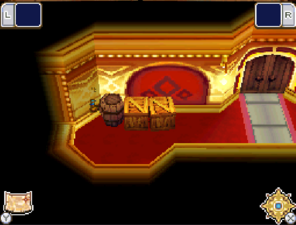
- Wedge Matthew to the left of the left-most barrel. Matthew will need to be as high as possible, so wiggle the stylus around the screen to ensure this. Normally Matthew will briefly run / kick up a dust cloud once he gets wedged as high as possible. (This is the first image below)
- With the stylus pressed against the right edge of the screen in line with Matthew, slowly bring the stylus down until Matthew starts vibrating and then stop pressing the stylux.
- The next part is easier if Matthew is not in his breathing animation - casting Grip, Whirlwind, or Fireball will achieve this. This will allow you to tell if Matthew is clipping by watching if his character model is shimmering.
- Press the stylus against the right edge of the screen in line with Matthew again, and now slowly bring the stylus up as far as possible while keeping Matthew clipping (either by watching for the character model shimmer or watching Matthew's shadow move)
- Hold this position until Matthew has clipped up as far as possible. (This is the second image below)
- Now very slowly bring the stylus down the right side of the screen until the stylus is roughly on top of the "X Menu" icon in the lower right of the screen. Let go of the stylus at this point. (This is the third image below)
- It is advised that you save the game at this point, so that retrying the final steps can be done easily if things go wrong.
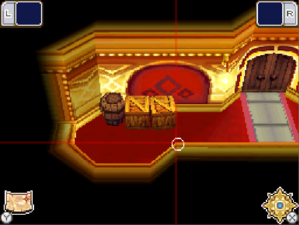
- Soft tap repeatedly on the indicated corner edge until Matthew's portrait on the other screen moves up one pixel. This indicates that you have clipped out of bounds. It is possible to clip slightly below the portrait moves - you can check this by wiggling the stylus against the middle of the top of the screen (if successful, Matthew will break out). (This is the fourth image below)
- Once Matthew is out of bounds, have Matthew's portrait run Down + Left through the indicated blue region and hold Down + Left for a while. Eventually you will enter the Crystallux battle cutscene where winning the battle unlocks Crystallux. (This is the fifth image below)
Warning - you will need to do this battle only with Matthew, Karis and Tyrell and there are eclipse world encounters that can be found within the Opera House.
Prizes
The prizes available by tossing a Lucky Medal into either of the Fountains are divided up into distinct prize pools. The prize pools determine the quantities of the items within that pool and which rings allow for these prizes to be won. The information is summarized in the following table.
Lucky Fountain Prize Pools
| ||||
|---|---|---|---|---|
| Tolbi Fountain | Lemuria Fountain | Rings | Quantity | |
| Prize Pool 0 | Center circle | Only one | ||
| Prize Pool 1 | All | 3 | ||
| Prize Pool 2 | Inner Yellow and outwards |
4 | ||
| Prize Pool 3 | Purple and outwards |
5 | ||
| Prize Pool 4 | Outer Yellow and outwards |
6 | ||
| Prize Pool 5 | Blank and outwards |
7 | ||
Each time an item is won at the fountain the quantity of the item is decreased by 1 unless there is only 1 of the item left (in this case the quantity remains 1). The exception is Eclipse which can only be one once, and is guaranteed to be won on the first time a Lucky Medal lands in the center. This means that each time an item is won the probability of the item being won is decreased. The probability of winning an item is determined by
- Probability of Winning = Quantity of Item Remaining / Number of Possible Items Remaining
As an example, the probability of winning the Wild Coat on the first Lucky Medal toss when the Medal lands outside of all of the rings is 6 / 75 which is 8%. For another example, the probability of winning the Assassin Blade when the Medal lands in the purple ring after previously having won an Adept's Helm and Earth Shield is 3 / 19 which is about 15%.
Assuming no prior items have been won, the base chance of winning an item from each prize pool is as follows:
Item Base Probabilities
| |||||||
|---|---|---|---|---|---|---|---|
| Center, purple circle |
First, yellow ring |
Second, purple ring |
Third, yellow ring |
Fourth, blank ring |
Outside all rings | ||
| Prize Pool 1 | 33.3% | 14.2% | 8.3% | 5.6% | 4% | 4% | |
| Prize Pool 2 | 19.0% | 11.1% | 7.4% | 5.3% | 5.3% | ||
| Prize Pool 3 | 13.8% | 9.2% | 6.7% | 6.7% | |||
| Prize Pool 4 | 11.1% | 8.0% | 8.0% | ||||
| Prize Pool 5 | 9.3% | 9.3% | |||||
Tolbi Spring
Tolbi Spring Rewards
| |||||||
|---|---|---|---|---|---|---|---|
| Center, purple circle |
First, yellow ring |
Second, purple ring |
Third, yellow ring |
Fourth, blank ring |
Outside all rings | ||
| ✔ | ✔ | ✔ | ✔ | ✔ | ✔ | ||
| ✔ | ✔ | ✔ | ✔ | ✔ | ✔ | ||
| ✔ | ✔ | ✔ | ✔ | ✔ | ✔ | ||
| ✔ | ✔ | ✔ | ✔ | ✔ | |||
| ✔ | ✔ | ✔ | ✔ | ✔ | |||
| ✔ | ✔ | ✔ | ✔ | ✔ | |||
| ✔ | ✔ | ✔ | ✔ | ||||
| ✔ | ✔ | ✔ | ✔ | ||||
| ✔ | ✔ | ✔ | ✔ | ||||
| ✔ | ✔ | ✔ | |||||
| ✔ | ✔ | ✔ | |||||
| ✔ | ✔ | ✔ | |||||
| ✔ | ✔ | ||||||
| ✔ | ✔ | ||||||
| ✔ | ✔ | ||||||
Lemuria Spring
Lemuria Spring Rewards
| |||||||
|---|---|---|---|---|---|---|---|
| Center, purple circle |
First, yellow ring |
Second, purple ring |
Third, yellow ring |
Fourth, blank ring |
Outside all rings | ||
| First time only | |||||||
| ✔ | ✔ | ✔ | ✔ | ✔ | ✔ | ||
| ✔ | ✔ | ✔ | ✔ | ✔ | ✔ | ||
| ✔ | ✔ | ✔ | ✔ | ✔ | ✔ | ||
| ✔ | ✔ | ✔ | ✔ | ✔ | |||
| ✔ | ✔ | ✔ | ✔ | ✔ | |||
| ✔ | ✔ | ✔ | ✔ | ✔ | |||
| ✔ | ✔ | ✔ | ✔ | ||||
| ✔ | ✔ | ✔ | ✔ | ||||
| ✔ | ✔ | ✔ | ✔ | ||||
| ✔ | ✔ | ✔ | |||||
| ✔ | ✔ | ✔ | |||||
| ✔ | ✔ | ✔ | |||||
| ✔ | ✔ | ||||||
| ✔ | ✔ | ||||||
| ✔ | ✔ | ||||||
| Lucky Medal Fountain prizes | ||
|---|---|---|
| Tolbi (Golden Sun) | Lemuria (The Lost Age) | |
| Weapons | Assassin Blade • Burning Axe • Grievous Mace | Fireman's Pole • Hestia Blade • Mighty Axe |
| Body Armor | Cocktail Dress • Kimono • Spirit Armor | Erebus Armor • Floral Dress • Wild Coat |
| Hand Armor | Battle Gloves • Earth Shield • Guardian Armlet | Aegis Shield • Crafted Gloves • Leda's Bracelet |
| Head Armor | Adept's Helm • Glittering Tiara • Ninja Hood | Brilliant Circlet • Crown of Glory • Minerva Helm |
| Consumable Items | Potion • Psy Crystal • Water of Life | Potion • Psy Crystal • Water of Life |
| Miscellaneous | N/A | Eclipse (summon) |
| See also | Lucky Medals • Coins | |


